D is for Daruma

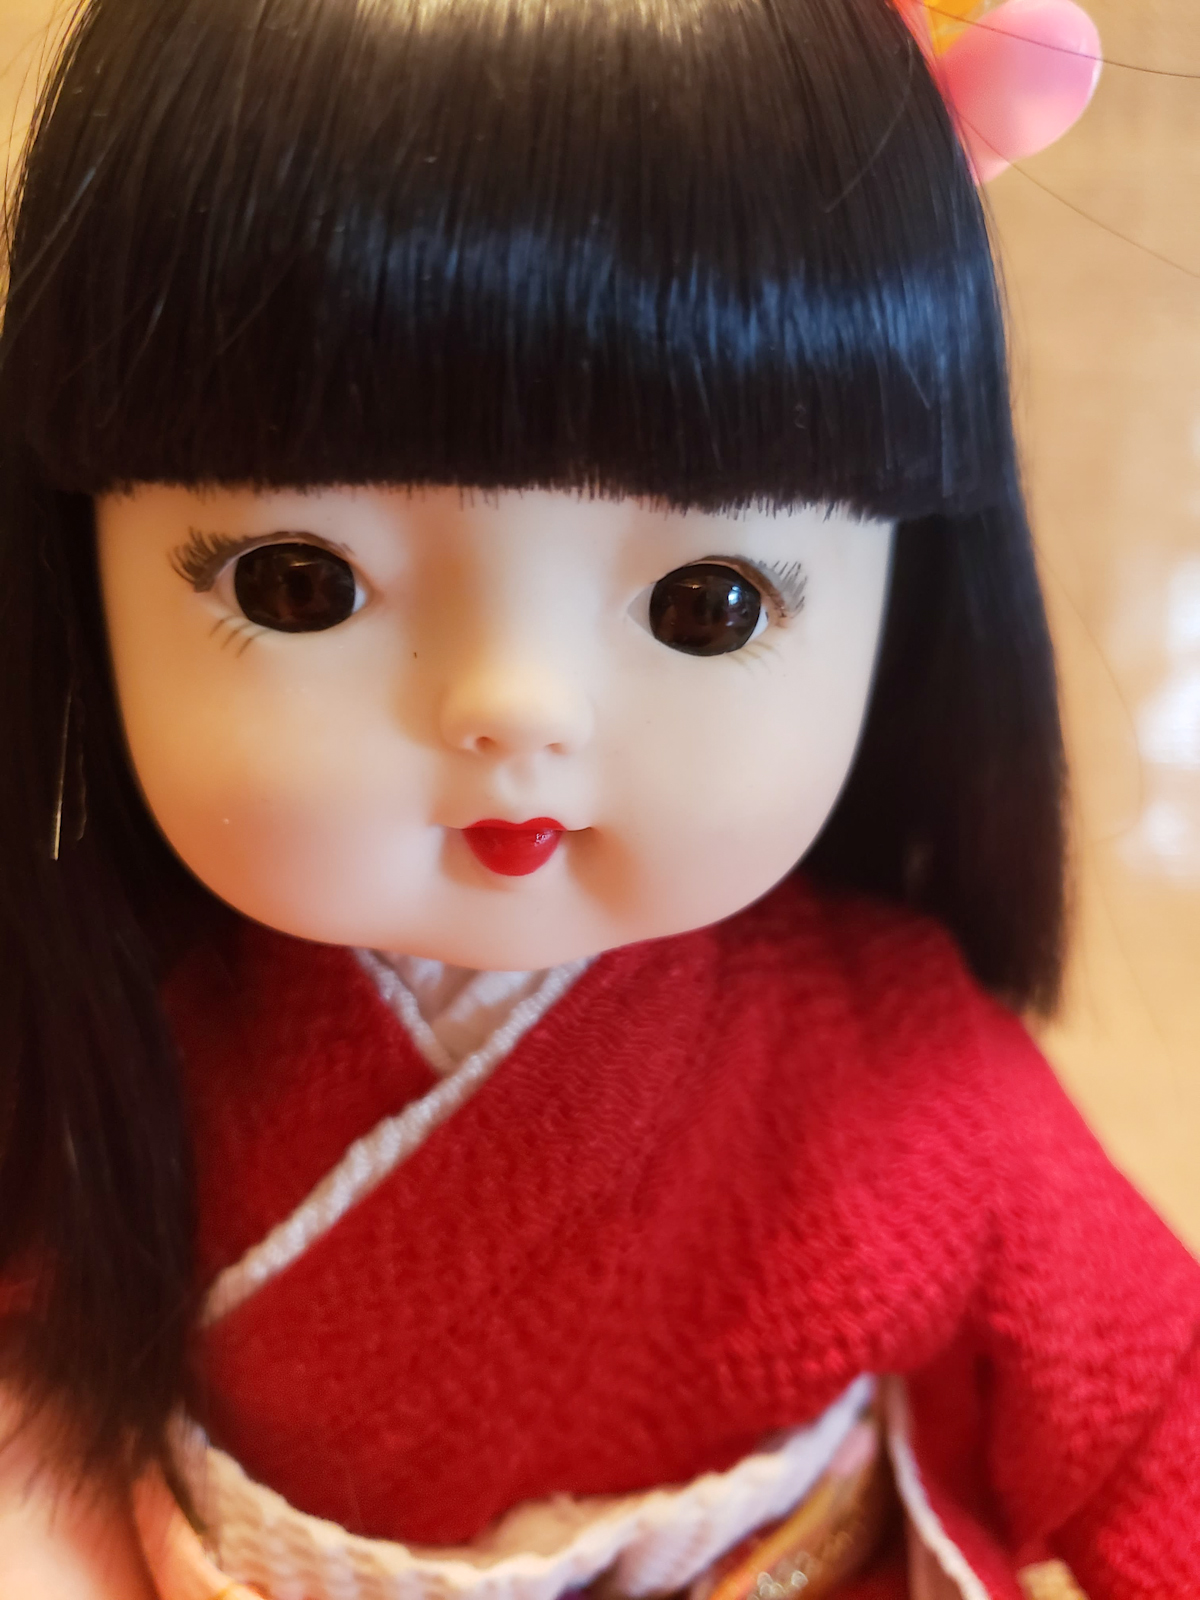
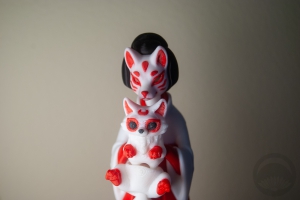
Daruma, 達磨, lucky doll representing Bodhidharma

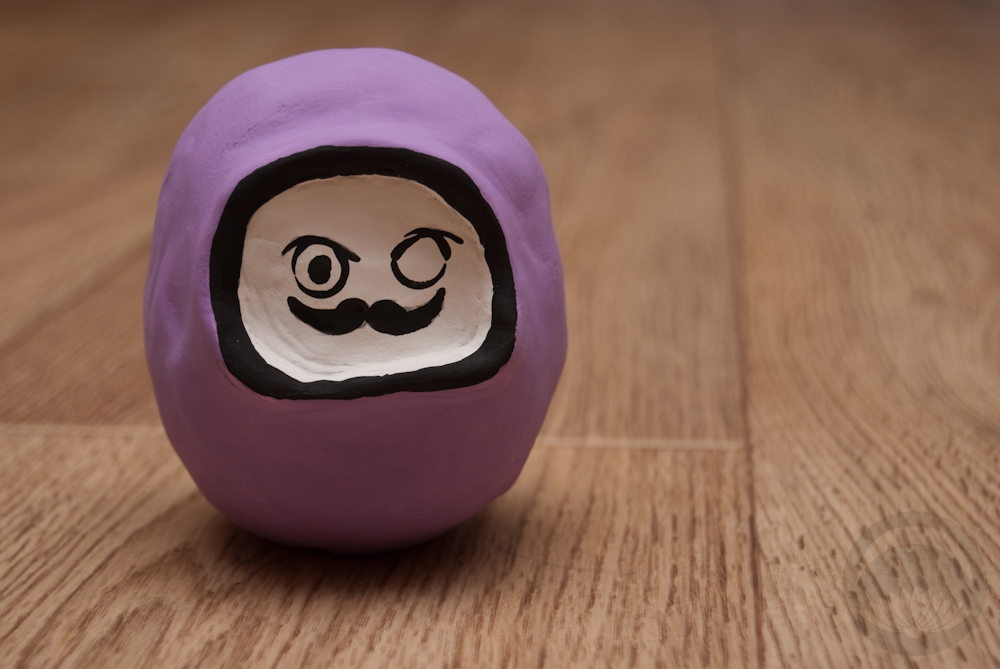
Daruma are those rounded, roly-poly little dolls (usually red, but other colours exist) with a grumpy-looking face. Often one or both eyes are left blank. They’re said to represent the bearded face of Bodhidharma, the founder of Zen Buddhism. Nowadays, they’re used to set goals and encourage perseverance. When you set a goal, you paint in the right eye in. When you accomplish the goal, you fill in the left. At the end of the year it’s common to return the daruma to the temple where it was purchased, for it to be thanked and set ablaze. You would then buy a new one to set a new goal for the upcoming year.

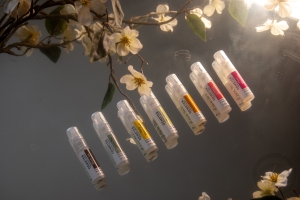
As I mentioned, the traditional colour for daruma is red, but it’s becoming more common to see a whole host of colours used to represent different goals. There are varying opinions as to which colour represents what, but some of the most common meanings are as follows:

Red – Luck & fortune
White – Marriage & harmony
Gold or yellow – Finance
Green – Health
Blue – Success
Pink – Love

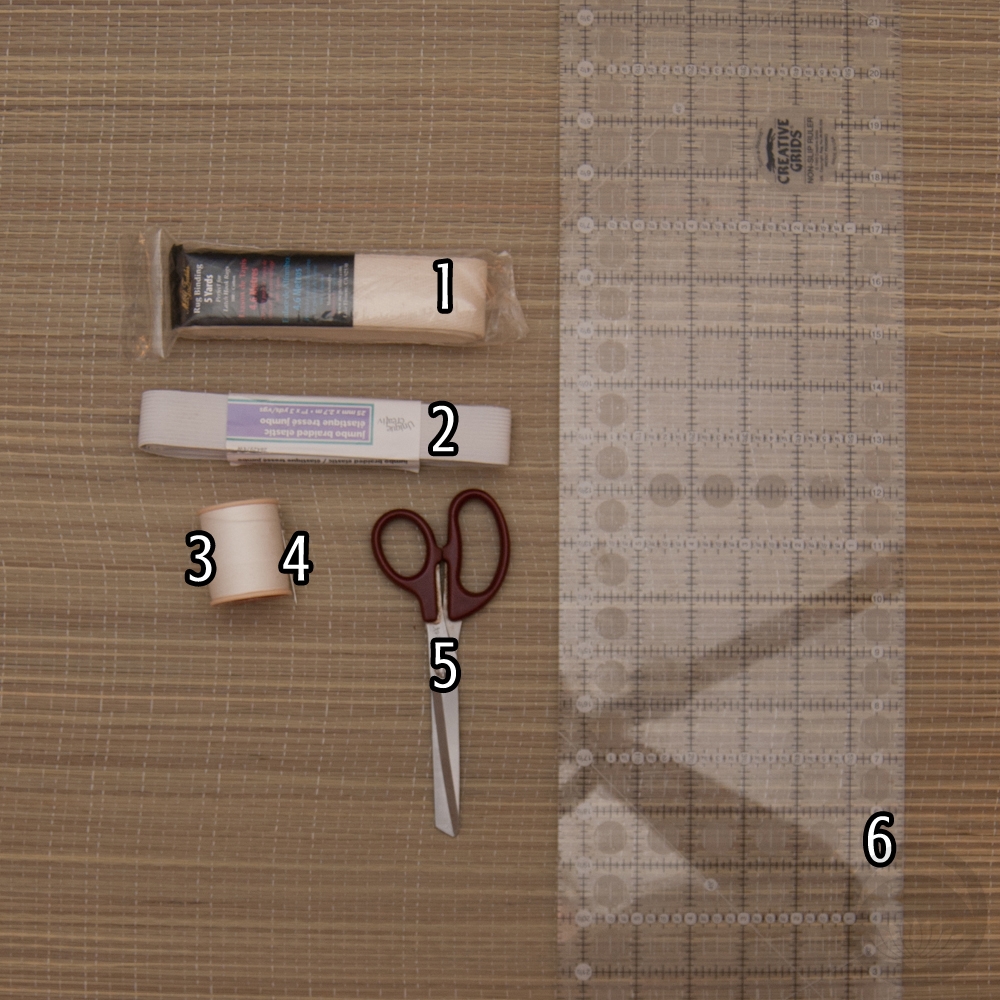
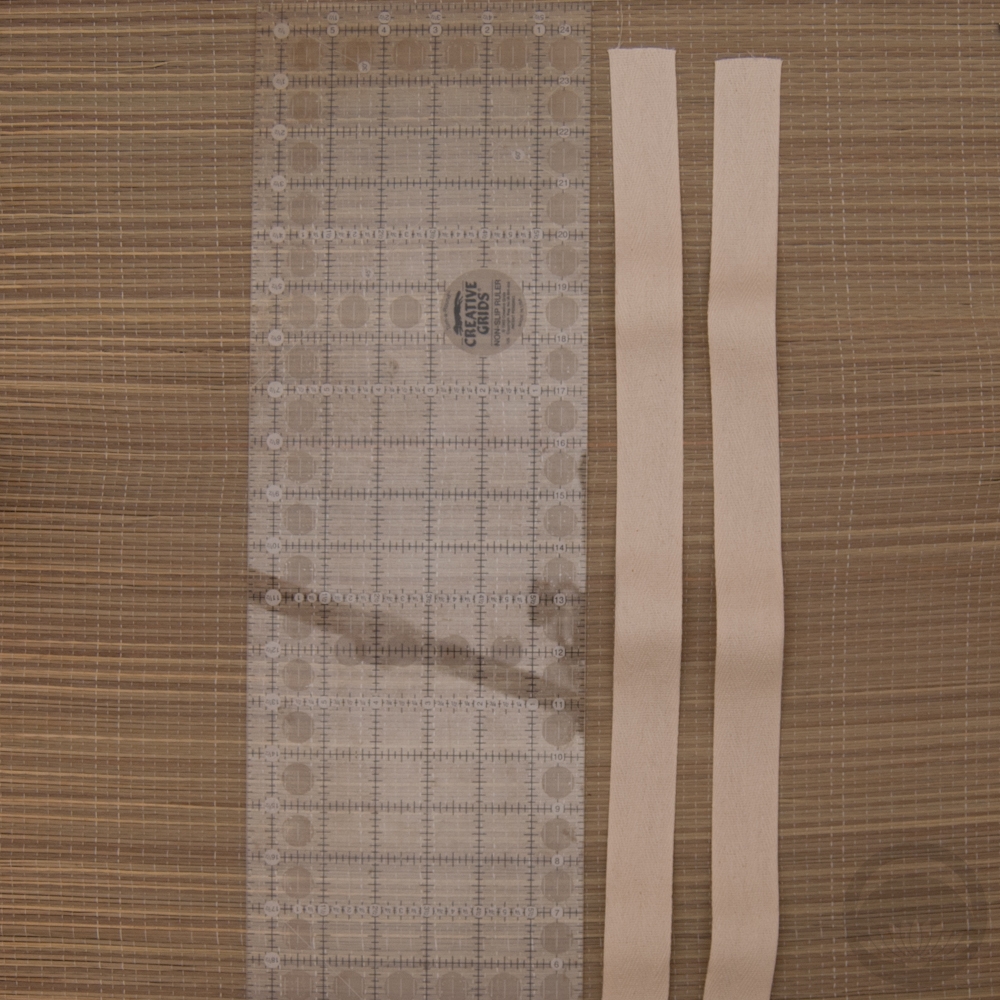
If you’d like to make your own daruma, keep reading! However, this one is not made of fragile papier maché and should absolutely not be burnt!

Continue reading

Review – Pagoda Lantern kit from One Man One Garage

Since we’re all trapped inside for the foreseeable future, it feels like a great time to share this fun little DIY project I found from a wonderful Etsy shop, One Man, One Garage! I purchased this back during the great bedroom flood debacle and assembled it when I needed a meditative little break; it was absolutely perfect.

One Man, One Garage creates laser-cut wood craft kits. All you have to do is carefully pop the pieces out of each board and assemble them, following the numbers etched into each piece. Instructions are provided online, but I honestly didn’t need them. This kit, despite looking incredibly intricate when complete, was very intuitive and smartly-designed. While not all the designs in this shop are Japanese in nature, this pagoda lantern caught my eye immediately and I knew I wanted to share it with you! Look how beautiful it is once it’s all lit up! The shop says it’s safe to use a tealight candle, but I’ve used an LED one here just in case.

It arrived tightly sealed, which helped keep all the pieces snug. This way there’s no risk of breakage. There was also a sweet little hand-signed postcard included, which is a personal touch that I really love when dealing with small artisan shops like this.


The only flaw I found in the kit was a very minor one, and I suspect a one-off issue. One of the laser cuts didn’t seem to have gone fully through the wood, which resulted in a bit of difficulty removing a piece. A tiny fragment broke off one end, but it wasn’t enough to impede assembly and it’s not even visible now that it’s all put together. I’m sure if I had contacted the shop they would have worked with me to sort it out, but it was such a tiny problem that I didn’t feel like it was worth bringing up. I just wanted to mention it here in the interest of being thorough.

Overall, this was a very fun, quick, and relaxing little craft. I love how it looks with the light in it, and I’m definitely going to be buying the Zen Garden kit (how utterly adorable is the little maneki neko?!) once I’m back at work and have some cash to spare. 🙂

 I purchased this item myself and chose to review it. 

Say Hello to Akane!

Everyone, please say hello to Akane!

I found this little lady on a shelf at my favourite vintage shop. She’s not particularly old; she’s made of a sort of soft vinyl instead of ceramic and gofun, and seems relatively mass-produced. Nonetheless I was utterly charmed by her and knew I had to bring her home. I was drawn immediately by her bright red kimono, which inspired me to name her Akane (茜), which means deep red and is a traditional girls’ name.

Unfortunately that kimono was pretty much all she had! There was a piece of cardboard wrapped in pink satin tied around her waist like a sort of obi, and a scraggly little piece of twine in her hair, but she had no real accessories or anything, so I decided to make her some custom pieces as well as give her a bit of a glow-up. I did take photos of the whole process, but since it was done more to relax and unwind I took the photos on my phone, wherever I happened to be working so I apologise for the quality and messy background of some of these.

Her face shape is adorable, but it felt very flat due to a lack of shading. She did have some pink blush on her cheeks but aside from that, she honestly looked like a cute potato. She also had lower eyelashes but no upper ones, and nearly invisible eyebrows. Using a combination of actual cosmetics and chalk pastels I gave her some shadows and contouring, deepened the flush on her cheeks, and gave her eyelashes and more defined eyebrows. It’s a subtle change, but she’s gone from a potato to a peach. You can also see the false eri I sewed for her to give the impression of a proper under-layer.

Next up was fixing her hair. Her bangs were quite uneven, but much worse was her hair in the back. I’m not sure if someone tried to trim her hair at some point or if she was made this way, but her hair was very lopsided in the back! I straightened it out and snipped away any broken or kinked hairs I could find. Then I tucked these cute little plum blossoms Kansai_gal sent me. They’re actually from packaging or something but I like that I’ve given them a second life. Since her head is vinyl I was able to just push a straight pin through them and they’re very solidly anchored in there.

With the cosmetic aspects taken care of, I got to work giving her a proper obi. I used some scrap kimono fabric and sewed a cute little tsuke-obi, and used some of the same textured white fabric from the eri to make an obiage. The whole thing attaches with a magnet and then a length of gold cord works as an obijime. Her socks are a bit of a cheat – they’re simply two fingers off a pair of white cotton polishing gloves! They fit her more perfectly than anything I could have sewn.

I’ve never named a doll I’ve fixed up before, but none of them have captivated me nearly as much as this little girl has. All the others reside in a display cabinet but she lives on my bedside table. Maybe I should sew a little zabuton for her to sit on. XD

Tea Time – DIY Floral Tea Blend

Today I have something a little different for you guys! You all know I love tea, and I love flowers, so this nifty DIY floral tea bag project on the FTD By Design blog was right up my alley. This is a great way to make a custom tea blend that’s perfectly suited to your tastes. With Mother’s Day coming up here in North America, these would make a really unique gift!

The post has some great selections of food-safe dried flowers to work with. I actually had a harder time finding some of them than I anticipated, oddly enough. I’d suggest hitting up bulk food stores and organic speciality stores.I chose to start with a base of the wonderful organic sencha tea the lovely folks over at Tea Forte sent me, and added dried rosebuds and hibiscus blossoms. I remembered we had some dried lavender from our garden and decided to add a little of that too.

The DIY includes incredibly thorough instructions on how to make your own tea bags using items you probably already have at home, and offers some super cute printable tags. Personally, I’m in favour of loose tea, and prefer not to create more single-use waste, so I chose to print one of the adorable tags and package the tea in a mason jar. However, if you’re taking it to the office or offering it as gifts, the DIY bags would be a fantastic idea.

The tea blend I made was really nice, the florals didn’t overpower the earthiness of the green tea but they were definitely noticeable. It also turned a really pretty pink colour. I’m glad I made a bunch of it, and I can’t wait to steep myself another cup.

Thank you to FTD for sharing this tutorial. I hope you check it out and have fun as well!

DIY Sanjuhimo Tutorial

While not necessary, a sanjuhimo (三重紐, triple string) is one of those tools that is an enormous help when making big ornate furisode obi-musubi. They can be a little hard to find online, especially if you’re only able to use English-language sites, although KimonoPoncho on Etsy often has them for sale.

Today was a damp, dreary day and I’m feeling a little under the weather with no energy to go out or do anything big so it was a good time to do a little crafting. I thought it would be pretty straightforward to make my own, and I was right! If you’d like to make your own, just keep reading.

You will need

  1. 2.5cm(1″) wide durable non-stretch trim – I used rug-binding tape, which works very well
  2. 2.5cm(1″) wide elastic
  3. Strong thread – I used cotton-wrapped polyester
  4. A strong sewing needle
  5. Scissors
  6. Measuring tape or guide


  • Measure out three pieces of elastic 25cm (10″) long, and two pieces of the non-stretch tape 60cm(24″) long.
  • Thread your needle with a doubled length of thread for extra reinforcement.
  • Overlap the three pieces of elastic and one piece of cotton tape by roughly 2.5c(1″).
  • Using small stitches, sew the pieces together using a square shape with an X in it. Since this will be pulled taut and supporting the obi, you want to make sure the tension is spread across a wider area than a single line.
  • Repeat this step with the other tape and other ends of the elastic, so you now have three strips of elastic in the centre of a long band of cotton tape.

That’s all there is to it! Simply tie the sanjuhimo around the top of your obi, like you would with an obi-makura, and have fun experimenting. For some really great video tutorials using a tool like this, check out さんさんmama on YouTube. If you make one and use it, I’d love to see!