DIY Sanjuhimo Tutorial

While not necessary, a sanjuhimo (三重紐, triple string) is one of those tools that is an enormous help when making big ornate furisode obi-musubi. They can be a little hard to find online, especially if you’re only able to use English-language sites, although KimonoPoncho on Etsy often has them for sale.

Today was a damp, dreary day and I’m feeling a little under the weather with no energy to go out or do anything big so it was a good time to do a little crafting. I thought it would be pretty straightforward to make my own, and I was right! If you’d like to make your own, just keep reading.

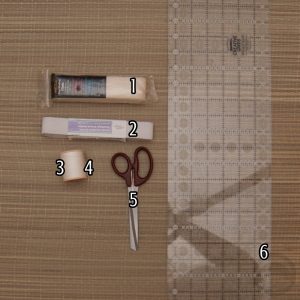
You will need

  1. 2.5cm(1″) wide durable non-stretch trim – I used rug-binding tape, which works very well
  2. 2.5cm(1″) wide elastic
  3. Strong thread – I used cotton-wrapped polyester
  4. A strong sewing needle
  5. Scissors
  6. Measuring tape or guide


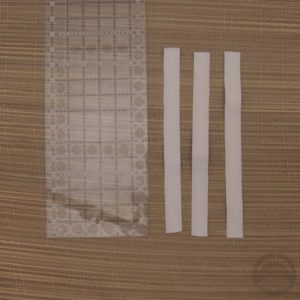
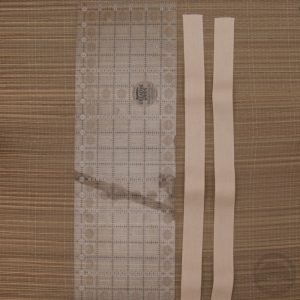
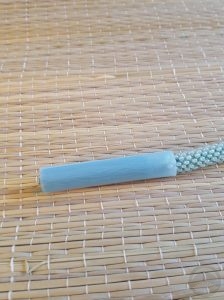
  • Measure out three pieces of elastic 25cm (10″) long, and two pieces of the non-stretch tape 60cm(24″) long.
  • Thread your needle with a doubled length of thread for extra reinforcement.
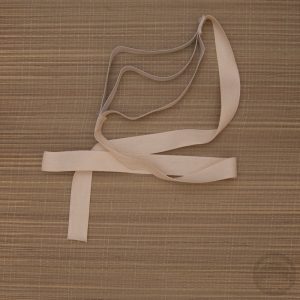
  • Overlap the three pieces of elastic and one piece of cotton tape by roughly 2.5c(1″).
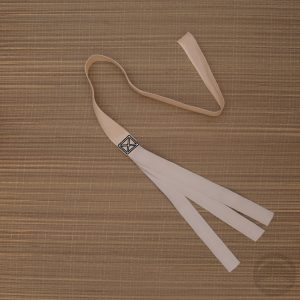
  • Using small stitches, sew the pieces together using a square shape with an X in it. Since this will be pulled taut and supporting the obi, you want to make sure the tension is spread across a wider area than a single line.
  • Repeat this step with the other tape and other ends of the elastic, so you now have three strips of elastic in the centre of a long band of cotton tape.

That’s all there is to it! Simply tie the sanjuhimo around the top of your obi, like you would with an obi-makura, and have fun experimenting. For some really great video tutorials using a tool like this, check out さんさんmama on YouTube. If you make one and use it, I’d love to see!

Kimono Outfit Inspiration Generator!

Feel like playing with kimono coordinations, but aren’t sure where to start? Use this to generate ideas, and use as few or as many as you like! I made it to keep myself from going bonkers at work earlier today, and figured it would be fun to share it.

It will generate two sets of data. Traditional will give you a few simple options to work from, and Adventurous may result in some really out-there looks. You don’t have to use everything it suggests, but it would be fun to try getting them all into one coordination! If this results in any really cool (or really ridiculous) combinations and you put them together, I’d love to see them.

(Best viewed on a full screen, parts may overflow or be cut off on mobile apps)

DIY Tabletop Shoji Screen

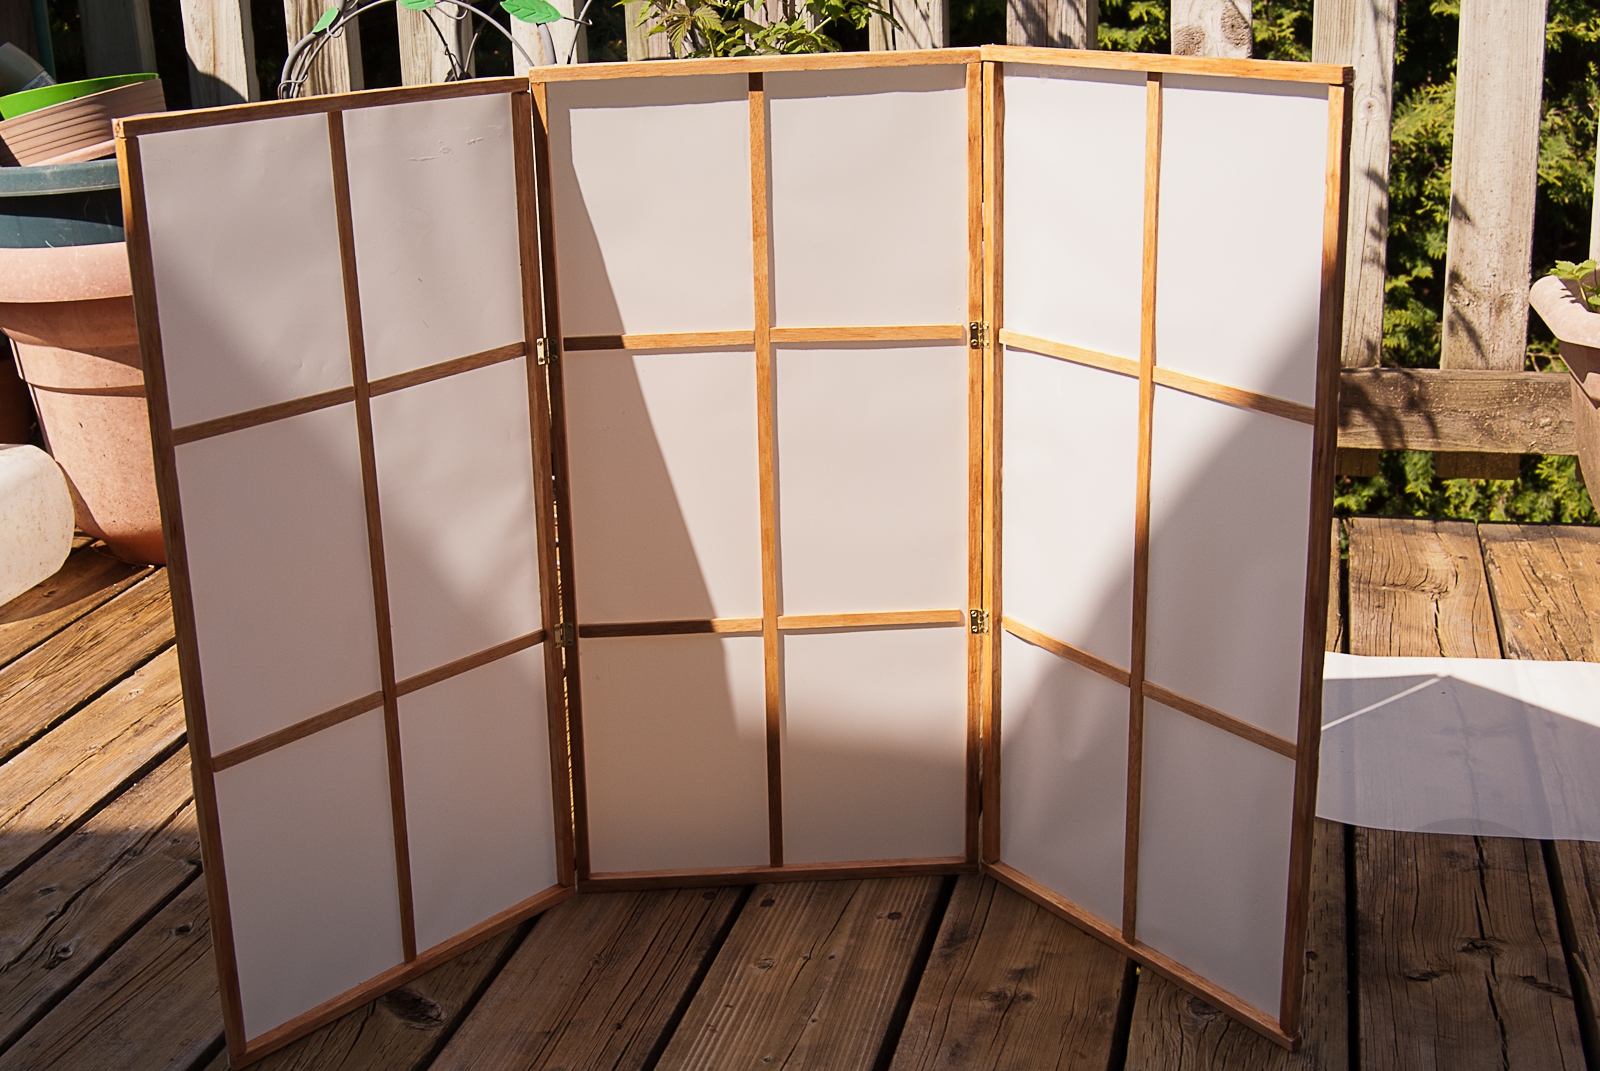
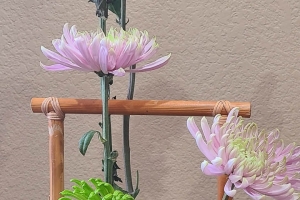
When I said I was inspired by the ikebana displays at the Botanical Gardens this weekend, I bet you didn’t think this was what I meant! But I was so charmed by the smaller-proportioned tabletop shoji screen  used as a backdrop for one of the arrangements, I knew I wanted one as soon as possible. I browsed around and found one online but the cost + shipping came 0ut to $60 US, which was more than I was looking to spend. So I hit up the local Michael’s craft store yesterday and bought a couple of supplies, and with two short afternoons of work out on the back deck enjoying the lovely weather, I’ve got something that I’m really quite proud of. It’s incredibly light and easy to store. It is a bit fragile, but since it won’t be bearing any weight or staying on display for extended periods of time that’s fine with me.

If you’d like to make one of your own, just read on! I will give the exact measurements for this one, which comes out to three feet wide and two feet tall, but you can absolutely scale up or down for your needs. You can also dress it up with fancier paper and different stain or paint on the wood if you want to. I plan to use this as a neutral backdrop for ikebana and product reviews, amongst other things, so I went with plain white and a fairly mid-range cherry stain.
Continue reading

Quick & Easy Obijime Tassel Storage Solution

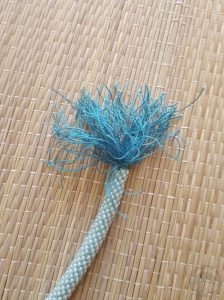
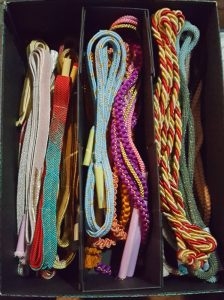
Finding a practical storage solution for obijime is one of the great conundrums of kimono collecting. They get tangled, the tassels get ratty and frayed, and most of the storage options I’ve come across involve wrapping the tassels in paper which gets tedious and wasteful if you use them frequently and have to redo the wrappings every time.

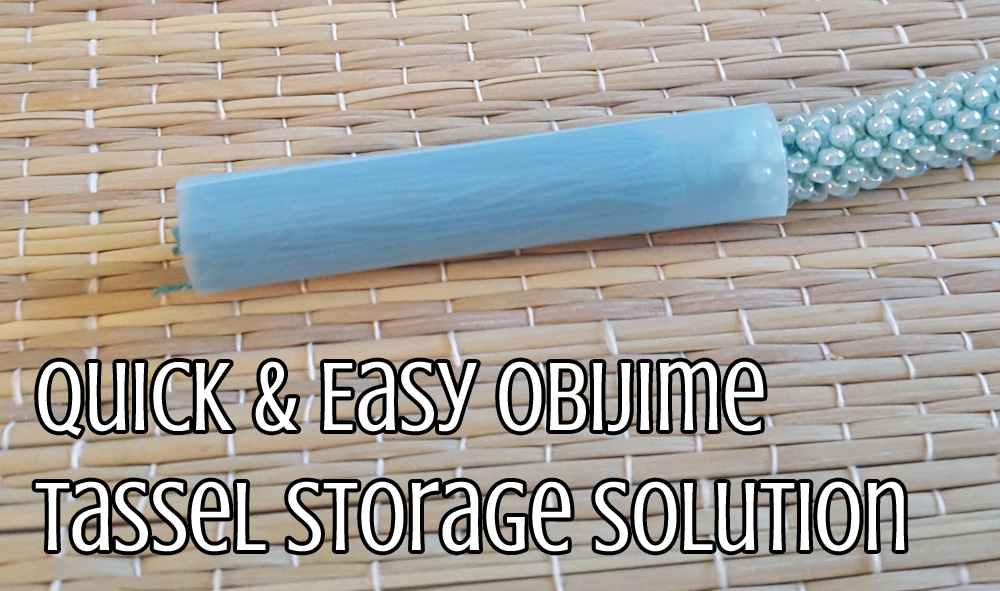
I wanted to find a quicker and more practical way to store them that would also be affordable and easily accessible. After a couple of experiments, I think I’ve found the perfect solution and wanted to share it with you all – bubble tea straws! You can also find them listed as milkshake or smoothie straws, you just want to make sure they’re a wider width than typical drink straws. They’re available on Amazon as well as at nearly any grocery store, they’re very inexpensive, and they’re much more durable than paper.

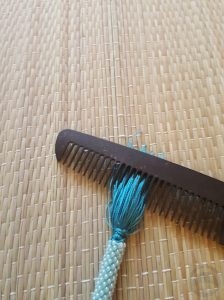
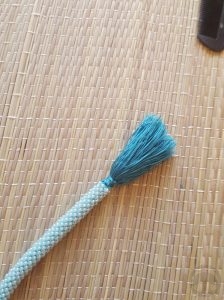
To begin with, I steamed. combed, and trimmed the tassels on my obijime. For a really great and thorough tutorial on cleaning, steaming, and maintaining obijime tassels, please check out Naomi’s “Project Obijime” blog post. It’s really thorough and clear, and a great place to start.

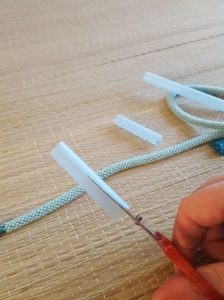
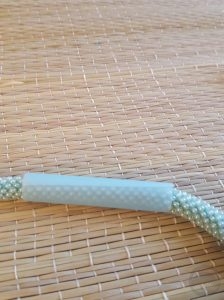
After all your tassels are tidied up, what you need to do is cut a piece of the straw slightly longer than your tassel and then slit it up one side. Insert the body of the obijime in through the slit and then slide it down to protect the tassel. Then just store however works for you – mine are simply folded in half and then in half again and put into divided boxes by formality and shape. The great thing about using straws like this instead of paper or something else is that you can pull it off and slide it back on as many times as you’d like! No need to take the time to re-wrap them, and no waste.

The only time this feels like a less-than-perfect solution is with very wide and flat obijime, which are more common in vintage collections. Just be careful to make sure that you’ve pulled the straw down completely onto the tassel so it’s not causing the obijime itself to curl because they will stay that way and need steaming again to flatten out.

I hope you found this helpful! It’s such a simple little thing, but personally I think it makes a huge difference when it comes to storage and tidiness!

 This post contains affiliate link(s). If you choose to purchase, I receive a small rebate or commission which goes to the continued maintenance of this site. 

Furisode Dress Tutorial

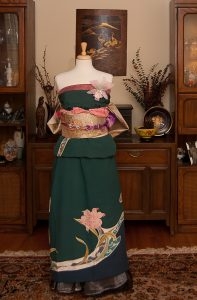
Several months ago, some photos started making the rounds of an awesome way to temporarily modify a kimono to wear over a Western-style dress, as a sort of reversible fusion of traditional and modern. I was determined to figure out how to do it, and I think I succeeded quite well back then. While commonly suggested for a wedding, these would also be a really special and unique outfit for a prom, ball, sweet sixteen, quinceañera, or any other event where a ballgown would be worn.

Since then, several people have asked me for a tutorial and I kept getting sidetracked by other projects and my own squirrel brain. The original photos, as well as new ones, are now making the rounds again so it felt like a good time to revisit it and do a proper step-by-step breakdown for you all.

This can be a bit tricky, so if you’re hoping to do it for an event I’d absolutely suggest practising a few times and having someone to help you out.

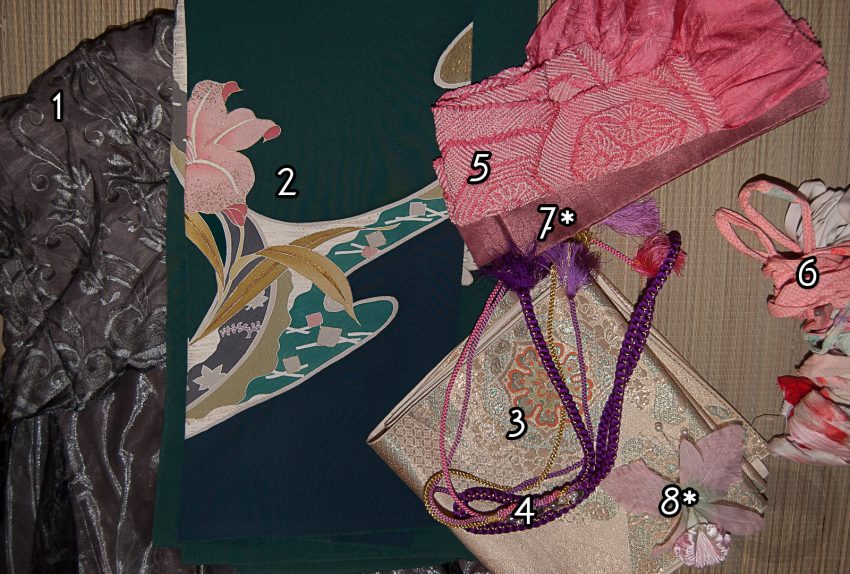
You will need:

  1. Dress with voluminous skirts
  2. Kimono (furisode work best)
  3. Fukuro obi
  4. Obijime
  5. Obiage
  6. Koshihimo (several)
  7. Kasane-eri (optional)
  8. Accessories (optional)

Other dressing accessories such as an obi-ita, obi-makura, dressing clips, etc, are optional but helpful, depending on what kind of obi musubi you have in mind. Make sure you have everything near at hand, because once you start tying and bustling the kimono it’s not the sort of thing you can pause and walk away from.

Step 1 – A naked mannequin! How scandalous! Seriously though – if you’re dressing a mannequin this is your starting point. If you’re dressing yourself, put on whatever traditional foundation garments you’d wear under your dress. Forget kimono underwear now, just wear something comfortable that won’t show under your gown (unless that’s what you’re going for, in which case, you do you. A harness bra would add a really fun gothic element with the right kimono)

Step 2 – Put your dress on, make sure it’s fully secured and done up. It will be carrying some extra strain, so you want to make sure it fits you properly and won’t go sliding around when you adjust the kimono over top.

Step 3 – This is where things get fun. Pick up your furisode and hold it up in front of you, with the back facing outwards. You’ll be putting it on backwards. Find the centre point of the collar, align it at your sternum. If you want to add a kasane-eri for a bit of colour and contrast, now’s the time. Once you’ve got your kimono arranged across your bust, wrap it around your torso and hold it snug while you tie everything in place with a koshi-himo. Make sure to leave the sleeves free, you will be adjusting them later. This is where a second set of hands definitely helps. If you have someone to hold everything in place for you while you tie the kimono in place, it will be much easier.

Step 4 – Once you have the kimono tied snugly in place, you can start pulling up the excess and folding it over the himo tied at your waist. If you’ve worn kimono traditionally, this part is very similar to adjusting your ohashori. You can have some fun here; there’s no specific length that the kimono has to reach. You can hike the kimono up far enough to show the hem of your dress, or you can have it almost dusting the ground.

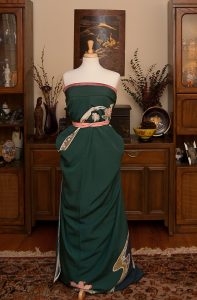
Step 5 – Once you have the length determined, arrange the sleeves behind the dress and snugly tie everything in place with another himo. You can arrange the sleeves in the back like this, and it almost forms a train. You can also have them draped around the front like I did with the previous furisode dress, which gives a more youthful vibe, almost reminiscent of an apron or jumper. Have fun and experiment.

Step 6 – Smooth everything out with an obi-ita, and take the time to smooth everything out. If you need an extra koshi-himo or two don’t hesitate to use them. Make sure everything is snug and secure, especially if you’re dressing yourself (or another person) and not a mannequin.

Step 7 – Once everything is good and tight, you can begin wrapping your obi. This part is going to be essentially the exact same as when wearing kimono. Wrap twice around the torso and use the rest to tie your musubi. You can have fun here too; this outfit is so non-traditional you can really go wild with how you tie the obi. For simplicity’s sake I did a sort of bunko variant but there are really no rules here.

Step 8 – Secure the obi with an obijime, make sure it’s good and snug. If you used an obi-makura, hide it with an obiage. Even if you don’t need the obiage, it’s a nice way to add a little more colour and texture to your “dress”. Again, have fun! We’ve broken so many rules by this point there’s no real reason to worry about the others.

Step 9 – Voila! Your new ballgown is ready for the runway, with no modification or damage to the kimono.

I hope this is easy enough to follow along. Feel free to ask for clarification if you need help, and if you attempt this I would love to see photos!