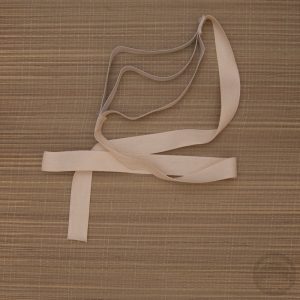
While not necessary, a sanjuhimo (三重紐, triple string) is one of those tools that is an enormous help when making big ornate furisode obi-musubi. They can be a little hard to find online, especially if you’re only able to use English-language sites, although KimonoPoncho on Etsy often has them for sale.
Today was a damp, dreary day and I’m feeling a little under the weather with no energy to go out or do anything big so it was a good time to do a little crafting. I thought it would be pretty straightforward to make my own, and I was right! If you’d like to make your own, just keep reading.
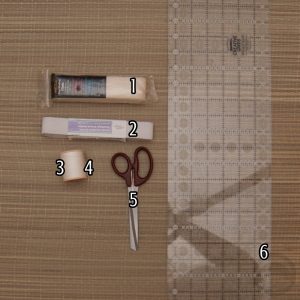
You will need
- 2.5cm(1″) wide durable non-stretch trim – I used rug-binding tape, which works very well
- 2.5cm(1″) wide elastic
- Strong thread – I used cotton-wrapped polyester
- A strong sewing needle
- Scissors
- Measuring tape or guide
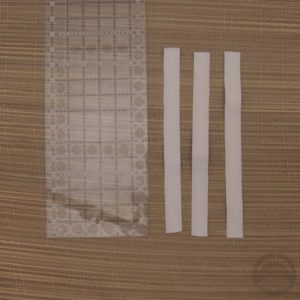
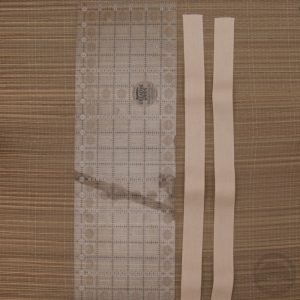
- Measure out three pieces of elastic 25cm (10″) long, and two pieces of the non-stretch tape 60cm(24″) long.
- Thread your needle with a doubled length of thread for extra reinforcement.
- Overlap the three pieces of elastic and one piece of cotton tape by roughly 2.5c(1″).
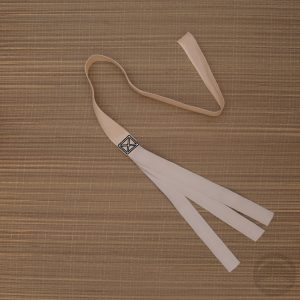
- Using small stitches, sew the pieces together using a square shape with an X in it. Since this will be pulled taut and supporting the obi, you want to make sure the tension is spread across a wider area than a single line.
- Repeat this step with the other tape and other ends of the elastic, so you now have three strips of elastic in the centre of a long band of cotton tape.
That’s all there is to it! Simply tie the sanjuhimo around the top of your obi, like you would with an obi-makura, and have fun experimenting. For some really great video tutorials using a tool like this, check out さんさんmama on YouTube. If you make one and use it, I’d love to see!







 Bebe Taian
 CHOKO Blog
 Gion Kobu