F is for Fudangi

Fudangi, 不断着, home wear/casual clothes/ordinary dress

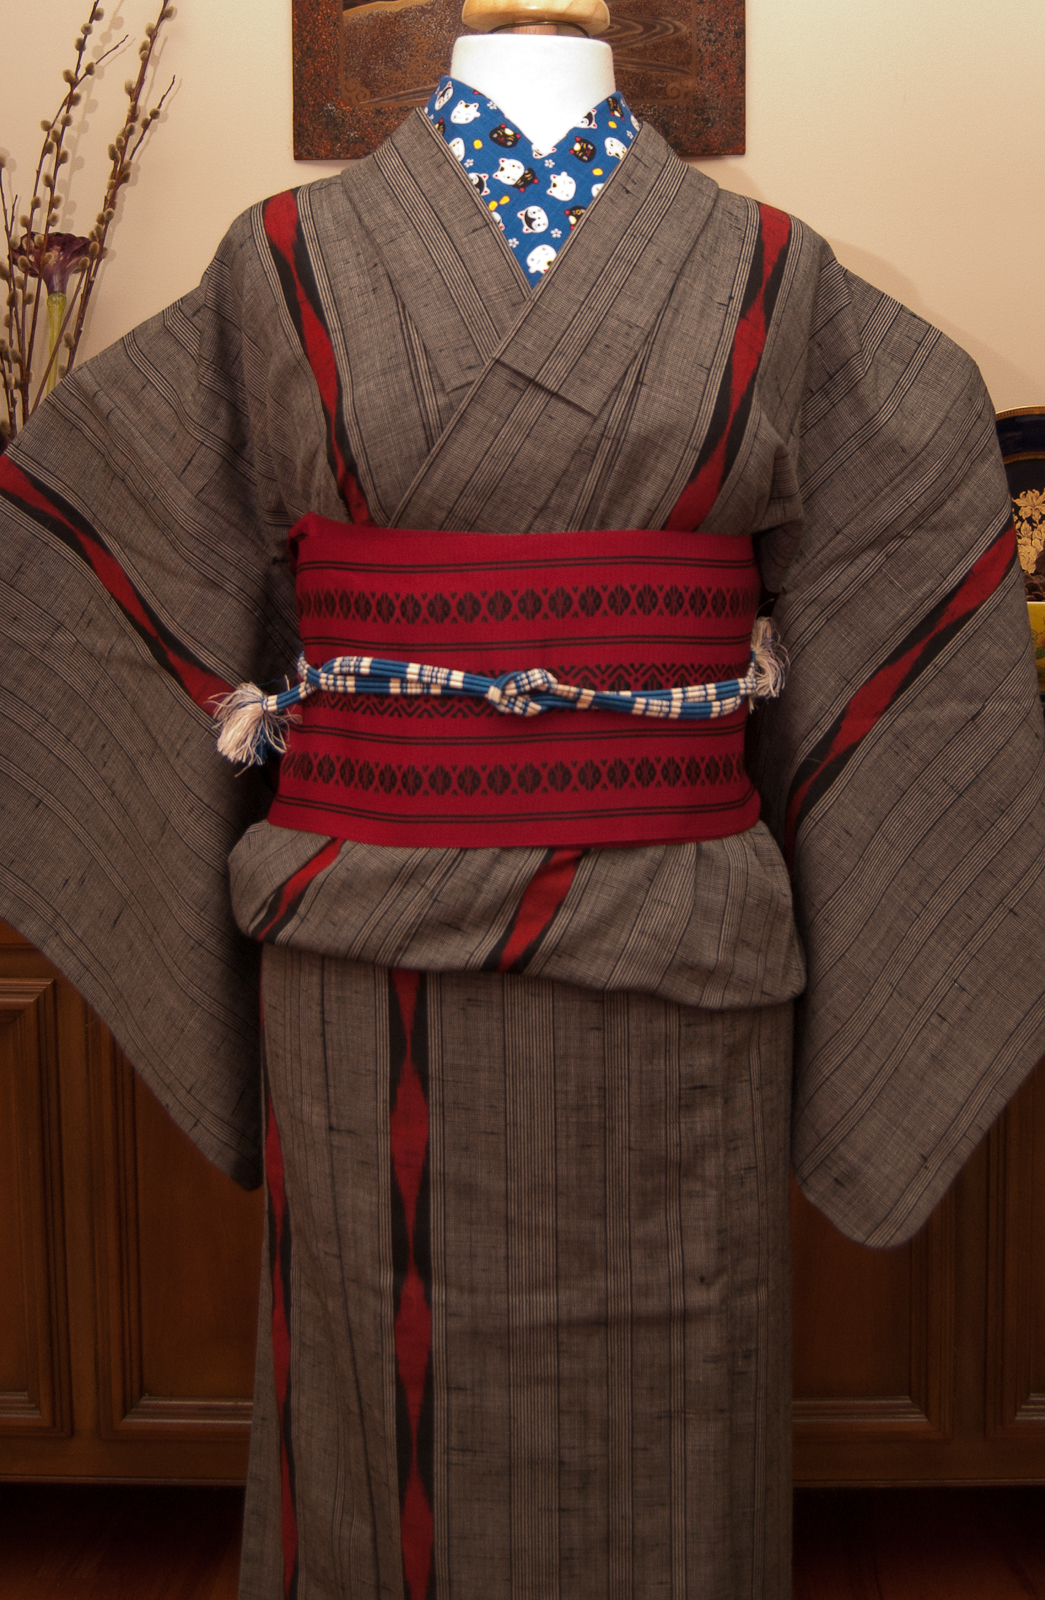
That’s a delightfully vague definition. Much like the infernal “office casual” it’s a term that leaves a lot of room for interpretation. So what exactly is fudangi? The general consensus for kitsuke is that it comprises anything from wool or cotton kimono that you’d wear around the house to komon and obi without metallic accents that you’d wear to run errands or meet up with friends for lunch. Often it’s much looser and more relaxed when it comes to the rules, but you still want to avoid anything overly formal. Obi should be hanhaba or casual nagoya, obijime should be thin, fancier textiles like shibori or yuzen-dyed silk should be used sparingly if at all. Think of rough-woven and rustic textiles like wool, meisen weave, etc. Fun accessories like haneri and obidome are always a good way to inject some personality in.

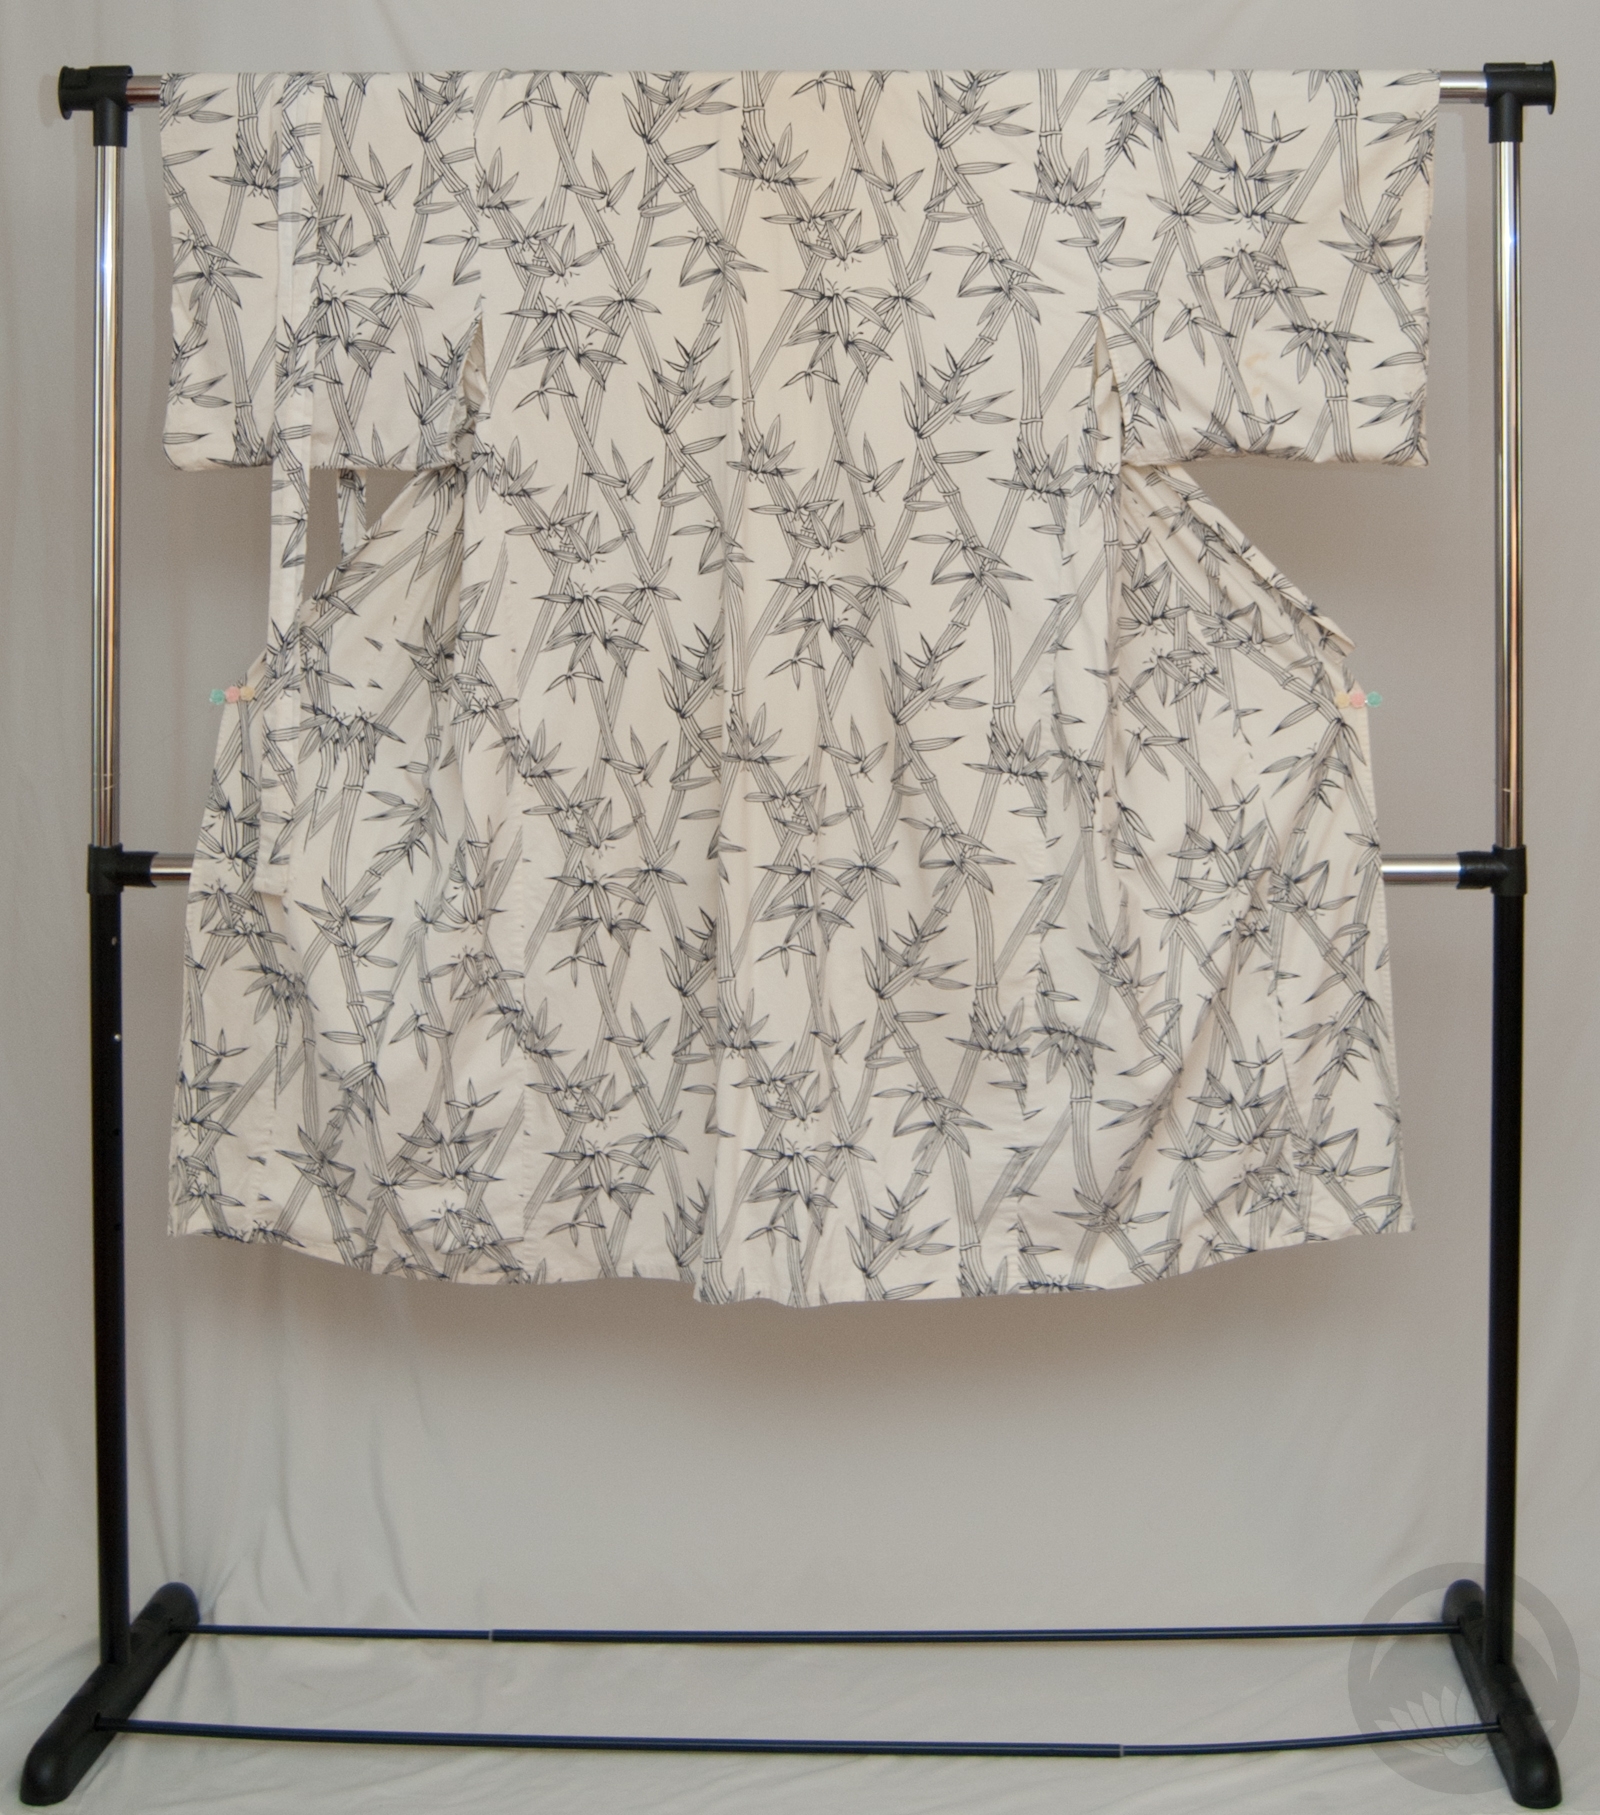
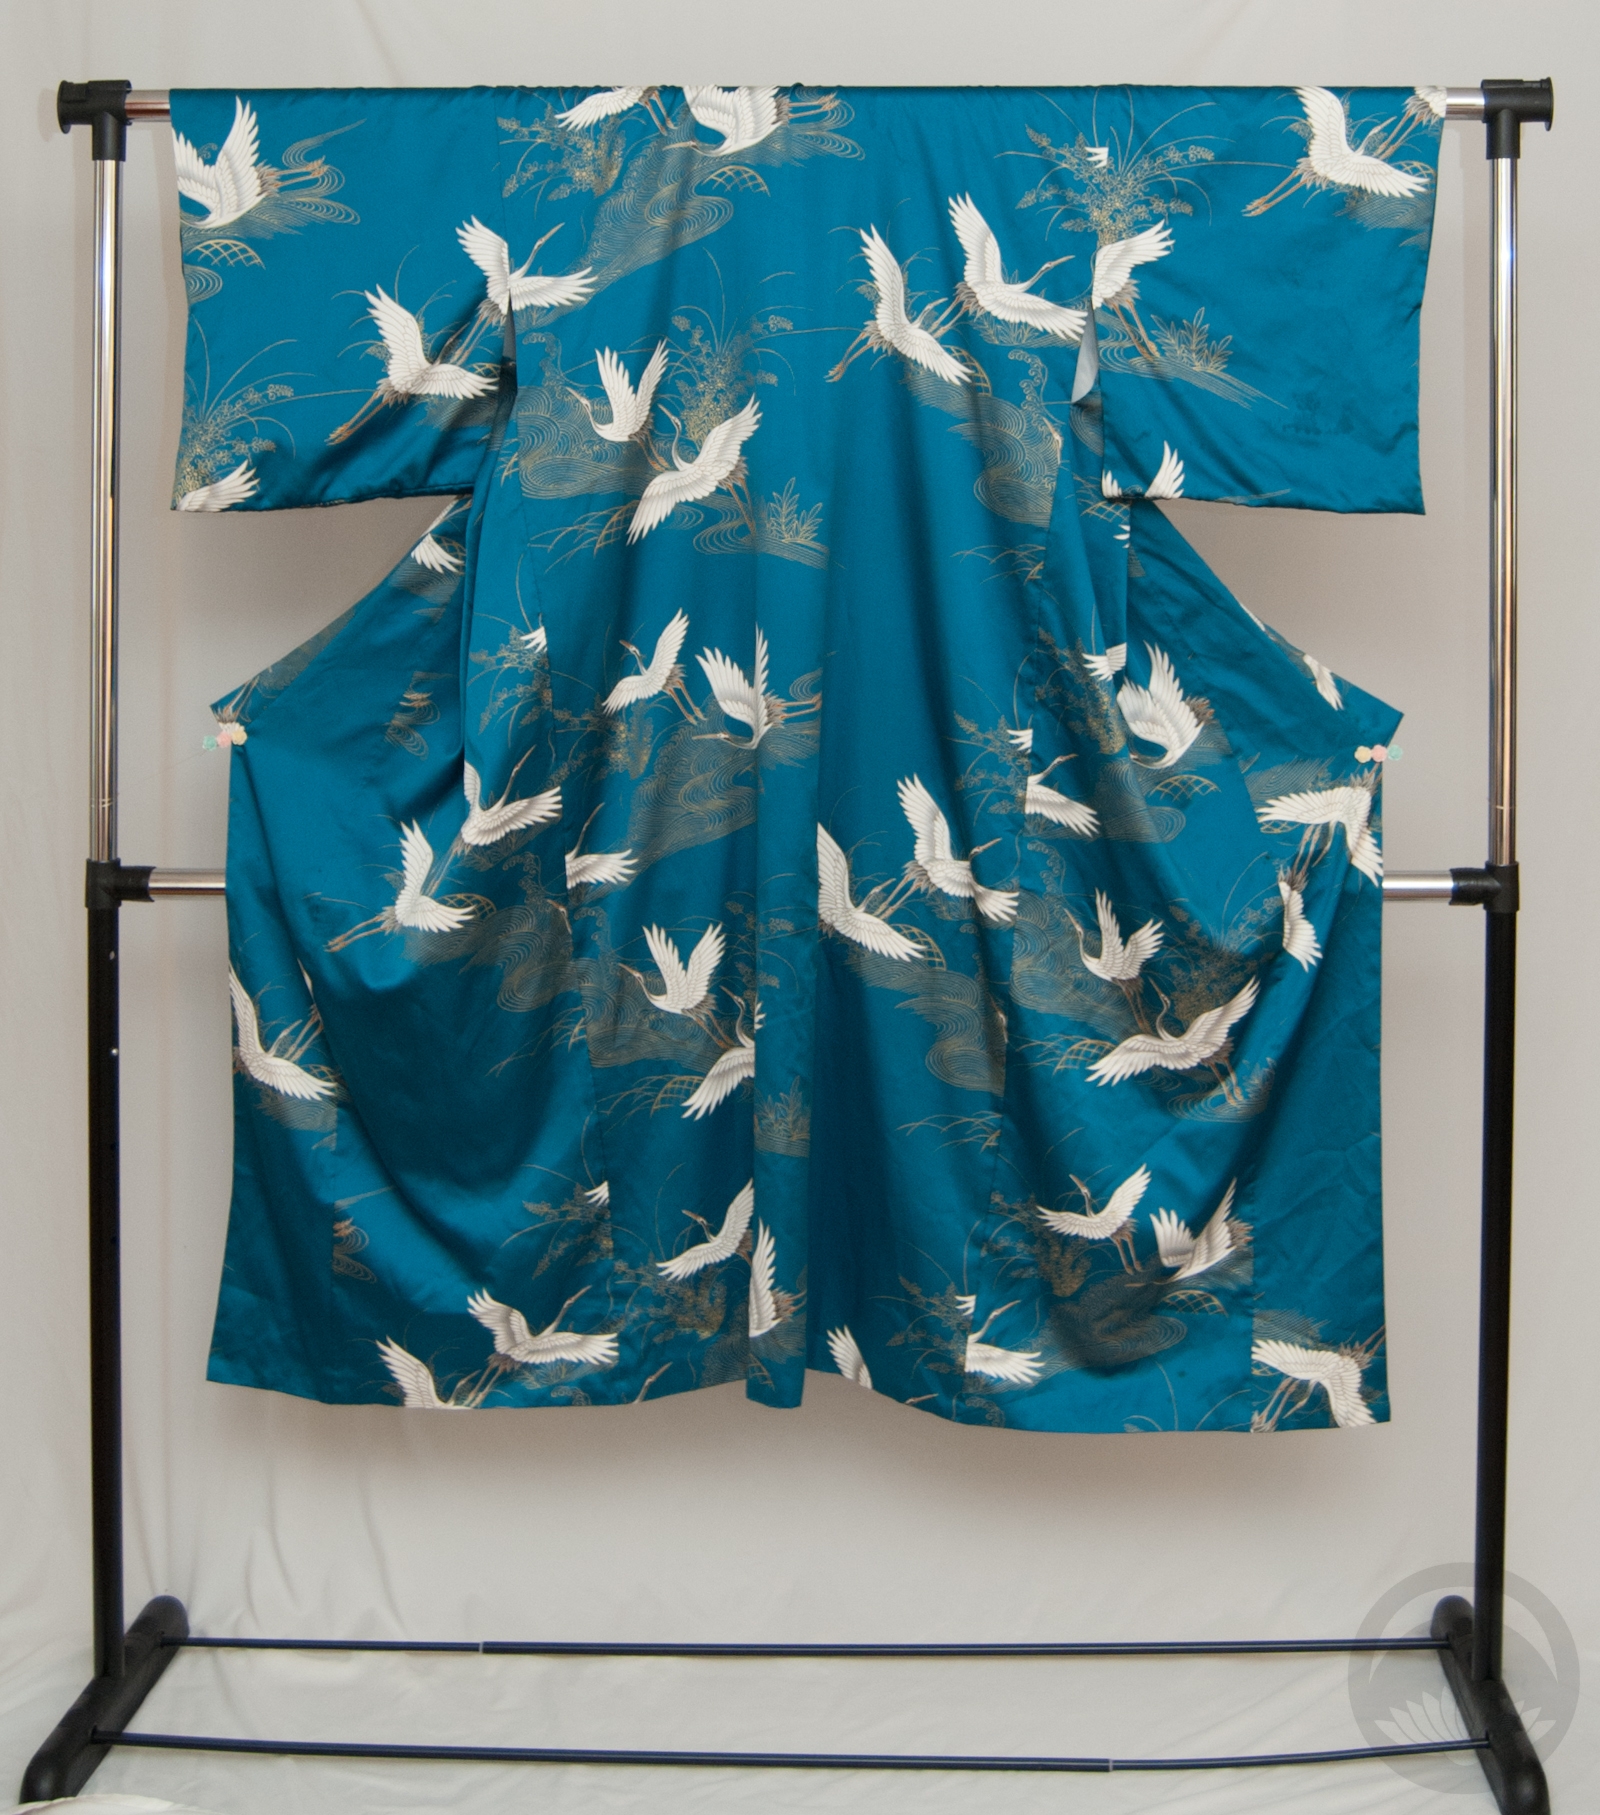
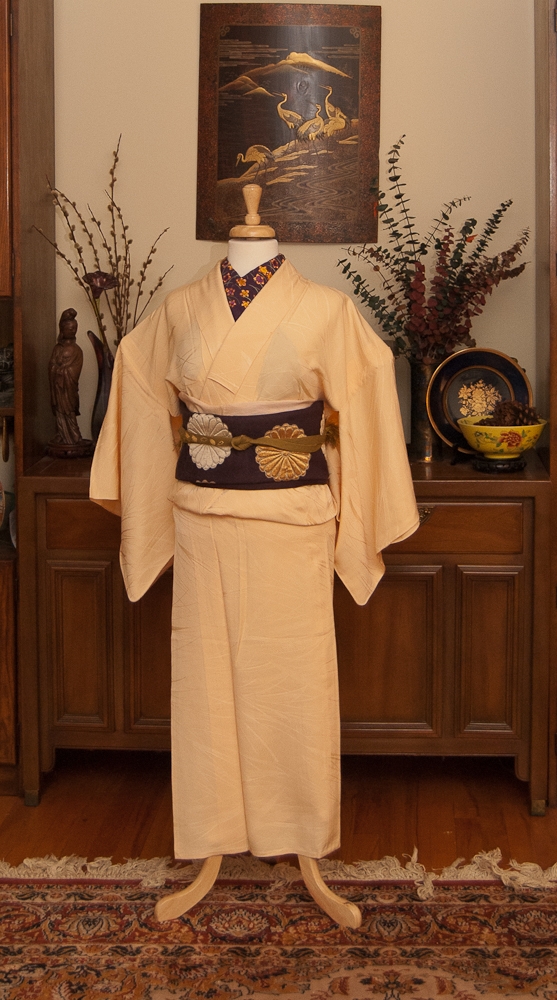
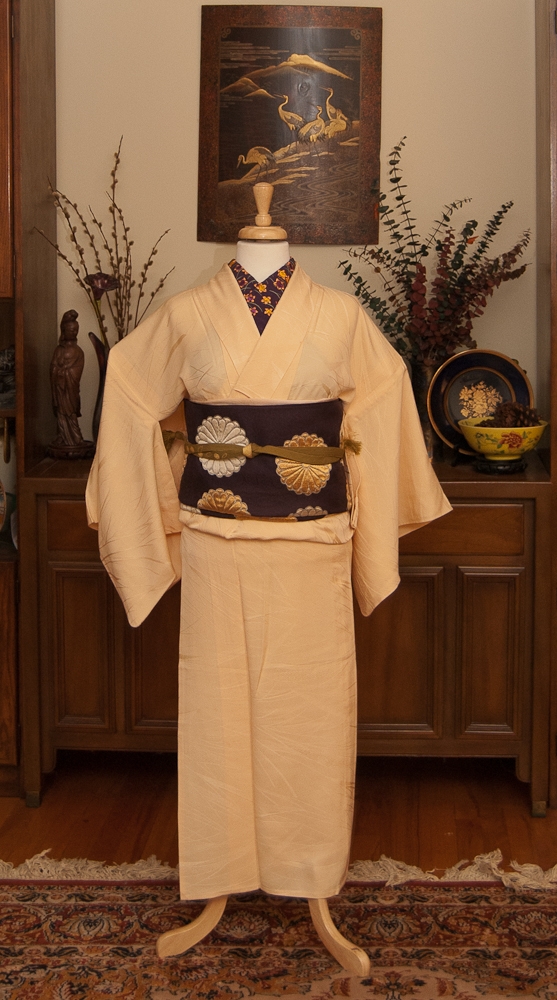
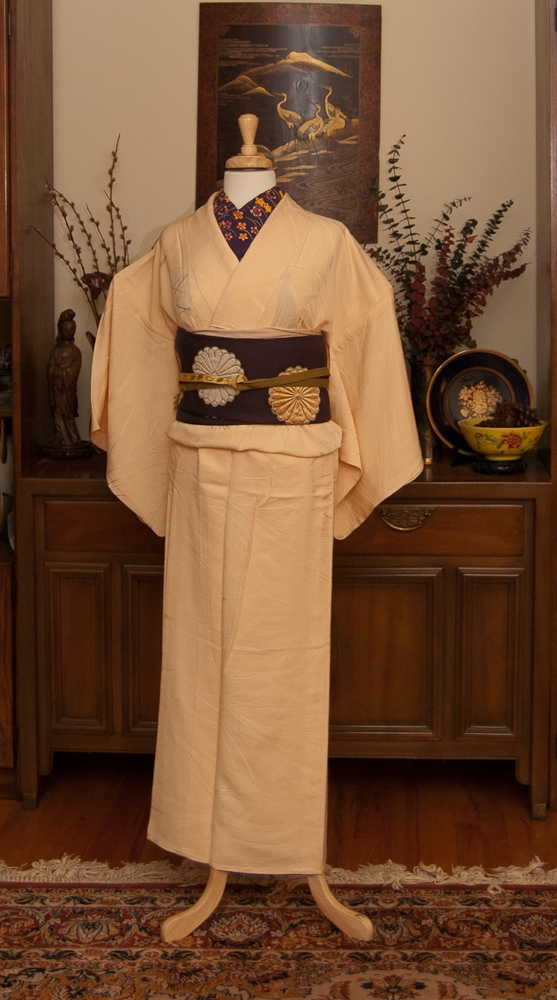
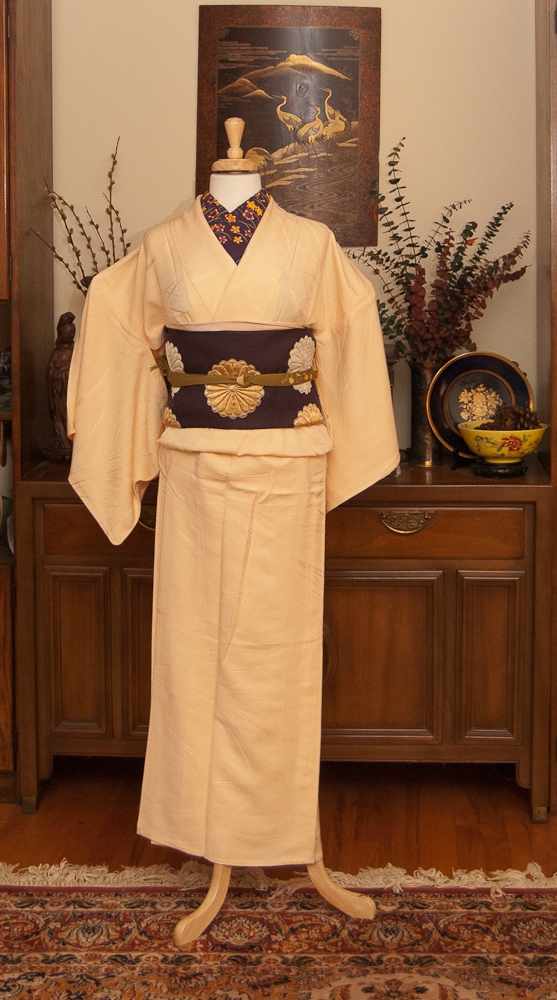
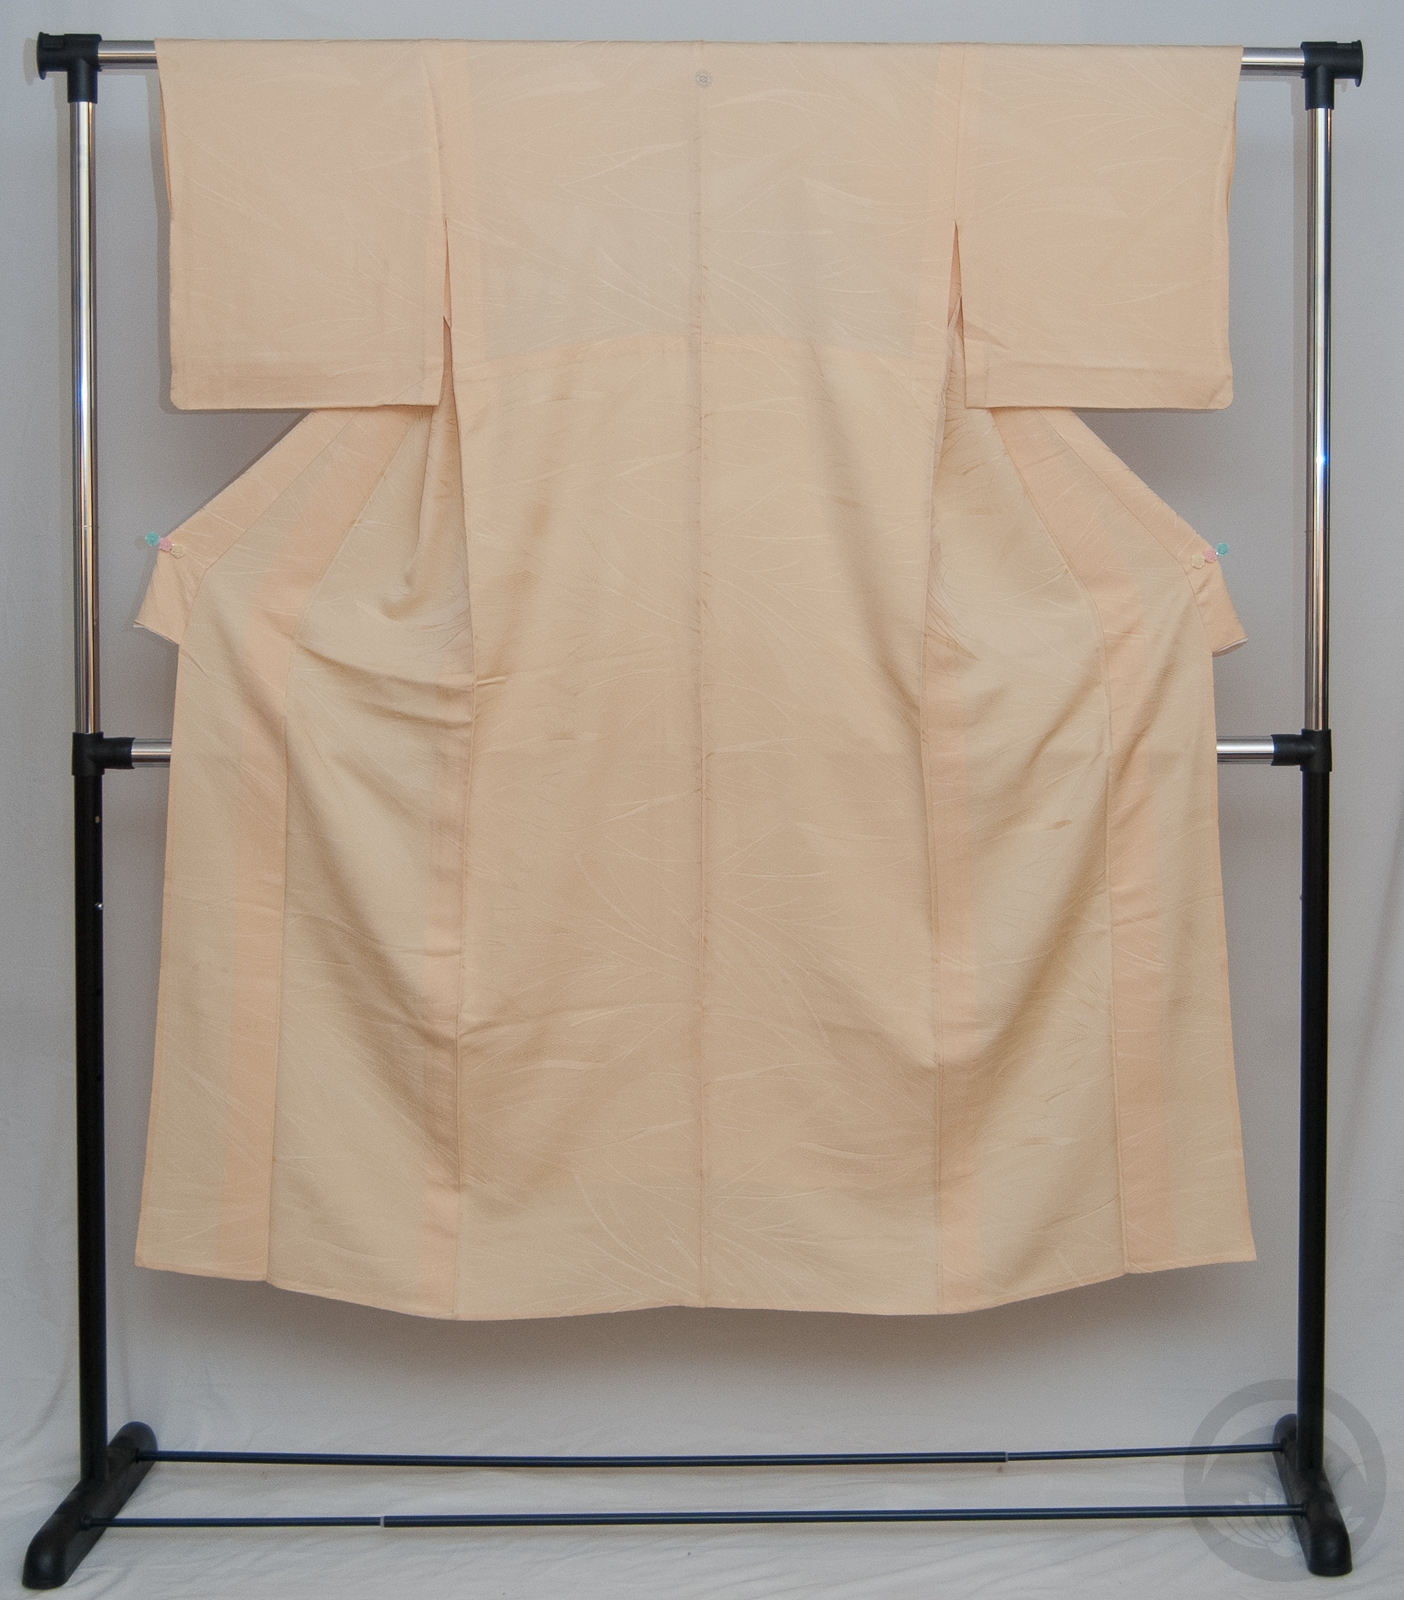
To give a better idea, I’ve collected some of my favourite coordinations from last year, where I made an effort to put together an outfit that exemplified fudangi at least once per month. As you can see, there’s plenty of room for variation, all while staying relaxed and comfortable.

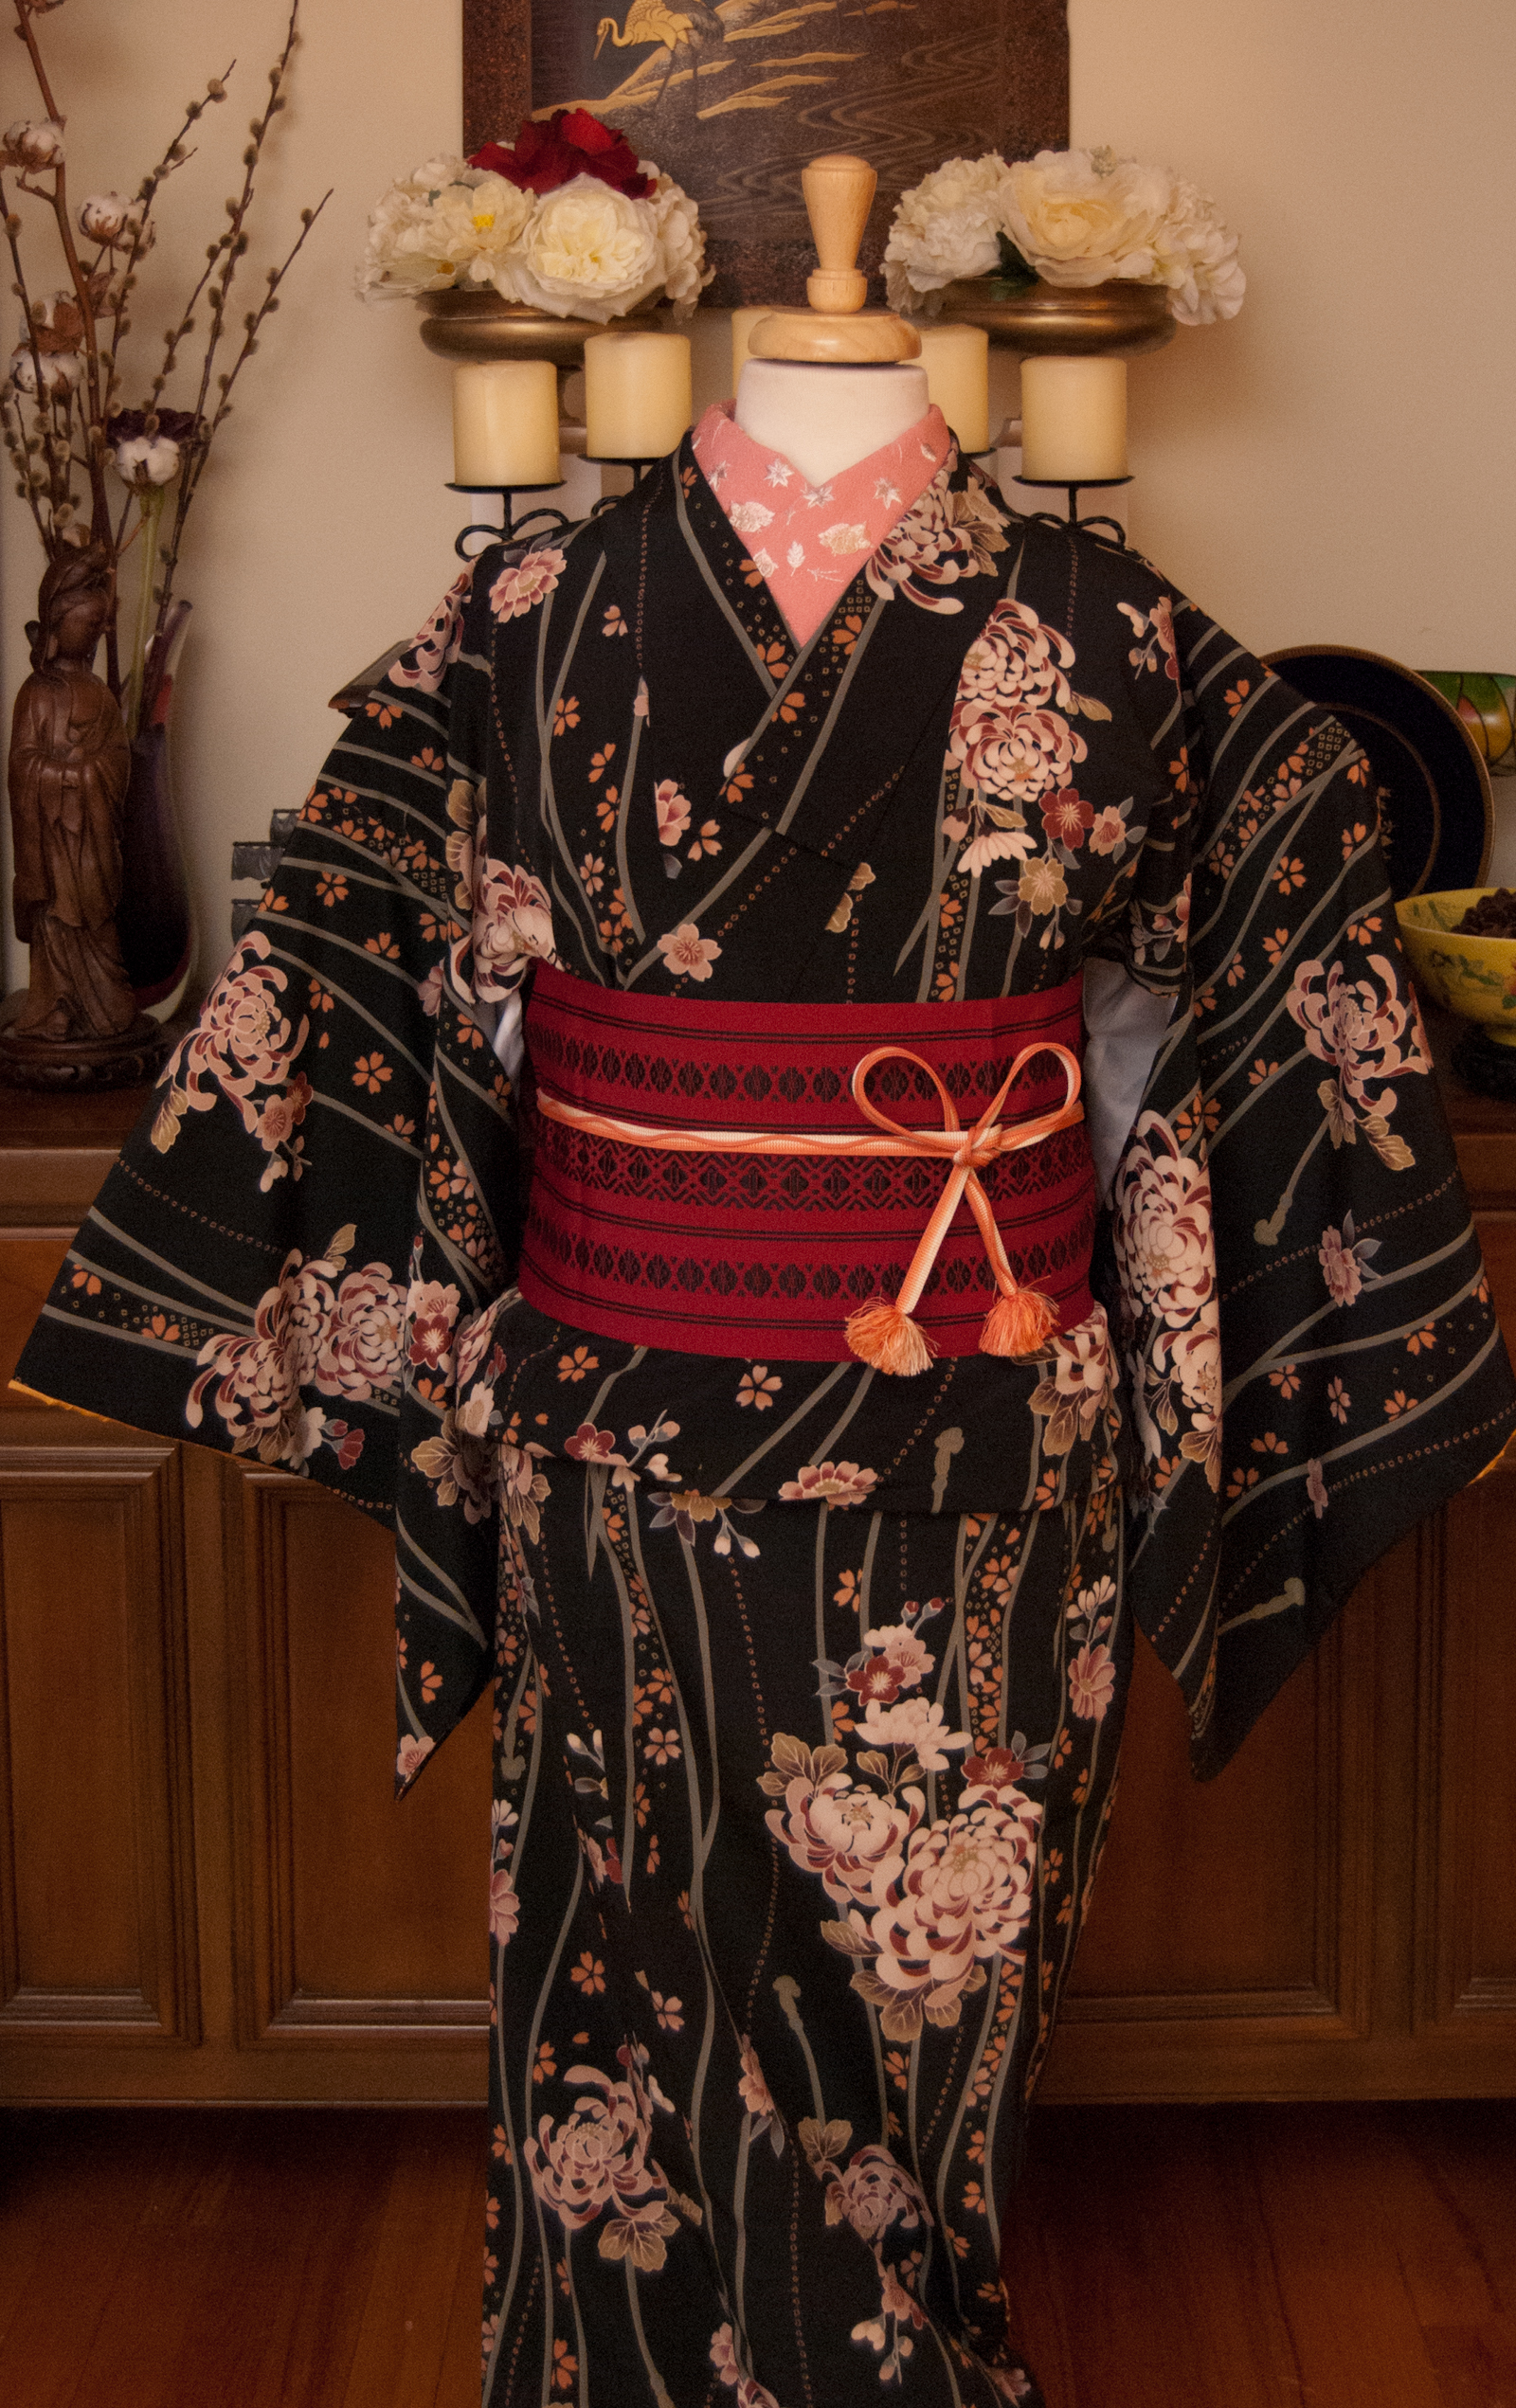
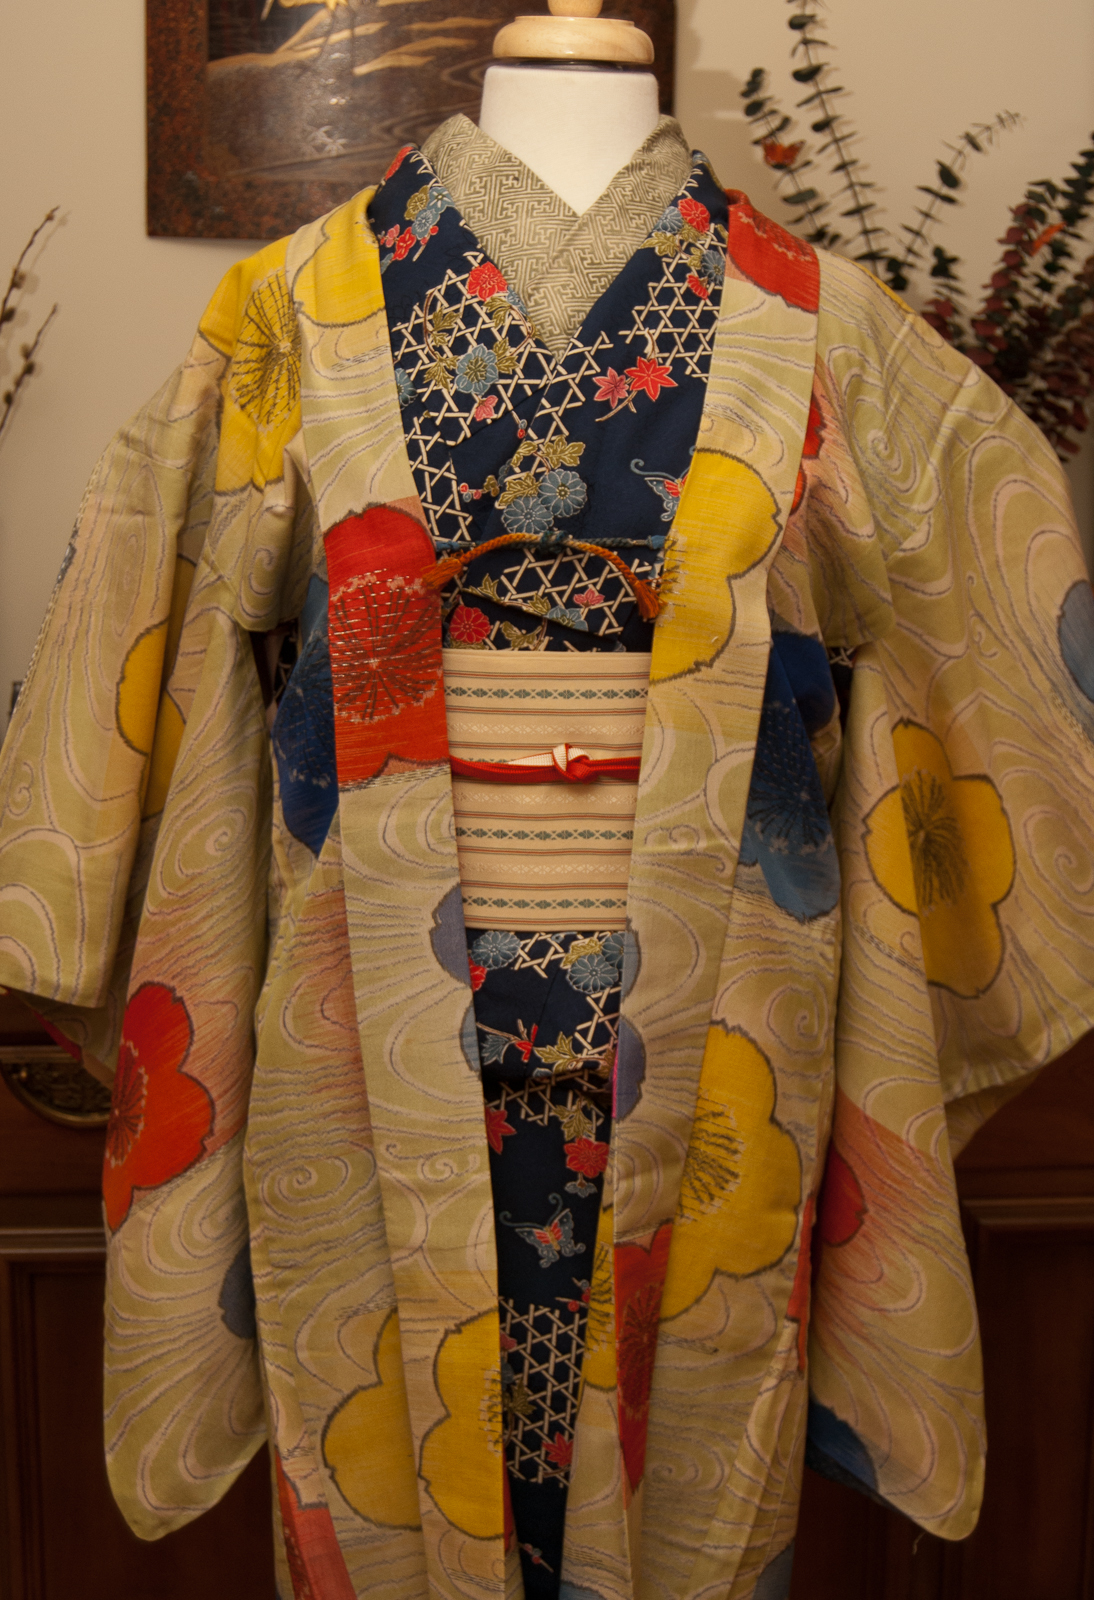
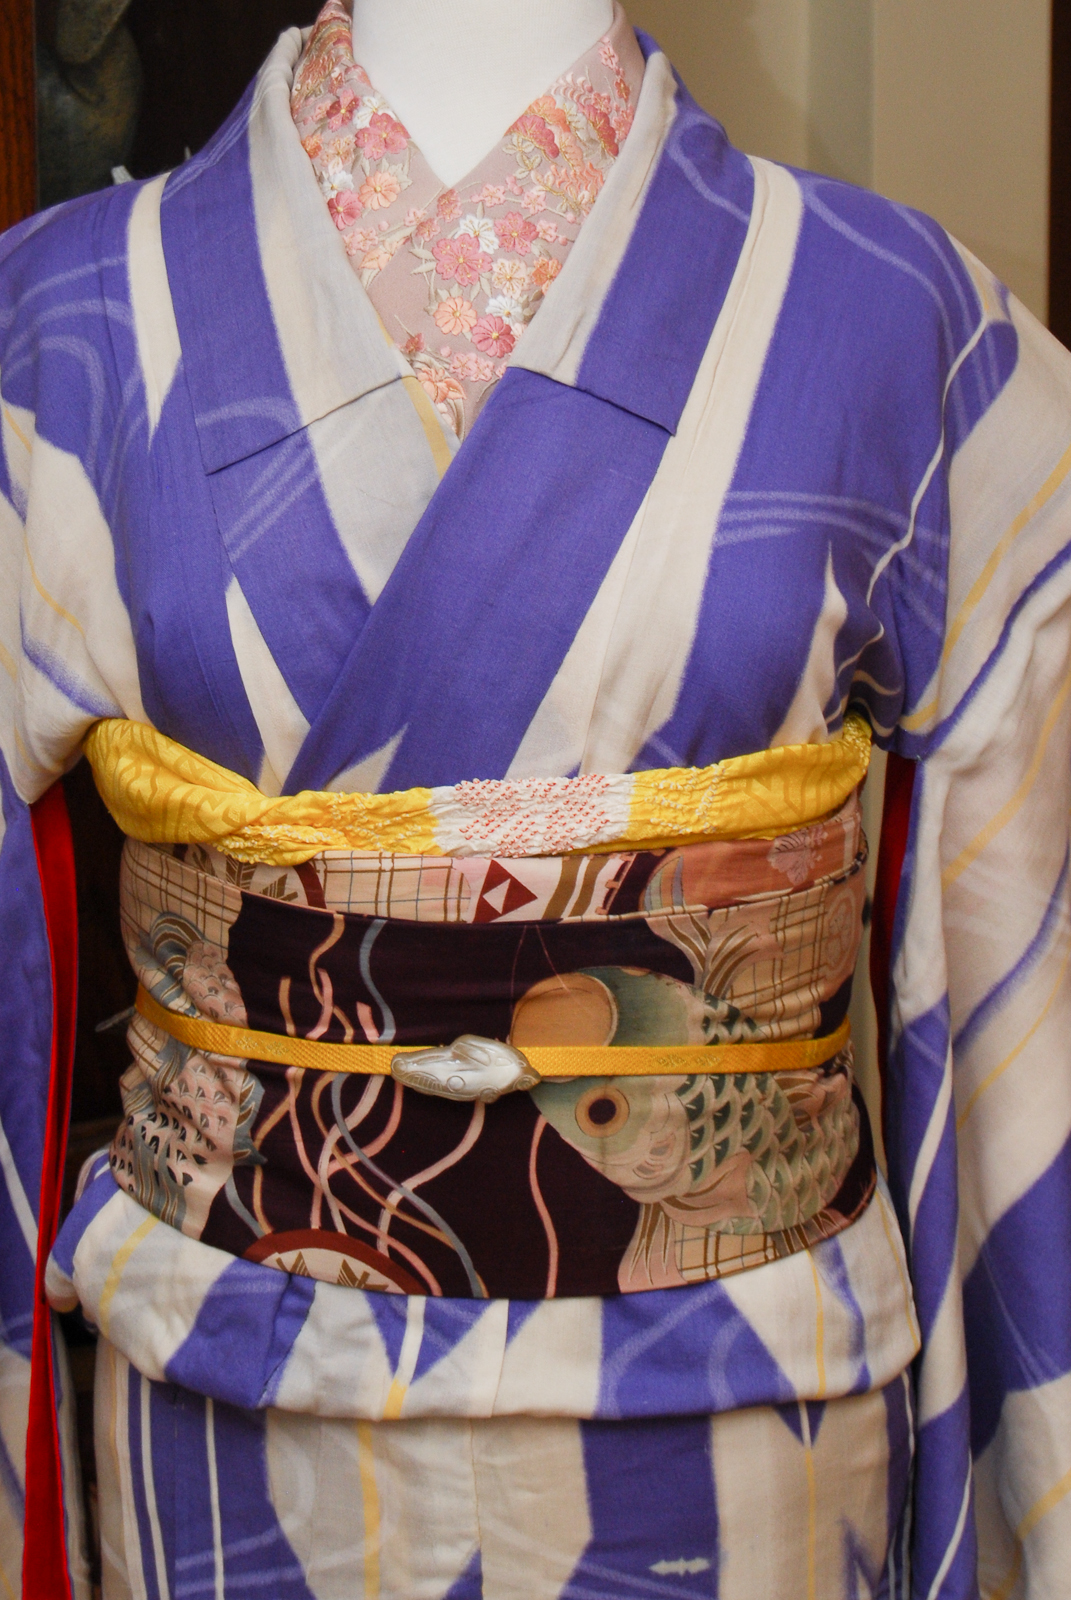
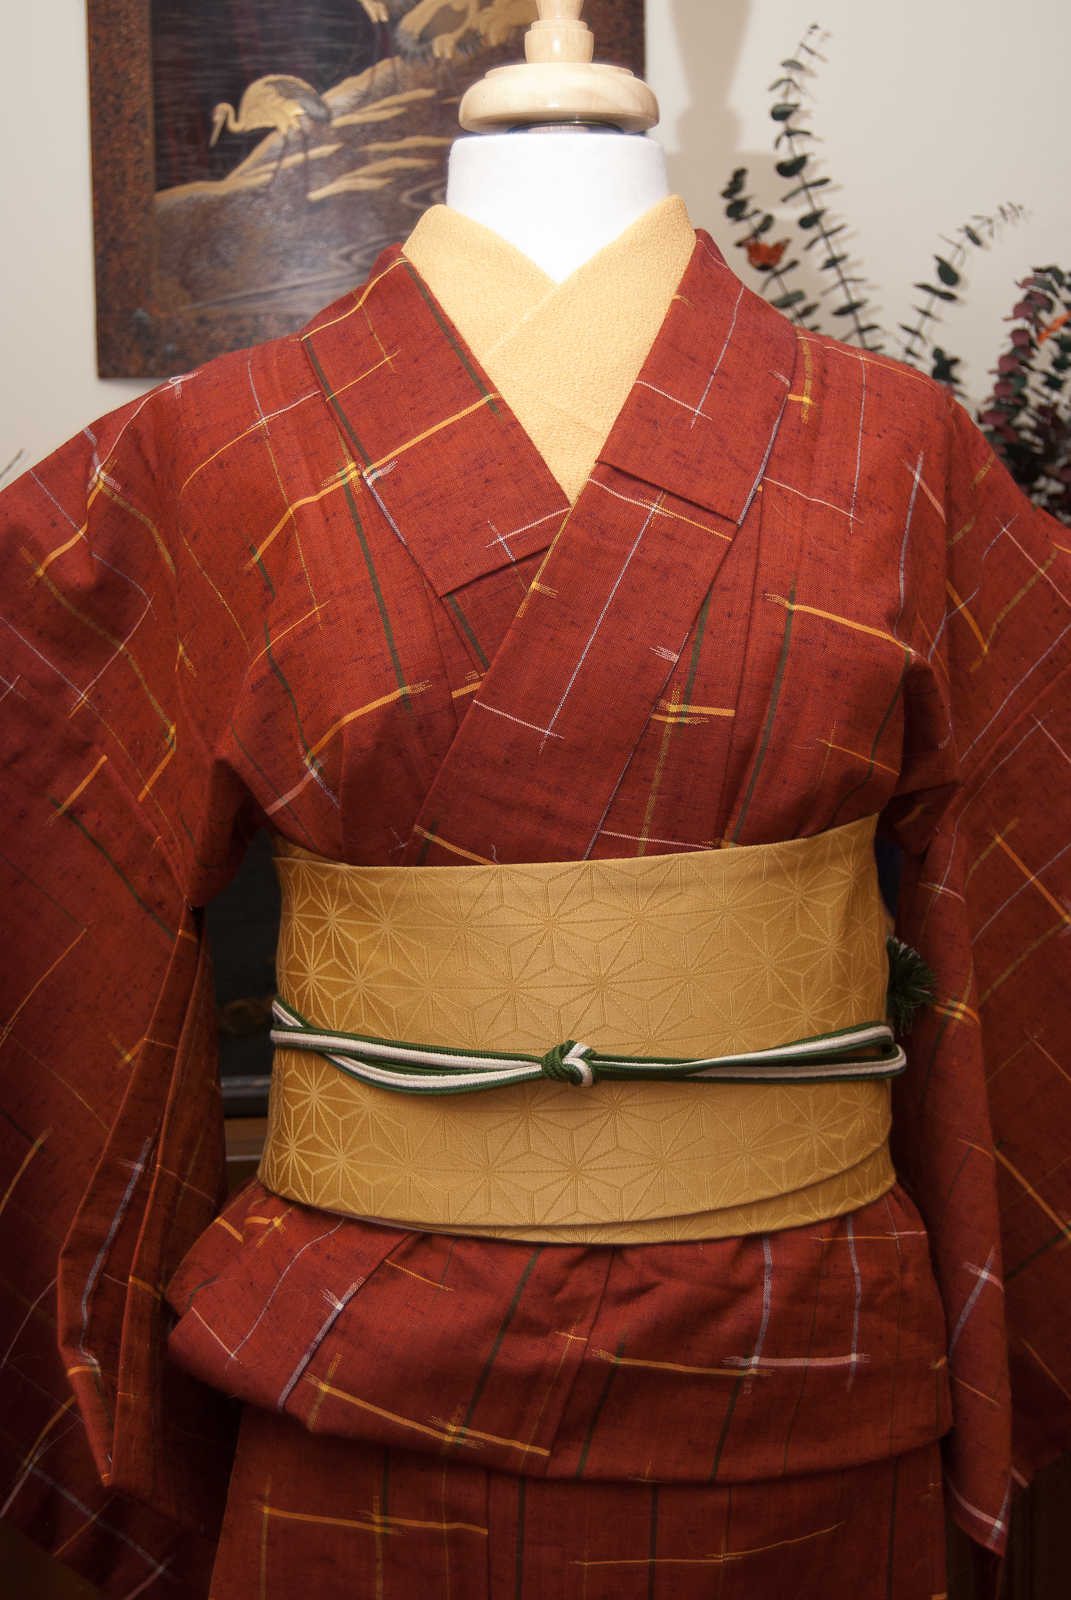
As much as I love really gorgeous formal furisode and kurotomesode, there’s a lot to be said for casual, cool, comfortable outfits like these.

When is a kimono not a kimono?

One thing I’ve come to learn over the fifteen years I’ve been at this whole collecting thing is that there is such a broad swath of things that online sellers, whether unscrupulous or simply misinformed, will label as kimono. It can be incredibly confusing and overwhelming for new collectors who are trying their best to get something authentic. Today, I’m going to try to help you out and break down “real” versus “fake” kimono, as well as authentic Japanese garments that would simply be a little awkward or inappropriate as outerwear.

Technically, kimono does just mean an item you wear (着 – ki, to wear; 物 – mono, thing), but when you think of traditional Japanese clothing there is usually a pretty distinct line delineates what is and is not a kimono. When starting to collect, it’s not uncommon to come across all manner of strange, hard-to-categorise items. To the novice, they may look and feel like a proper kimono, but they may get you funny looks if worn in inappropriate situations.

Today, I’m going to break down some of these more common misunderstood items in the hopes of clearing up some of these confusion. Of course, you can wear whatever you own and love, but if you’re new to this and feeling overwhelmed while browsing online or at conventions, hopefully this will help you out! Nearly all of these are pieces I own, which I hope goes to reassure you that they’ve all got their place and nearly none (we’ll get to the lone exception later) are inherently bad or wrong things to own. There’s just a time and a place for them.

Kimono-influenced Dressing gown

These may be made in China, North America, or even Japan, but they are meant to be worn like any other dressing gown or bathrobe. They will typically have Japonesque feels and motifs to them, and definitely do evoke a formal kimono-ish vibe, but they are absolutely just for in-house wear.


Defining characteristics:

  • Fabric: shiny satin or polyester
  • Belt: Yes, same fabric
  • No okumi panel
  • Often (but not always) has closed, narrow sleeves

Appropriate wear situations: Lounging, at home, at the spa 


Nemaki

Our first traditional Japanese garment, the nemaki is essentially bed- or house-wear. They’re incredibly comfortable and casual, but not the sort of thing you’re going to want to be wearing outside of the house unless it’s part of a costume or a themed event of some sort where other folks might be wearing pyjamas, novelty onesies, or similar garments.


Defining characteristics:

  • Fabric: woven cotton or hemp
  • Belt: Yes, same fabric. May be attached.
  • White with printed indigo designs
  • Short; mid-calf or knee length
  • Closed, narrow sleeves

Appropriate wear situations: Lounging, at home, in bed


Onsen yukata

A step up from nemaki but still not “outside clothes”. They’re generally a little fancier, since they may be seen by non-family members, but it’s still in the context of sleeping or bathing. Wearing one of these outside of a hotel, inn, or hot-springs situation would definitely get you some funny looks. I have, however, worn one in lieu of a juban in a pinch, so there’s a tip for you!


Defining characteristics:

  • Fabric: woven cotton or hemp
  • Belt: Usually, same fabric
  • White with printed indigo designs
  • Knee or mid-calf length
  • Typical kimono sleeves

Appropriate wear situations: Lounging, at home, at the spa, at the ryokan, at the onsen


Cosplay kimono

No. Just… no. These are mass-produced by factories that only care about making a quick buck, and don’t give a hoot about anything resembling accuracy. They’re often sold as “traditional” or “authentic”  kimono which takes advantage of people who are still learning, and that frustrates me immensely. I couldn’t even bring myself to buy one of these for reference purposes, so you’ll have to deal with this photo from one of the many, many online vendors of these things. Personally, I feel like the biggest travesty on these is the “obi”, which is generally a belt in the same fabric as the kimono itself, with an attached bow backed with a cardboard square. Or, as my friend once put it, a “spinal mortarboard“. I thought these fake obi were funny enough to begin with, but now I can’t see them and not think of that comparison.

Defining characteristics:

  • Fabric: cheap, shiny polyester
  • Belt: Matching “obi”, usually backed with cardboard
  • “Japonisme” vaguely Asian designs
  • Thin, contrasting collar permanently attached
  • Much too short for proper wear, often leaving ankles exposed

Appropriate wear situations: Conventions if you must but ideally nowhere


Tourist kimono

Generally made in Japan for the export market, these are probably the closest to a proper formal kimono, but there are a few key differences. Kimono typically have some construction seams across the upper back and down the spine, and these usually don’t. The fabric also tends to be a little shinier and flashier in most cases. However, they can be a great starting point for a collector or something a little more worry-free to wear to a party or convention. Mine was a gift and I love it, it makes a really lush, opulent-feeling robe for swanning around the house in. Sometimes, you can luck out and find very historically interesting ones made as souvenirs during the post WWII occupation that I think have fantastic historical and reference value as well.

Defining characteristics:

  • Fabric: higher-quality satin, rayon, or occasionally silk
  • Belt: Occasionally, usually matching or contrasting fabric
  • Constructed very similarly to proper kimono
  • May have embroidery across the back
  • More traditional patterns
  • No horizontal back seam

Appropriate wear situations: Lounging, conventions, fashion wear


Yukata

The good old festival yukata. If your introduction to kimono was the ubiquitous summer festival of your favourite anime, you are no doubt familiar with these. They’re a great first purchase for someone dipping their toes into collecting, as they require way less layers, accessories, and fussing to put on than a kimono. You can find them in colours and patterns ranging from incredibly cute and youthful florals to subdued, more mature geometrics to suit any tastes. I firmly believe that every kimono collector should have a couple of these in their arsenal, as they’re cute and comfy, and great for dressing friends who may not be ready for the full kimono experience.

Defining characteristics:

  • Fabric: Crisp, breezy cotton or hemp
  • Belt: None, worn with coordinating hanhaba obi
  • Constructed using same pattern and structure as more formal kimono
  • Traditional motifs ranging from vibrant youthful florals to subdued geometrics

Appropriate wear situations: Summer festivals, picnics, conventions


Polyester komon

Our first “real” kimono! They may be made out of polyester, which some people will see and assume this falls into the same category as tourist kimono. However, nowadays polyester is a very common material for both casual kimono and formal rental pieces. These are great if you’re going somewhere where there’s a risk of mess; be it a restaurant, a convention, or simply an event in inclement weather, a poly komon is a fantastically versatile piece that I encourage all new collectors to invest in. Just be warned, they don’t breathe like natural fibers would, so they can get very hot in the summer or in crowded venues.


Defining characteristics:

  • Fabric: High-quality polyester, similar in feel to silk.
  • Belt: No, to be worn with coordinating hanhaba or nagoya obi
  • All-over repeating pattern

Appropriate wear situations: Casual events, conventions, dinners, parties


Silk kimono

There are too many varieties of real kimono to include one of each in this entry. I have already done a breakdown of types, formalities, and how to tell them apart, in this article so now that you know what isn’t a real kimono, feel free to go read about the many varieties that are.


Hopefully this has helped you break down what to look for when dipping your toes into the wonderful world of kimono collecting, and has helped give you a little confidence and the knowledge you need to make sure your first few purchases are things you will love and cherish!

“Iki, wabi-sabi, what now?” – The language of Japanese aesthetics

Language is a fascinating thing. There are so many different ways to express certain things. Nowhere is this more apparent than when dealing with multiple languages. Often, there is no way to translate a kimono-specific word into English, because there’s not been a need for it. Loanwords are a fantastic solution for most of these, things that can easily be clarified with a glossary or reference chart with a short definition.

Sometimes, however, a simple glossary isn’t enough. These concepts are more abstract and can’t easily be translated into English or explained in a sentence or two. I thought it would be both useful and interesting to break down some of the more common terms or expressions that often get used when describing certain styles. I use several of these, and they’re more complex than any floating tool-tip or single line definition, so here they are collected in one easy reference.

Iki – いき

The concept of iki evolved from the streamlined and urbane sense of style of the merchant class during the Edo era. In stark contrast to the overly ornamented, almost gaudy fashions worn by samurai and the ruling classes, a sense of iki evolved from simple colours and patterns and thoughtful unexpected touches. A sense of refinement would be clear in the quality of fabric and attention to detail more than flamboyant colour and embroidery. Think of the fashionably effortless appeal of a young Parisian woman, and there you will find a western analogue for iki.

Wabi-Sabi – 侘寂

Wabi-sabi is probably the aesthetic term most commonly referenced in English when discussing Japanese style. Here in the west, it has almost come to mean “anything Japanese”, but in reality it has a more precise usage. When something is truly wabi-sabi, it embraces the fragile imperfection of nature. It evokes a sense of transience, a slight roughness of aspect that reminds us all of where we came from. Raw slubbed silk, uneven handmade pottery, naturally winding and twisted branches are all wonderful examples of wabi-sabi.

Shibui – 渋い

Shibui is quite possibly the most straightforward of these terms. Like a sense of excellent, refined taste, shibui is simple and elegant, again focusing on quality craftsmanship and sparse lines. If iki is a stylish young woman, shibui is her refined grandmother. Unlike some of the others mentioned here, shibui may aim for perfection, but with the implicit understanding that it will never be fully achieved. Subtle but exceptional decoration and luxurious fabrics and materials are essential here.

Mono no Aware – 物の哀れ

When you think of the fleeting, ephemeral beauty of the short-lived sakura blossom, appreciating the moment all the more because you know it’s going to be over soon, you’re experiencing mono no aware. There is a distinctly Japanese awareness of the constantly changing essence of the natural world around us, as evidenced by the seventy-two micro-season calendar.Mono no aware not only acknowledges the impermanence of things, it focuses on that impermanence, as well as the wistful feelings it engenders.

Mottainai – もったいない

A bit of an outlier, mottainai isn’t a sense of aesthetics so much as a general philosophy of regret about waste and excess. It comes into play especially when it comes to vintage pieces, which are often remade into new things. It’s very common to find fukuro obi that may have been stained or are too small converted into hanhaba obi or tsuke-obi. Less common but still frequent are conversions like turning a kimono into a haori, or into a western-style dress. There is beauty in the history of a garment, and in giving it new life instead of creating more waste. This becomes more and more vital as a preservation method as traditional techniques start to die off, and a way to protect our increasingly fragile environment.

Kawaii – かわいい

If you’ve spent any time on the internet, odds are you’ve encountered kawaii. It’s absolutely a more modern concept than the others mentioned here, and may not necessarily be as relevant in the world of kimono, but it’s definitely starting to have more of an influence. We’re seeing more pastels, more frills, more lace, than ever before. Kawaii as an aesthetic isn’t just “cute”. It’s cute beyond cute. Cute as a lifestyle choice. It’s about embracing the youthful and girly in a way that can feel almost subversive in a world that encourages us all to grow up fast.

Are there any other terms like this you think should be included? Something you’ve heard or read but aren’t sure about? Please leave a comment below!

Adjusting obi width to your proportions

Recently, a discussion on the Immortal Geisha facebook page got me thinking about folded obi width and size. Typically, a fukuro obi is folded in half before wrapping it around your torso, and for the average Japanese frame this looks balanced and proportional. However. many of us are not lucky enough to have a typically petite, slight build, and sometimes a narrower obi can make us look oddly cut-off or silly.

So what I thought I would do was take multiple pictures of the mannequin at differing heights, in the same outfit but with the obi tied at different widths. Obviously, this can only be done most easily with a full-width or unsewn obi, but the principle can be applied to tying a hanhaba or nagoya obi as well; just overlap the wraps to give the impression of a wider or narrower band.

The following two sets of photos have the mannequin set at approximately 167 cm (5’6″) and 180 cm (6′). The first obi on each is folded to roughly 12 cm (5″), the second is folded in half at roughly 16 cm (6″), and the third is folded to 20 cm (8″). As you can see, the obi width changes the overall balance of the outfit without being obviously “incorrect”. It’s a subtle difference, but if you’re very tall like I am, or very short, adjusting your obi can make a significant difference.

Love your height, be it “too tall” or “too short”! We’ve all got our challenges, and there are always tricks to making things work. 🙂

Items used in this coordination

Furisode Dress Tutorial

Several months ago, some photos started making the rounds of an awesome way to temporarily modify a kimono to wear over a Western-style dress, as a sort of reversible fusion of traditional and modern. I was determined to figure out how to do it, and I think I succeeded quite well back then. While commonly suggested for a wedding, these would also be a really special and unique outfit for a prom, ball, sweet sixteen, quinceañera, or any other event where a ballgown would be worn.

Since then, several people have asked me for a tutorial and I kept getting sidetracked by other projects and my own squirrel brain. The original photos, as well as new ones, are now making the rounds again so it felt like a good time to revisit it and do a proper step-by-step breakdown for you all.

This can be a bit tricky, so if you’re hoping to do it for an event I’d absolutely suggest practising a few times and having someone to help you out.

You will need:

  1. Dress with voluminous skirts
  2. Kimono (furisode work best)
  3. Fukuro obi
  4. Obijime
  5. Obiage
  6. Koshihimo (several)
  7. Kasane-eri (optional)
  8. Accessories (optional)

Other dressing accessories such as an obi-ita, obi-makura, dressing clips, etc, are optional but helpful, depending on what kind of obi musubi you have in mind. Make sure you have everything near at hand, because once you start tying and bustling the kimono it’s not the sort of thing you can pause and walk away from.

Step 1 – A naked mannequin! How scandalous! Seriously though – if you’re dressing a mannequin this is your starting point. If you’re dressing yourself, put on whatever traditional foundation garments you’d wear under your dress. Forget kimono underwear now, just wear something comfortable that won’t show under your gown (unless that’s what you’re going for, in which case, you do you. A harness bra would add a really fun gothic element with the right kimono)

Step 2 – Put your dress on, make sure it’s fully secured and done up. It will be carrying some extra strain, so you want to make sure it fits you properly and won’t go sliding around when you adjust the kimono over top.

Step 3 – This is where things get fun. Pick up your furisode and hold it up in front of you, with the back facing outwards. You’ll be putting it on backwards. Find the centre point of the collar, align it at your sternum. If you want to add a kasane-eri for a bit of colour and contrast, now’s the time. Once you’ve got your kimono arranged across your bust, wrap it around your torso and hold it snug while you tie everything in place with a koshi-himo. Make sure to leave the sleeves free, you will be adjusting them later. This is where a second set of hands definitely helps. If you have someone to hold everything in place for you while you tie the kimono in place, it will be much easier.

Step 4 – Once you have the kimono tied snugly in place, you can start pulling up the excess and folding it over the himo tied at your waist. If you’ve worn kimono traditionally, this part is very similar to adjusting your ohashori. You can have some fun here; there’s no specific length that the kimono has to reach. You can hike the kimono up far enough to show the hem of your dress, or you can have it almost dusting the ground.

Step 5 – Once you have the length determined, arrange the sleeves behind the dress and snugly tie everything in place with another himo. You can arrange the sleeves in the back like this, and it almost forms a train. You can also have them draped around the front like I did with the previous furisode dress, which gives a more youthful vibe, almost reminiscent of an apron or jumper. Have fun and experiment.

Step 6 – Smooth everything out with an obi-ita, and take the time to smooth everything out. If you need an extra koshi-himo or two don’t hesitate to use them. Make sure everything is snug and secure, especially if you’re dressing yourself (or another person) and not a mannequin.

Step 7 – Once everything is good and tight, you can begin wrapping your obi. This part is going to be essentially the exact same as when wearing kimono. Wrap twice around the torso and use the rest to tie your musubi. You can have fun here too; this outfit is so non-traditional you can really go wild with how you tie the obi. For simplicity’s sake I did a sort of bunko variant but there are really no rules here.

Step 8 – Secure the obi with an obijime, make sure it’s good and snug. If you used an obi-makura, hide it with an obiage. Even if you don’t need the obiage, it’s a nice way to add a little more colour and texture to your “dress”. Again, have fun! We’ve broken so many rules by this point there’s no real reason to worry about the others.

Step 9 – Voila! Your new ballgown is ready for the runway, with no modification or damage to the kimono.

I hope this is easy enough to follow along. Feel free to ask for clarification if you need help, and if you attempt this I would love to see photos!