Ikebana Workshop at Kyoto Fleurs

Yesterday I had the pleasure of attending an ikebana workshop at Kyoto Fleurs, a charming local florist here in Montreal. I know that when I started this journey I said I would focus on self-driven learning and more casual forms because I didn’t have the resources to commit to proper lessons, but the great thing about these workshops is that they’re held once a month and you don’t need to attend regularly, you can just come to one whenever you’re free and have some money to spare. This setup is much more accessible to me than a more rigid once-a-week type schedule.

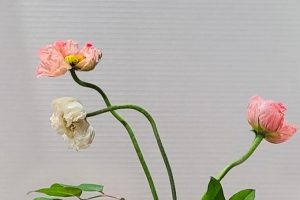
The workshop was taught by Satoko Ueno, who has twenty years of experience and teaches the Shogetsu school style. I’ve typically been learning free-form and Ikenobo-style through books and videos, and it was great to get help with a more strict and traditional form from another school. The workshop was broken up into two parts, the first part was a very rigid traditional arrangement using tulips, and the second part was a free-form arrangement of willow branches, pittosporum, and vibrant anemones.
First Satoko-san demonstrated each form, very clearly and kindly explaining as she went. We all watched intently as she showed us each step and broke down the stricter rules of the traditional ikebana as she assembled the arrangement.  She also provided us with printouts breaking down heights, proportions, and shapes to keep in mind. Of course, I forgot mine there as I was leaving. I’m not the most organised person on the planet sometimes…

The free-form arrangement was very different; we were all given the same materials and general guidelines but allowed to do whatever felt and looked right. It was fascinating to see all the difference in shapes and compositions we all came up with, despite starting with the same things. It also confirmed to me that I’m much more fond of the liberty the free-form style affords, but I really do need to focus on more traditional shapes and rules for a while, I think.
Here are my two final arrangements. I’m quite happy with both of them!

As much as I’ve been enjoying doing this on my own, this workshop showed me that I still have so much to learn! Being able to see a teacher’s work in person as well as receiving immediate feedback and constructive criticism as I went was an invaluable experience. I’m very much looking forward to attending more of these if I can arrange time off work.

If you’re local and interested in attending one of these awesome workshops, you can follow Kyoto Fleurs on Facebook. They’re typically going to be held the first Tuesday of each month, but dates are subject to change so follow them to get updates and information in advance!

A Wild Diane Appears!

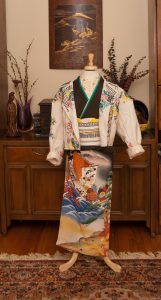
You guys! Look at this! Recently a friend drew my attention to the fact that Kimonomachi shop on Rakuten now carries a selection of modern poly komon in size 4TL. Even when I was thinner, it was nigh-impossible for me to find kimono that were actually long enough for me. Now that I’m also significantly overweight, I’d pretty much given up wearing a kimono comfortably as a lost cause, but this one borders on being too big for me. Isn’t that wild?

Sadly, I only noticed my obiage had slipped off my makura after I took the photos. Oops!

It feels so good to be able to dress myself again, and so easily and comfortably too. It’s amazing how much of a difference the proper fit makes. I’d love to buy myself another one, but these kimono are not inexpensive at ¥ 14,000. I managed to get this one for significantly less because I had Rakuten points a PayPal gift card that needed to be used. I may cave in and buy myself a different pattern if I get a large tax return this year. We’ll see.

For reference, I am 179cm (5’10”) tall with a 121cm (48″) bust and a 36K bra, a 91cm (36″) natural waist, and 120cm (47″) hips. I typically wear a size 18 or 1X in North American clothing sizes. This kimono wraps easily from hip to hip, a full one and a half times my widest measurement. So if you’re a similar size and looking for something that will actually fit you properly, I cannot suggest these enough!

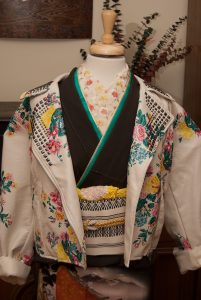
I paired the kimono with this moorish arch nagoya obi that couldn’t match better if I’d bought them together. The rusty orange-red of the obi makes the red accents in the kimono pop, and the turquoise base colour of the obi is the exact same as the arches. Looking at the photos, it’s quite clear that a standard otaiko musubi done with an average-sized nagoya obi just looks disproportionately small and odd on my frame, so whenever I actually wear this kimono out to an event I will likely go with a hanhaba or chuuya obi tied in something I can control the size of better. Vibrant lemon yellow accessories made everything pop, and I couldn’t resist using my obidome with snails on it. It’s too cute for words, and ties in with the warm creme colour on the flowers of the kimono.

As a final note, a little reminder that the best laid plans of mice and men often go awry. I dressed myself in this outfit last Thursday and took photos, with the intention of posting it on Fudangi Friday. I transferred, edited, and uploaded the photos. And then on Friday morning I settled in at work, and during a quiet moment started drafting the entry. It was at that point I realised I had the kimono on backwards. Somehow I’d managed to dress myself and then take and edit photos without ever noticing! And as much as I encourage playing with rules when it comes to kimono, wrapping it backwards (right side over top of the left) is only ever done for a body being prepared for a funeral, and it is not a rule I would ever consider breaking unless it was for a very explicit purpose like a costume. So I scrapped my initial plan and re-dressed myself today. Honestly, I’m glad I did, because I managed to tie the obi much more neatly and the lighting was a lot better as well.

Items used in this coordination

Happy Hina-Matsuri!

I hope everyone is having a great day! While it’s still March 2nd here in Canada, it’s been March 3rd, Hinamatsuri, in Japan for several hours already. Last year, I made a set of dolls with perler beads. The year before that, origami. This year I decided to go for a double-whammy. I drew a set which are also available as a print, and I made this adorable set from Nanoblock that was super fun to put together.

May this year be filled with luck and love to you and all the girls and women in your lives.

 This post contains affiliate link(s). If you choose to purchase, I receive a small rebate or commission which goes to the continued maintenance of this site. 

#Monokimono Challenge – Rose Pink

This certainly seems to be the month of pink! First there was the pink ikebana, then there was the pink sakura artwork, and now for this month’s #monokimono challenge, an experiment in pink and texture.

For the first one, I focused on pieces that had a lot of pattern going on, but had the colour in the background. This one, I decided to use pieces that were essentially solid, but all in the same soft dusty rose pink tones and lots of varied texture. I started with my iromuji with the really thick watery rinzu, and then the reverse side of the pink-and-grey sakura chuuya obi. It’s solid and smooth and contrasts perfectly with the rich texture of the kimono. Then this amazing new lace haori, which is slightly less saturated in colour but adds yet another layer of really thick, tactile interest. Throw in a few more shades of pink and interesting textures in the accessories, and I think this is a very successful monochrome outfit. It feels both timeless and modern somehow, and could be worn to so many different events.

Items used in this coordination

Since I’ve nearly completed cataloguing my entire collection, I thought I would add this little mini-feature to coordination entries. I still have obijime left to add, but once that’s done I will be going back and adding these detail images to entries over time. What do you think?

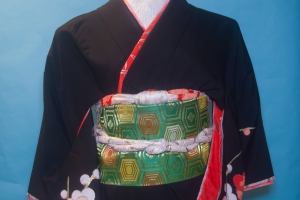
Adjusting obi width to your proportions

Recently, a discussion on the Immortal Geisha facebook page got me thinking about folded obi width and size. Typically, a fukuro obi is folded in half before wrapping it around your torso, and for the average Japanese frame this looks balanced and proportional. However. many of us are not lucky enough to have a typically petite, slight build, and sometimes a narrower obi can make us look oddly cut-off or silly.

So what I thought I would do was take multiple pictures of the mannequin at differing heights, in the same outfit but with the obi tied at different widths. Obviously, this can only be done most easily with a full-width or unsewn obi, but the principle can be applied to tying a hanhaba or nagoya obi as well; just overlap the wraps to give the impression of a wider or narrower band.

The following two sets of photos have the mannequin set at approximately 167 cm (5’6″) and 180 cm (6′). The first obi on each is folded to roughly 12 cm (5″), the second is folded in half at roughly 16 cm (6″), and the third is folded to 20 cm (8″). As you can see, the obi width changes the overall balance of the outfit without being obviously “incorrect”. It’s a subtle difference, but if you’re very tall like I am, or very short, adjusting your obi can make a significant difference.

Love your height, be it “too tall” or “too short”! We’ve all got our challenges, and there are always tricks to making things work. 🙂

Items used in this coordination