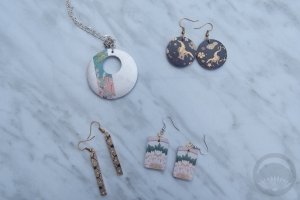
DIY – Washi Tape Earrings

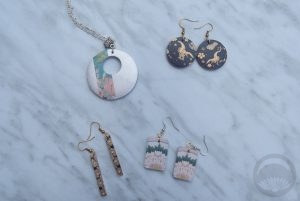
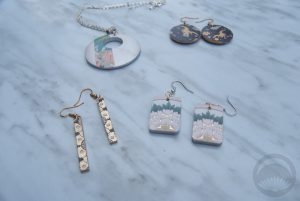
A while back the lovely folks at The Washi Tape Shop sent me a gorgeous selection of washi tapes. I used some to make these fun kokeshi-style dolls, but I’ve been trying to think of other ways to feature the designs. I was inspired to make these fun. stylish, and easy washi tape earrings! Including dry time for the optional paint and varnish, these come together in less than an hour.

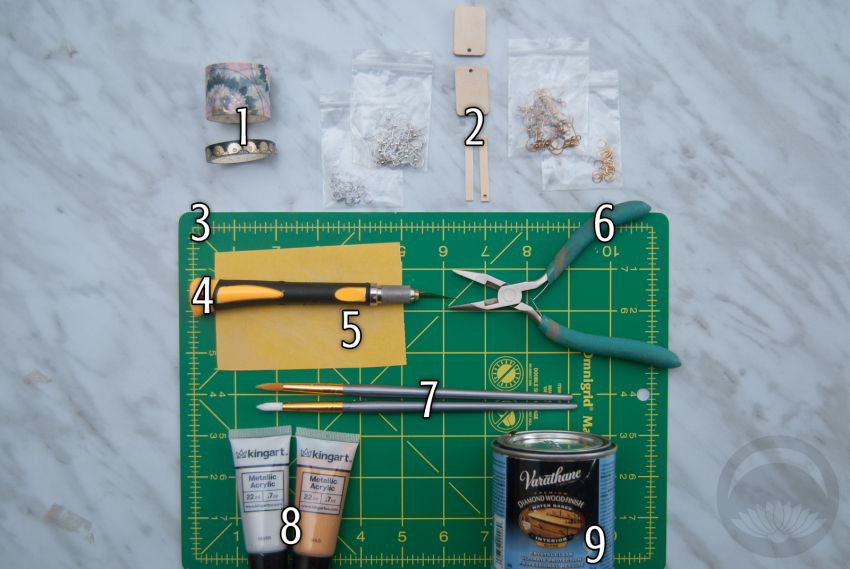
You will need:

  1. Washi tape
  2. Earring hardware
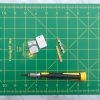
  3. Work-safe mat
  4. Sharp scissors or a craft knife
  5. Fine-grit (180 to 220 grit) sandpaper or file
  6. Pliers
  7. (Optional) Paint brushes
  8. (Optional) Metallic paint
  9. (Optional) Varnish or Mod-Podge

You don’t need to paint the blanks, but personally I think it makes the end product look a lot more finished and professional. Metallic paints also help tie in the metallic accents on the washi tape.

How-To:

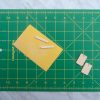
  1. Gently sand the edges of your wood pieces. They may be cheaply machine cut and not properly finished, and you don’t want rough wood near your ears or neck.
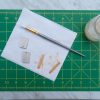
  2. If painting your wooden blanks, do this next. Do two thin coats on either side and make certain to paint the thin edges, as these will be the most visible.
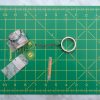
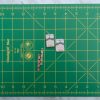
  3. Once paint is fully dry, carefully smooth a piece of tape onto one flat side of the wooden blank. If your washi tape has a specific direction or accent you want to feature, take the time to align it properly. It will make the finished piece look much more professional.
  4. Using your scissors or knife, trim the excess tape off, following the shape of the wood piece.
  5. Flip the blank over and do the same taping-and-cutting on the other side.
  6. With the tip of your knife or even the hook of one of the earrings, pierce through the tape on both sides of the tiny hole at the top of the piece. If you’re having trouble finding it, hold your piece up to a bright light; the hole will shine through.
  7. Varnish isn’t necessary but it will help seal the tape from peeling off and give a nice shine to the earrings. If you choose to varnish, do it now.
  8. Once the piece is fully dry, open one jump ring with the pliers and attach a hook to each earring.
  9. Voila! Your stylish new pieces are done.

Now you’ve got beautiful, one-of-a-kind earrings that you can pair with funky kimono outfits or to add flair to a western outfit. You can also turn these into unique necklaces by using attaching a decorative bail or even just a jump ring and threading it on to a chain. These would make beautiful gifts, too.

Have fun and experiment with paint colours and tape placement or even add decorative items, rhinestones, or other personal touches!

 I received this item from the retailer or manufacturer for honest review purposes.This post contains affiliate link(s). If you choose to purchase, I receive a small rebate or commission which goes to the continued maintenance of this site. 

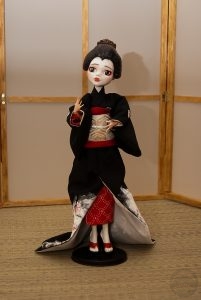
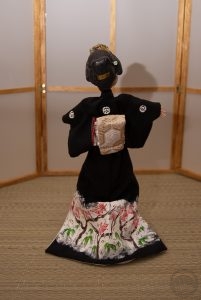
Tsukihana, Custom Geisha Monster High Doll

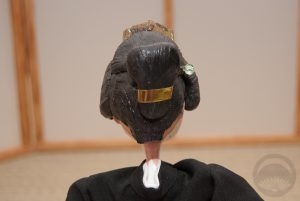
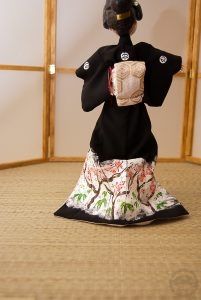
Hello everyone! I’d like you all to meet Tsukihana! Back at the beginning of the year I got a bee in my bonnet and decided I wanted to customise a doll. If you follow me on Instagram, you’ve likely seen sneak peeks and progress shots, but she’s finally complete and I’m so excited to share her.

She started life as a Draculaura doll I bought on the cheap off eBay. I chose Draculaura because I liked the shape of her face, and her skin colour was close enough to a normal human skin tone that it wouldn’t be too difficult to tone down the few visible bits. I also wanted a doll with primarily black hair, but that ended up not mattering in the end.

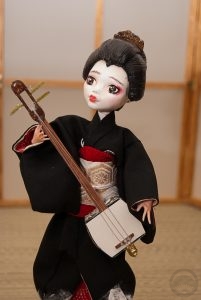
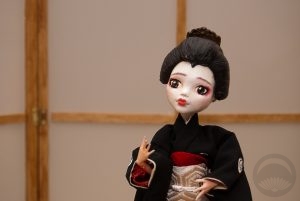
I started out with her face. I stripped down the original paint, toned down the back of her head and neck with soft pastels, and used white chalk paint as oshiroi. The face details were a combination of pastels, watercolour pencils, and acrylic paint. The Draculaura doll’s face sculpt reminded me very much of a now-retired geiko named Mamehana, so I referenced the following photos of her quite heavily while painting. (1, 2, 3).
My next step was to change the colour of her hands from pink to a more natural tone. Somehow during this process, I lost her hands. I looked for them for literally months, but they’re just… gone. In the end I gave up and bought a replacement set on eBay. I toned them with brown and yellow chalk pastels that helped neutralise the bright pink tone.

When it came to repainting the face and body, I found Dollightful  and Poppen Atelier, two very helpful YouTube channels with lots of information on customising Monster High and similar dolls. Initially, I’d planned to style her original hair using these traditional katsura styling videos but in the end her hair proved too stubborn and poofy, and it looked pretty awful no matter what I did, so I chopped it all off and sculpted a hairstyle out of clay. It’s primarily based on the tsubushi shimada, but I had to take a few creative liberties. Her kanzashi are beads and charms I had lying around.

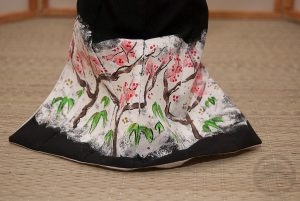
The outfit was a co-production. Makiko of JaponSakura (who also made this beautiful Pullip kimono) was kind enough to custom-make me a plain black hikizuri-style kimono and coordinating obi using the fabric I selected, since it reminded me of the moon. Once I received it, I painted the plum and bamboo design around the hem and the custom crests myself, I thought since it was such a small scale, using regular acrylic would be fine, but if I were to do another custom like this I’d definitely invest in fabric paints instead. The crests might seem a bit proportionally large by modern standards, but any smaller and they would have just looked like blobs. Her momi (the red fabric wrap geisha wear beneath the obi), juban sleeves, and underskirt are just scraps of red fabric I hand-sewed and tacked into place. The zori are a pair of MH shoes I repainted and modified slightly – they originally looked like this. I removed some of the strap bulk and painted some white to make it disappear a little. I did debate reforming her feet so they would be flat, but I was hesitant to experiment that much and risk ruining the doll. Makiko also included tabi with the kimono but they made her feet too bulky to fit in the shoes, so in the end I just sanded some detail off her toes and painted her legs with the same chalk paint I used on her face.

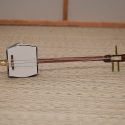
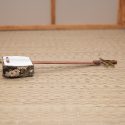
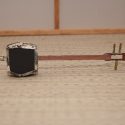
Her shamisen was improvised, made from foam board, stir sticks, and gorgeous washi tape from The Rare Orchid. I got a bunch of beautiful paper and tape from them, a full review is coming!

This beautiful lady has been a labour of love. For my first custom doll, I think she turned out spectacularly. I don’t think I’ll be doing this on a regular basis, as she was a significant investment in time, workmanship, and materials, but I might make her a friend or apprentice maiko in the future. I’m also seriously considering turning a Skelita Calaveras into a very stylised Jigoku Dayu but that will definitely be a much longer and more detailed project if it ever comes to pass.

Miniature Washitsu Project

One thing you may not know about me is that I am completely fascinated with dollhouse miniatures. I find something incredibly awe-inspiring about tiny, realistic objects. My father and I built a dollhouse for some of my figurines and decorating it with miniature food and accessories was my favourite parts. Sometimes when I’m bored, I’ll just browse through online retailers and on eBay, admiring the painstaking detail put into these things.

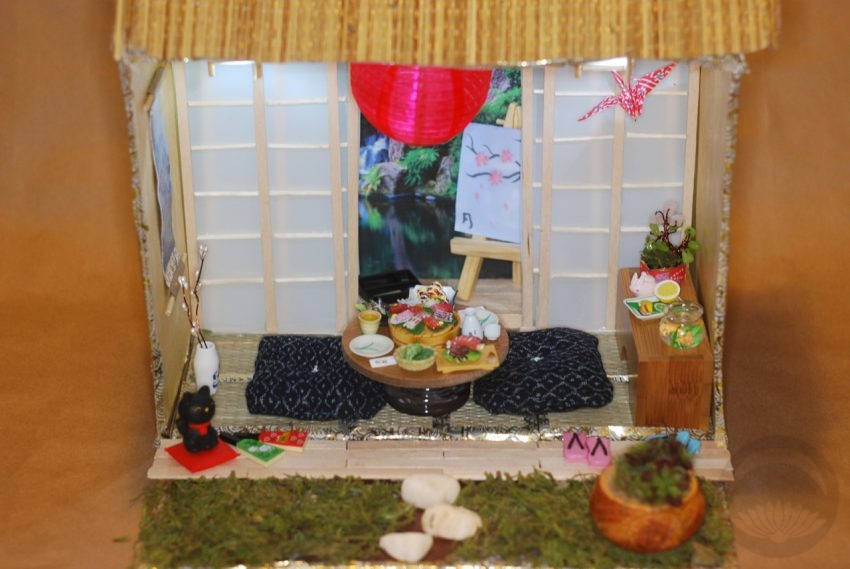
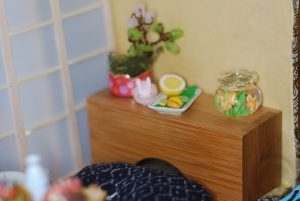
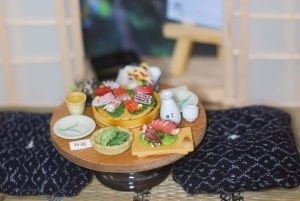
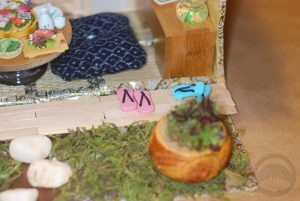
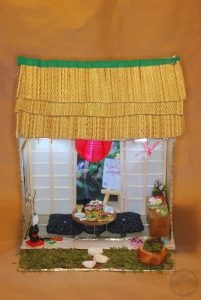
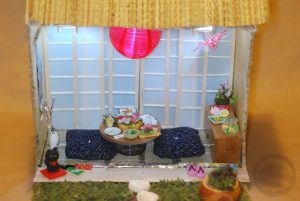
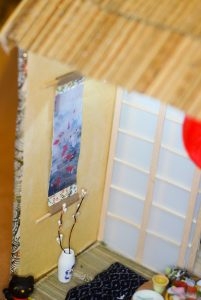
I’m honestly not sure what put the bee into my bonnet in the first place, but I recently decided I wanted to make a traditional miniature washitsu (Japanese room) diorama, and I wanted to make as much of it from scratch as I possibly could, using found objects or bits and bobs from the dollar store. The room started out as a cardboard mailing box. I covered it with brown craft paper. The roof is more cardboard, covered with pieces of a bamboo beach mat. The tatami mats inside were made out of more beach mat, adhered to foam-core and decorated with washi tape. The wood flooring is popsicle sticks, and the screens are sheer mylar with more popsicle sticks and match sticks. They slide open and closed, too, which I am very proud of! I made the zabuton out of leftover indigo fabric from my recent sashiko project. The table is a coaster and a napkin ring, and the console is the holder for the coasters.

[AFG_gallery id=’69’]

Most of the food and accessories are Re-Ment miniatures I already owned. The tiny bonsai I made myself, using a beads, and a bottle cap and some washi tape for the containter. The kakemono was printed and adhered to origami paper and toothpicks. The only items I purchased were the tiny geta, the vase (the pussywillows in the vase were made with wire and pearl flower pips), and the adorable little bowl of goldfish. The lighting was a happy accident; I made the two small fixtures and went looking for a small set of LEDs to light them, and found some at the dollar store that came with the adorable red lantern! I had to incorporate it!

It may not be perfect, but overall I’m so happy with how this turned out, and I suspect I will be making more dioramas like this in the future. I’d love to do a dressing room with a tiny tansu at some point!

Baby’s First Sashiko

Growing up, all the women in my family did (and still do) some sort of textile-based crafting. Needlepoint, embroidery, knitting, crochet; you name it, my mother, aunt, cousins, grandmothers, etc, were probably skilled in it. I’ve done some needlepoint in my life, but generally I’ve never had the knack for this sort of thing… until now!

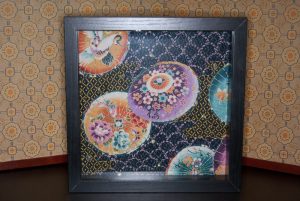
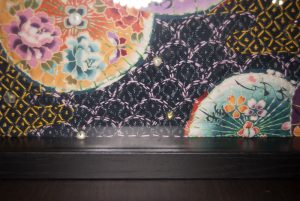
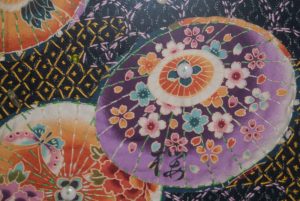
My friend Carol (of KimonoMomo on Etsy and the Ardent Thread blog) recently set up a crowdfunding project to help fund a trip to Japan to meet with textile artisans and as a thank-you for contributing, she sent me this nifty sashiko kit. Included was a large piece of rough indigo, two pieces of beautiful quilting cotton with parasols, and three skeins of coordinating thread. What I loved about this project was that theres’s no “right” or “wrong” way to do it. It inspires a great deal of creativity and freedom, which is what I think was missing from my previous attempts at any sort of needlepoint craft.

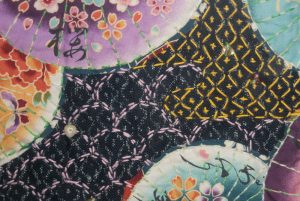
When I opened the package, I knew I wanted to feature the parasols centrally, so I cut a few of them out of the fabric and appliquéd them onto the indigo fabric. I spent some time looking up different styles of sashiko stitching and then decided that I would fill the background with “clouds” of differing stitches and colours. Initially I was going to do each segment in a different pattern but I worried it might look too busy and stuck to two – one following the print on the base fabric, and one of seigaiha (waves). I loved how organically the whole thing came together, and whenever something didn’t quite work out I could simply undo it and try something else. I also chose to accent the ferrule of each parasol with a little pink quartz, and threw a few other random beads into the background to add a little texture and interest.


Overall, I am utterly thrilled with how my first sashiko project came together. It was very relaxing, challenging enough to keep my interest without being frustrating, and the end results are totally unique. I think they’ll make beautiful gifts full of love and meaning, and they’re very soothing to do. I’m certain this won’t be my last one! If you’re looking to get into sashiko yourself, Carol’s Etsy shop has a fantastic selection of needles, threads and fabrics, as well as a wealth of knowledge to share.

I received this item as a backer perk for a project or product that was crowd-funded (Kickstarter, IndieGoGo, etc)