
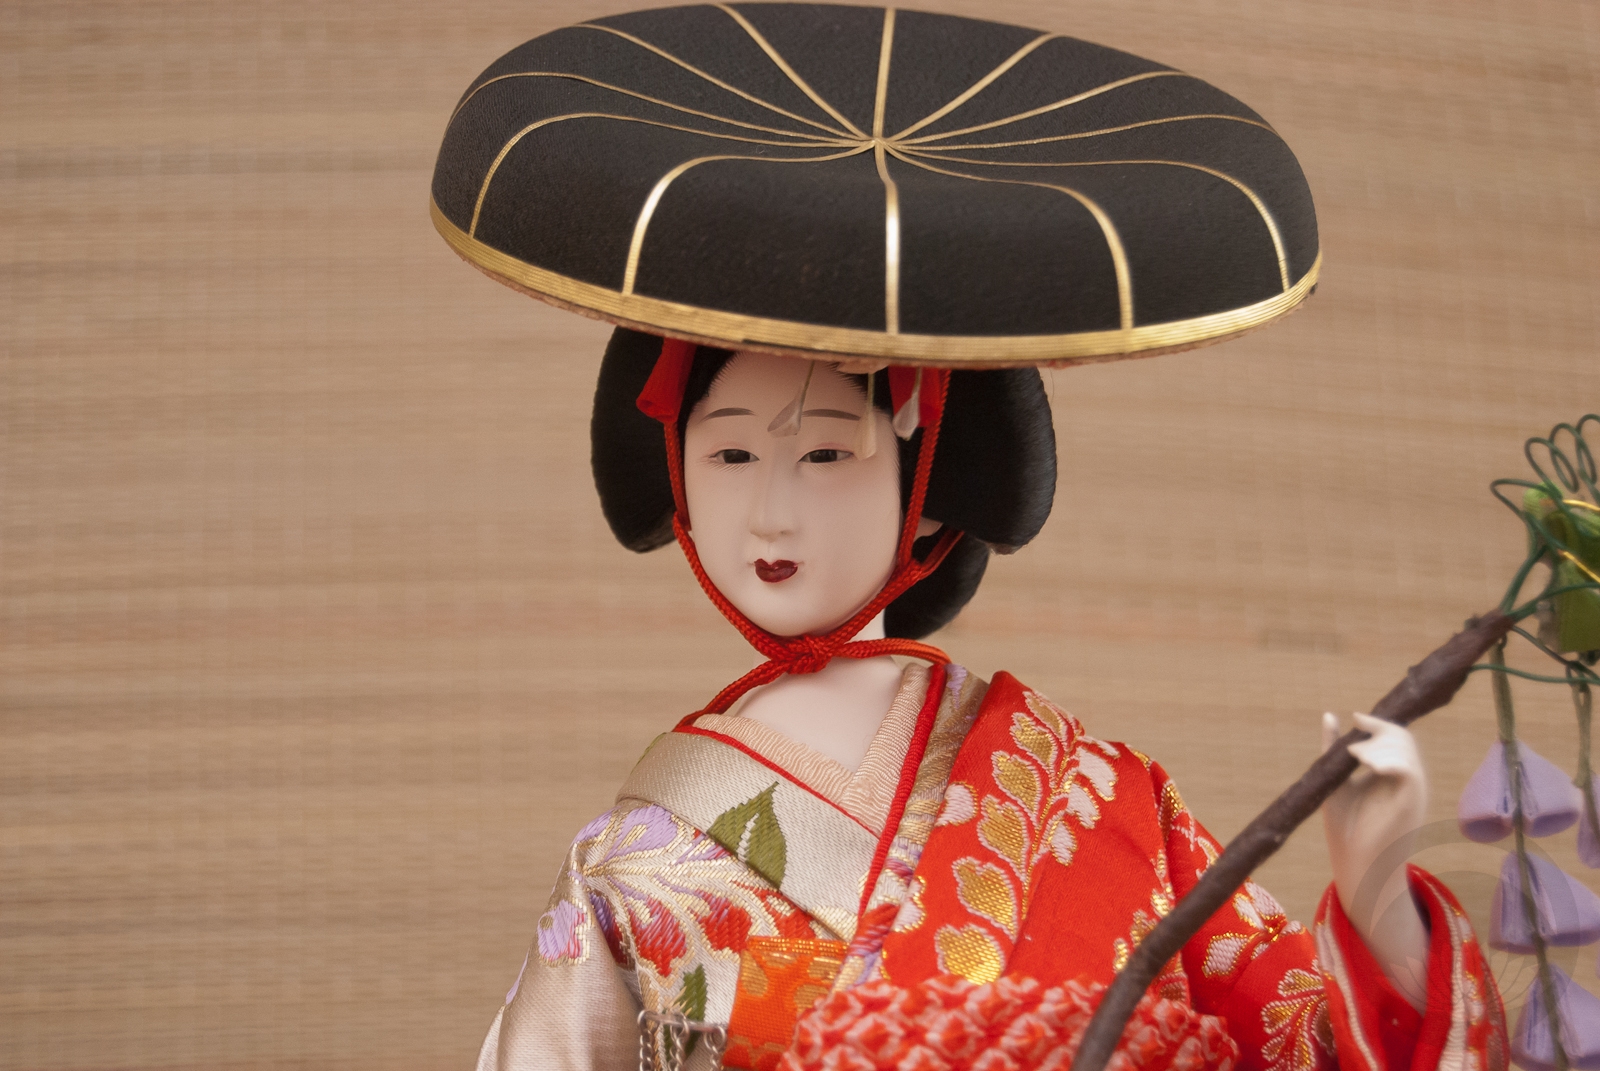
You may have seen the little souvenir doll I fixed up recently, and maybe even the ceramic hakata-style dancer I refinished, but this pretty Fuji Musume has been waiting for her moment in the spotlight since February of 2016! She had a very brief cameo on my Instagram account but has been in hiding ever since, unless you’ve been in my bedroom.
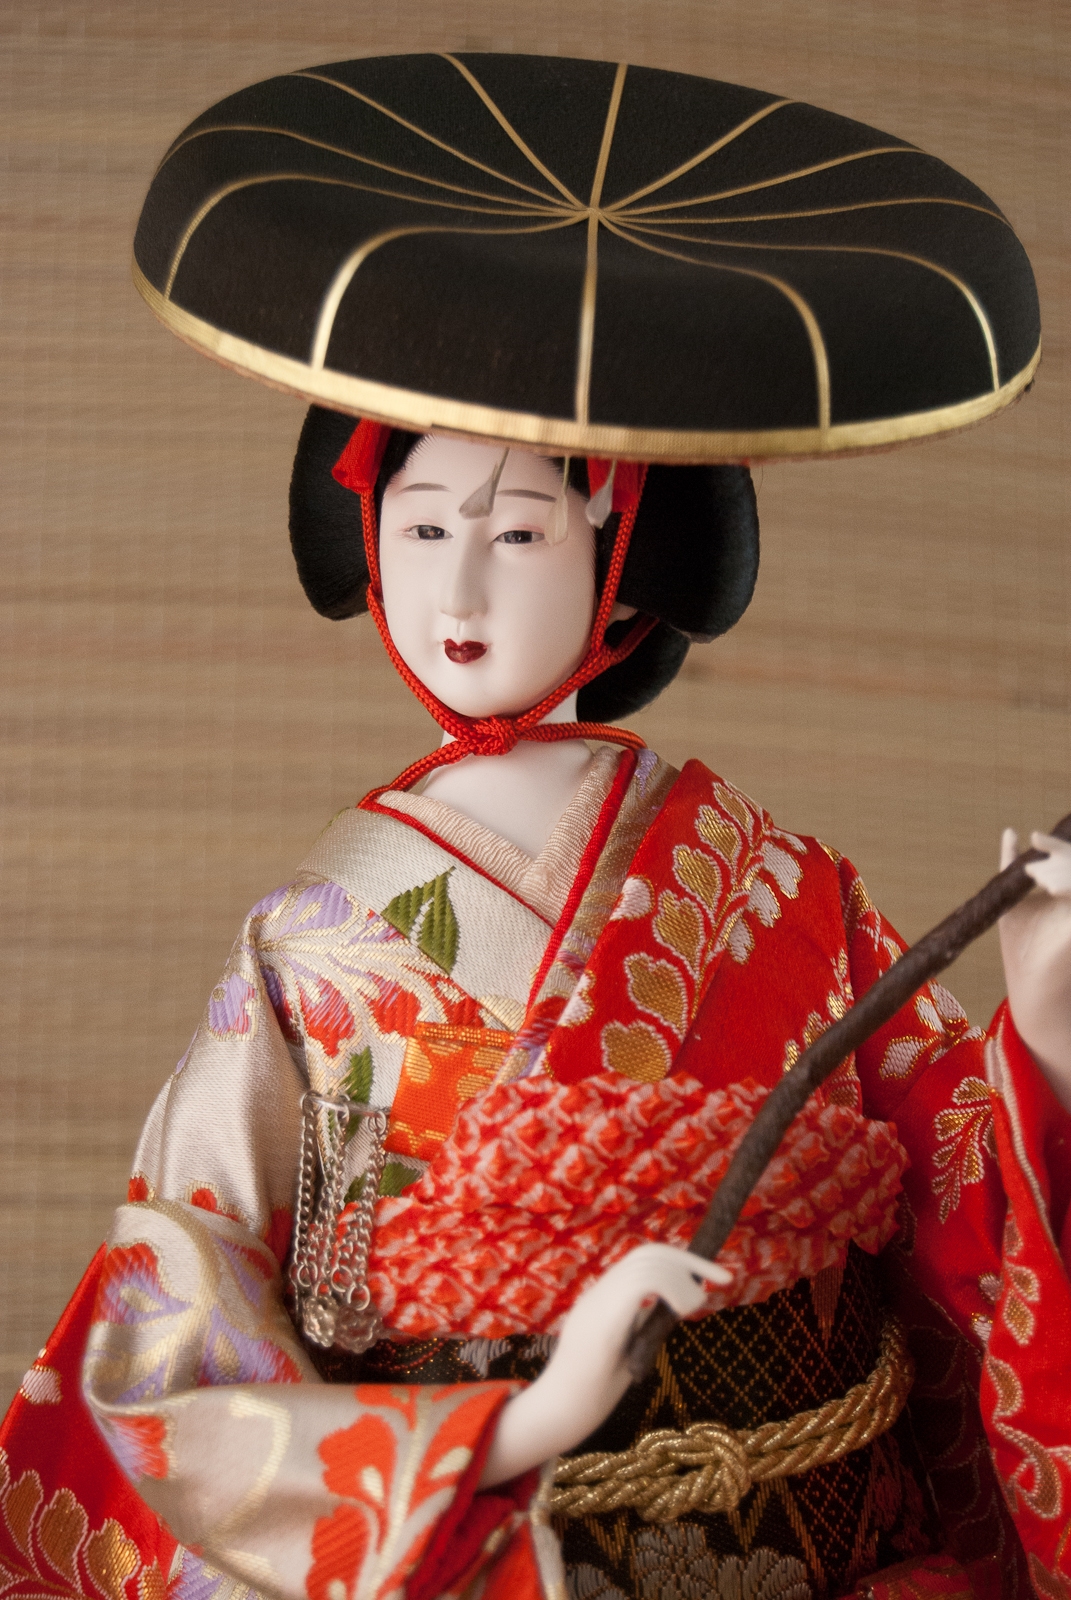
I found her in an antique shop near my house before I found the other two dolls. The owner tried to tell me she was in “perfect condition”, but once I took her out and had a good look at her I could see that absolutely was not the case. The delicate painting on her face was faded and chipped, her wisteria branch was sun-damaged and brittle, the structure under her hair was almost bleached, and there was a not insignificant crack in the bisque on the back of her neck. I managed to talk him down to a more than reasonable price for her and her glass case. I knew I wanted to restore her beauty, but I had no idea where to start, aside from the obvious things like getting her a new wisteria branch. While that was in the works, I focused on the other dolls and the things I learnt doing those two helped prepare me for more on her.


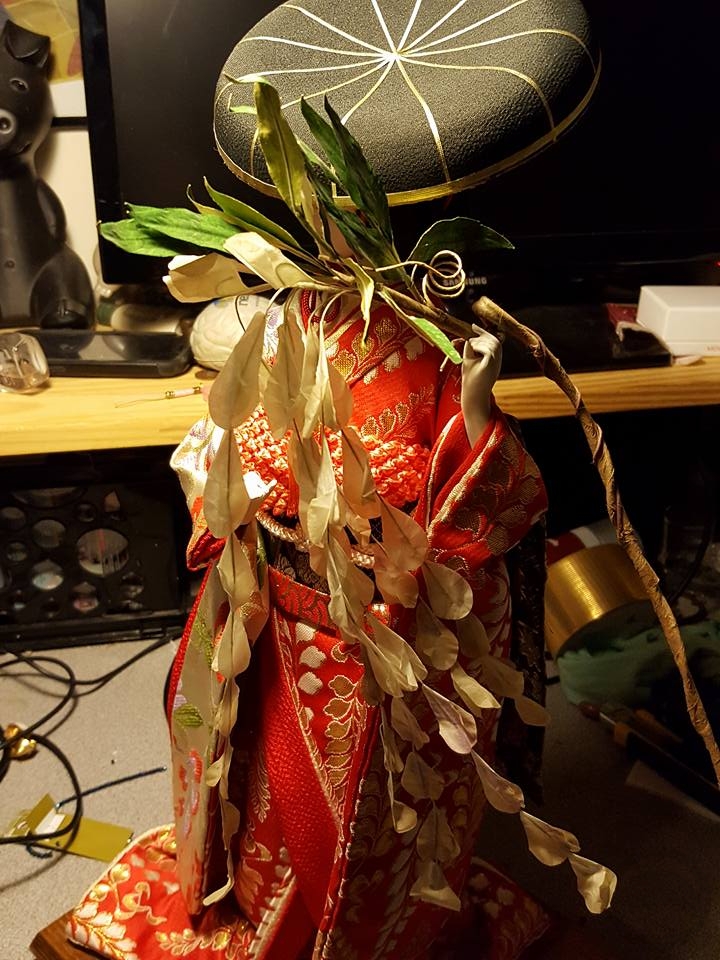
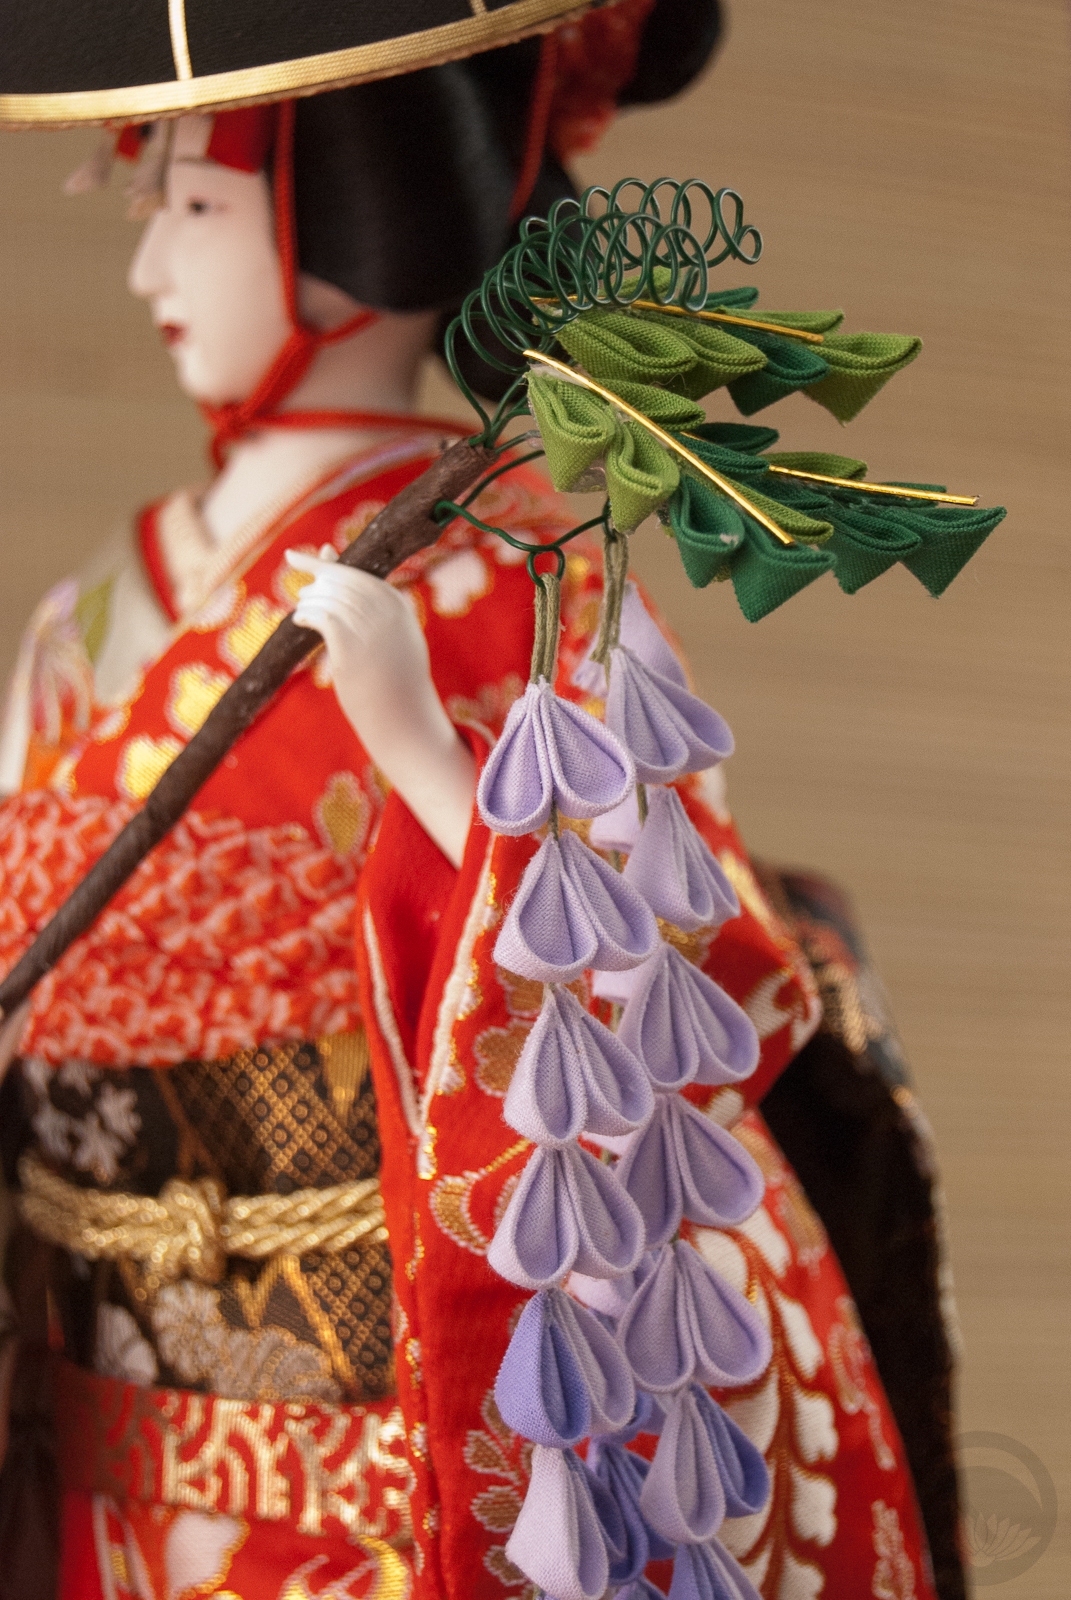
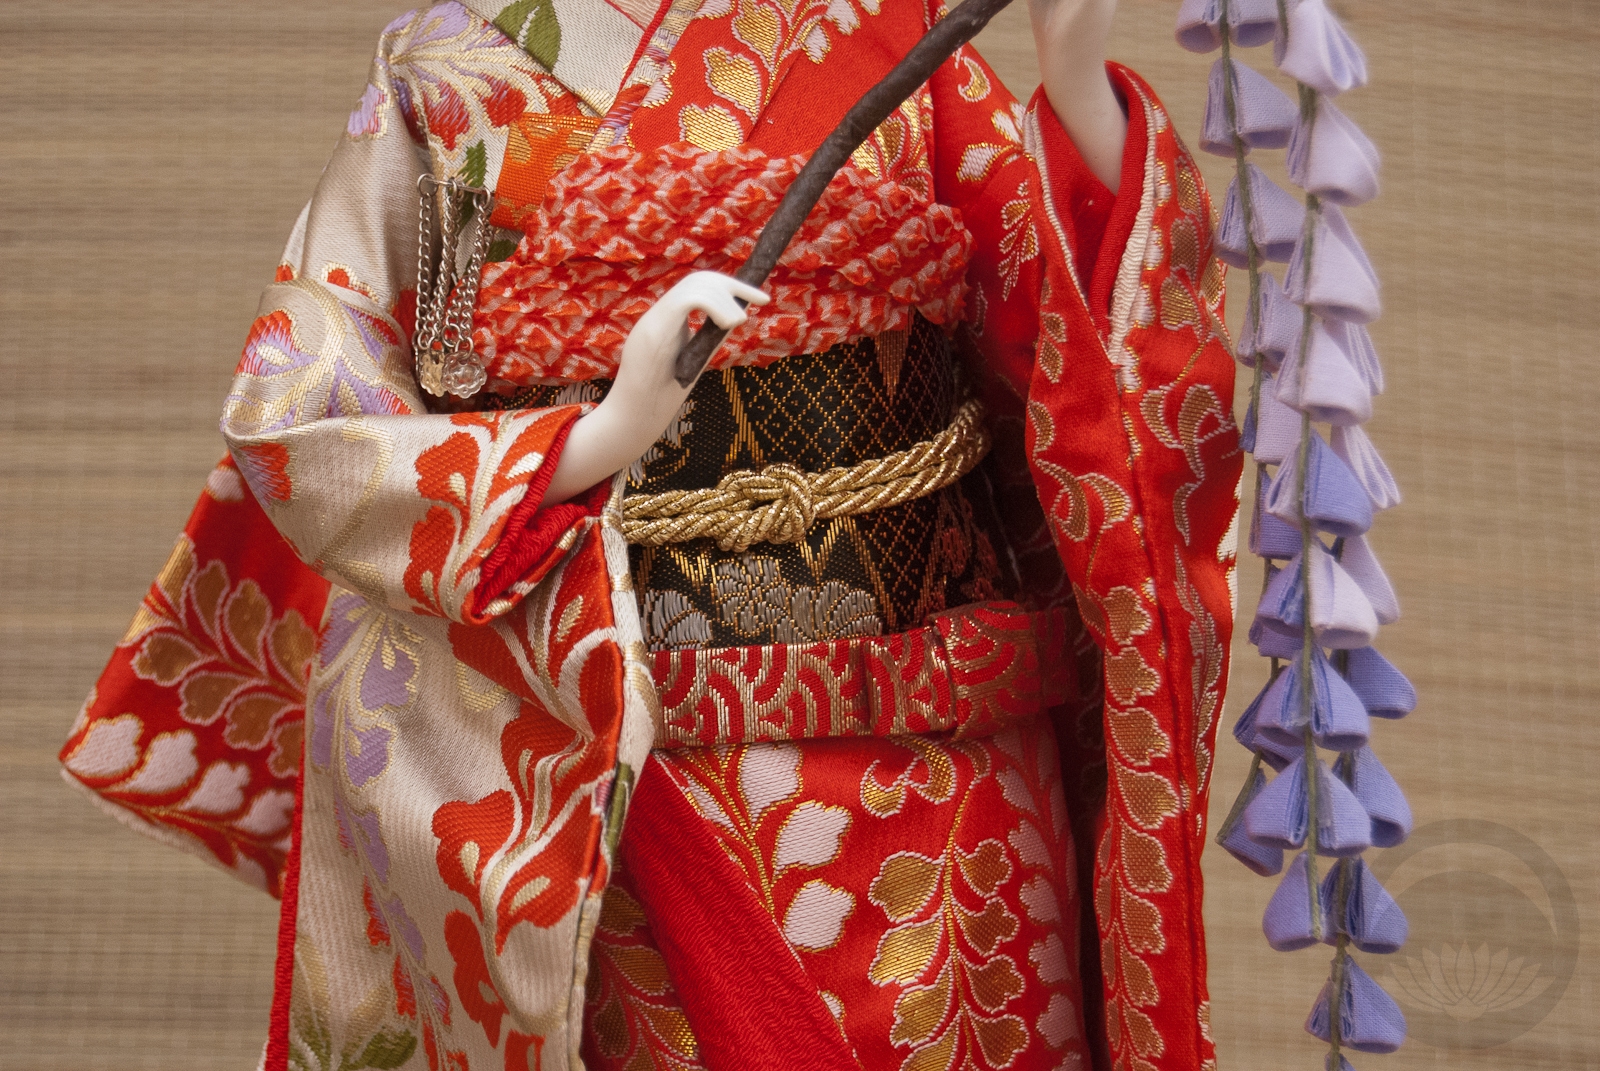
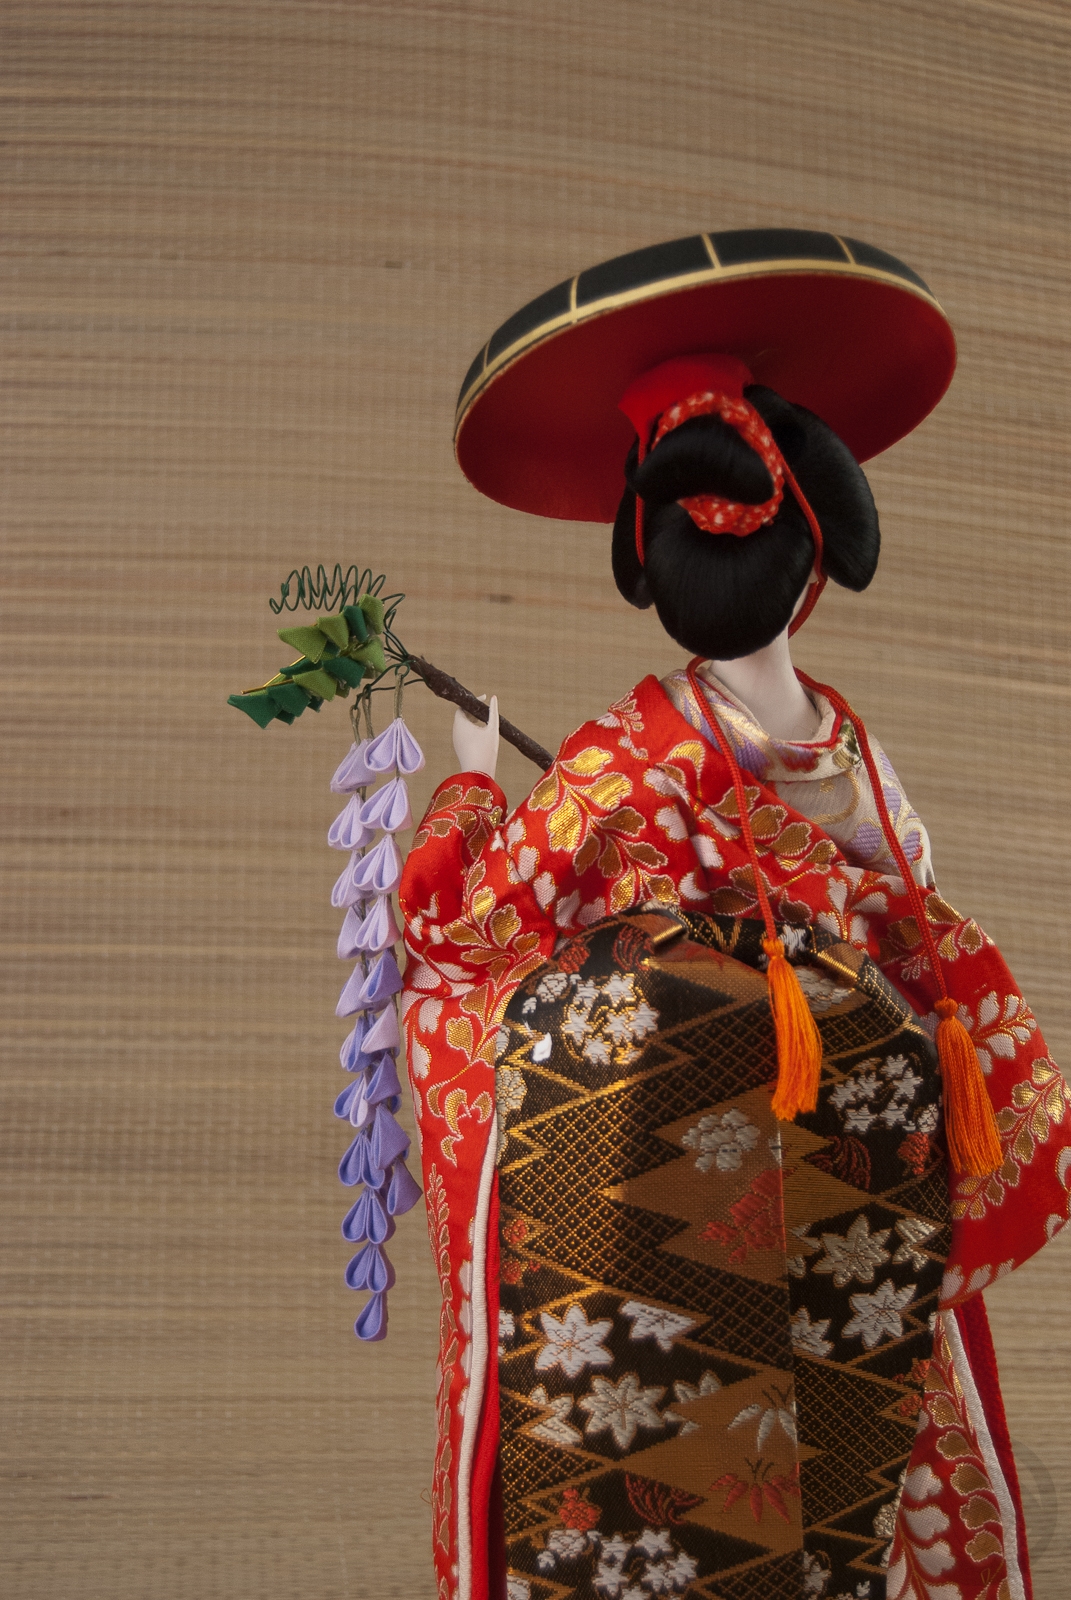
Jess from Tiaras ‘n Teakettles came to the rescue for the wisteria! I sent her photos and measurements of the original branch and she crafted this beautiful tsumami branch by hand. It’s got a lovely weight to it, the dangles flow gracefully, and it fits perfectly between her hands. I didn’t even have to glue it, it balances so well.
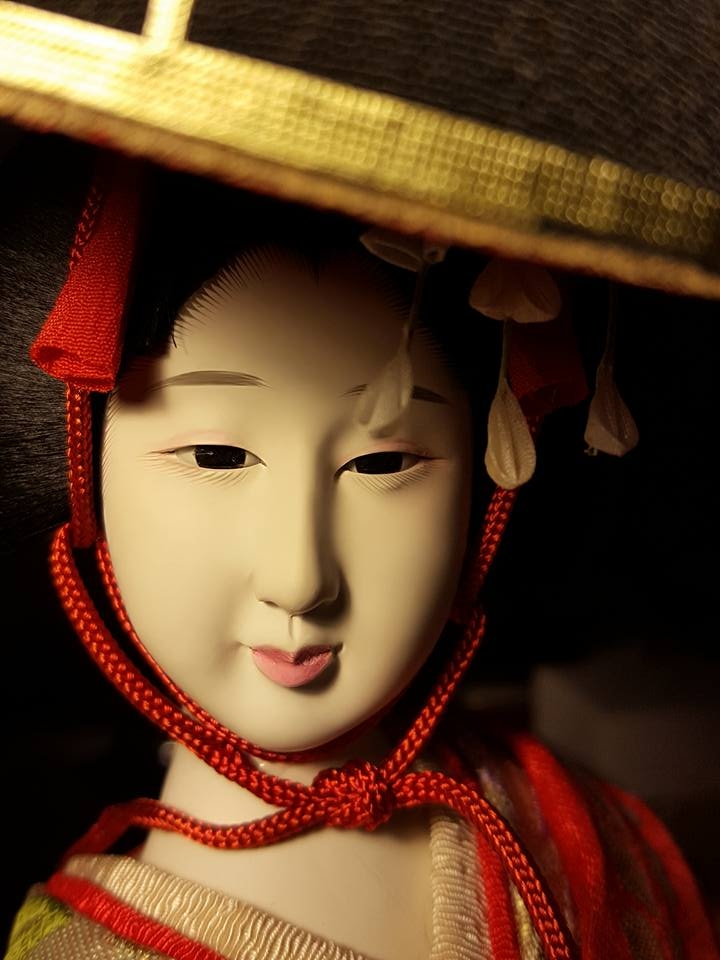
Once that was sorted I knew it was time to tackle the more serious issues. Her lips were lacquered in an almost glassy red that had cracked and split and faded over time. I ended up having to use Tamiya paint thinner to strip the original off properly, and then used watercolours to repaint her lips and add a tiny hint of red to her eyes. I feel like it helps breathe new life into her facial features.
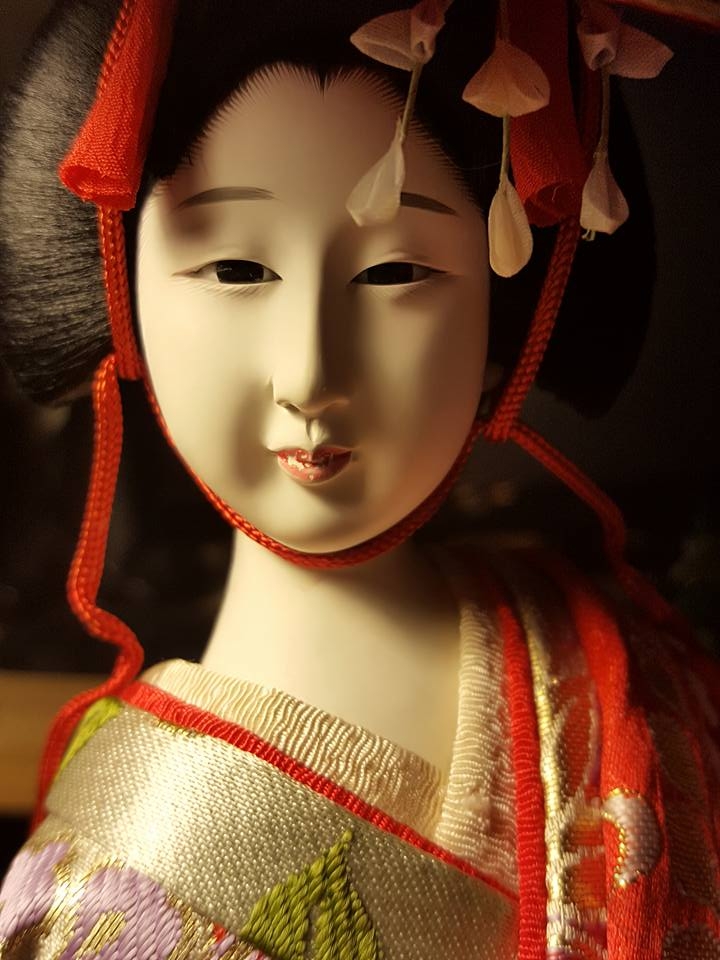
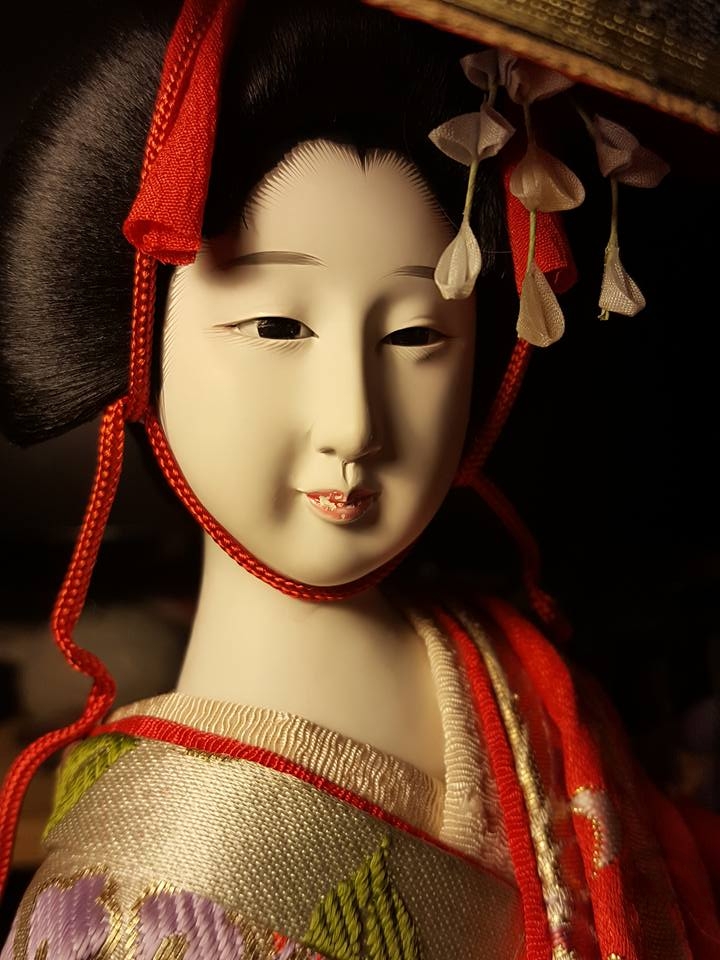

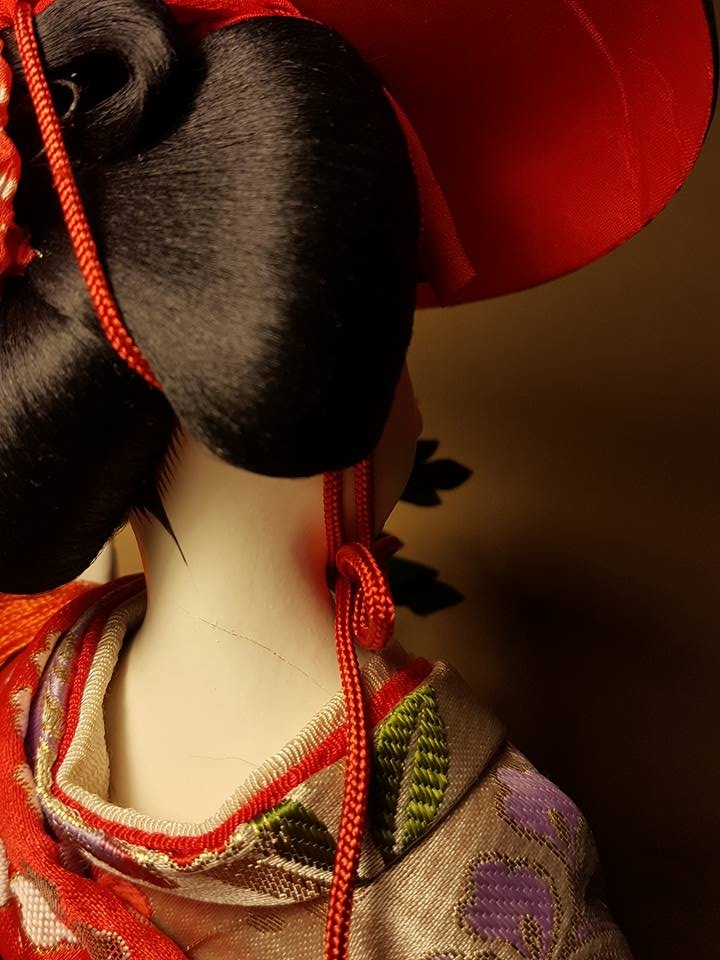
Next up was the most challenging bit; repairing the cracked bisque on the back of her neck. Thankfully it was just a surface defect, not a structural one, and with the way she stands in her display case it’s virtually unnoticeable, but I knew it was there and I wanted to fix it. I tried a few different things before stumbling upon crafting chalk paint. It’s easy to find in any large craft store such as Michaels. I bought a bottle of white and mixed in the tiniest amounts of peach and brown to make it warmer and less stark. I worked in incredibly thin coats, brushing it over the crack and wiping away the excess each time, essentially filling the crack in with the chalk paint and blending the edges out with a wet brush. If you’re right next to her or looking through a camera lens you can see it faintly, but it’s nearly gone.

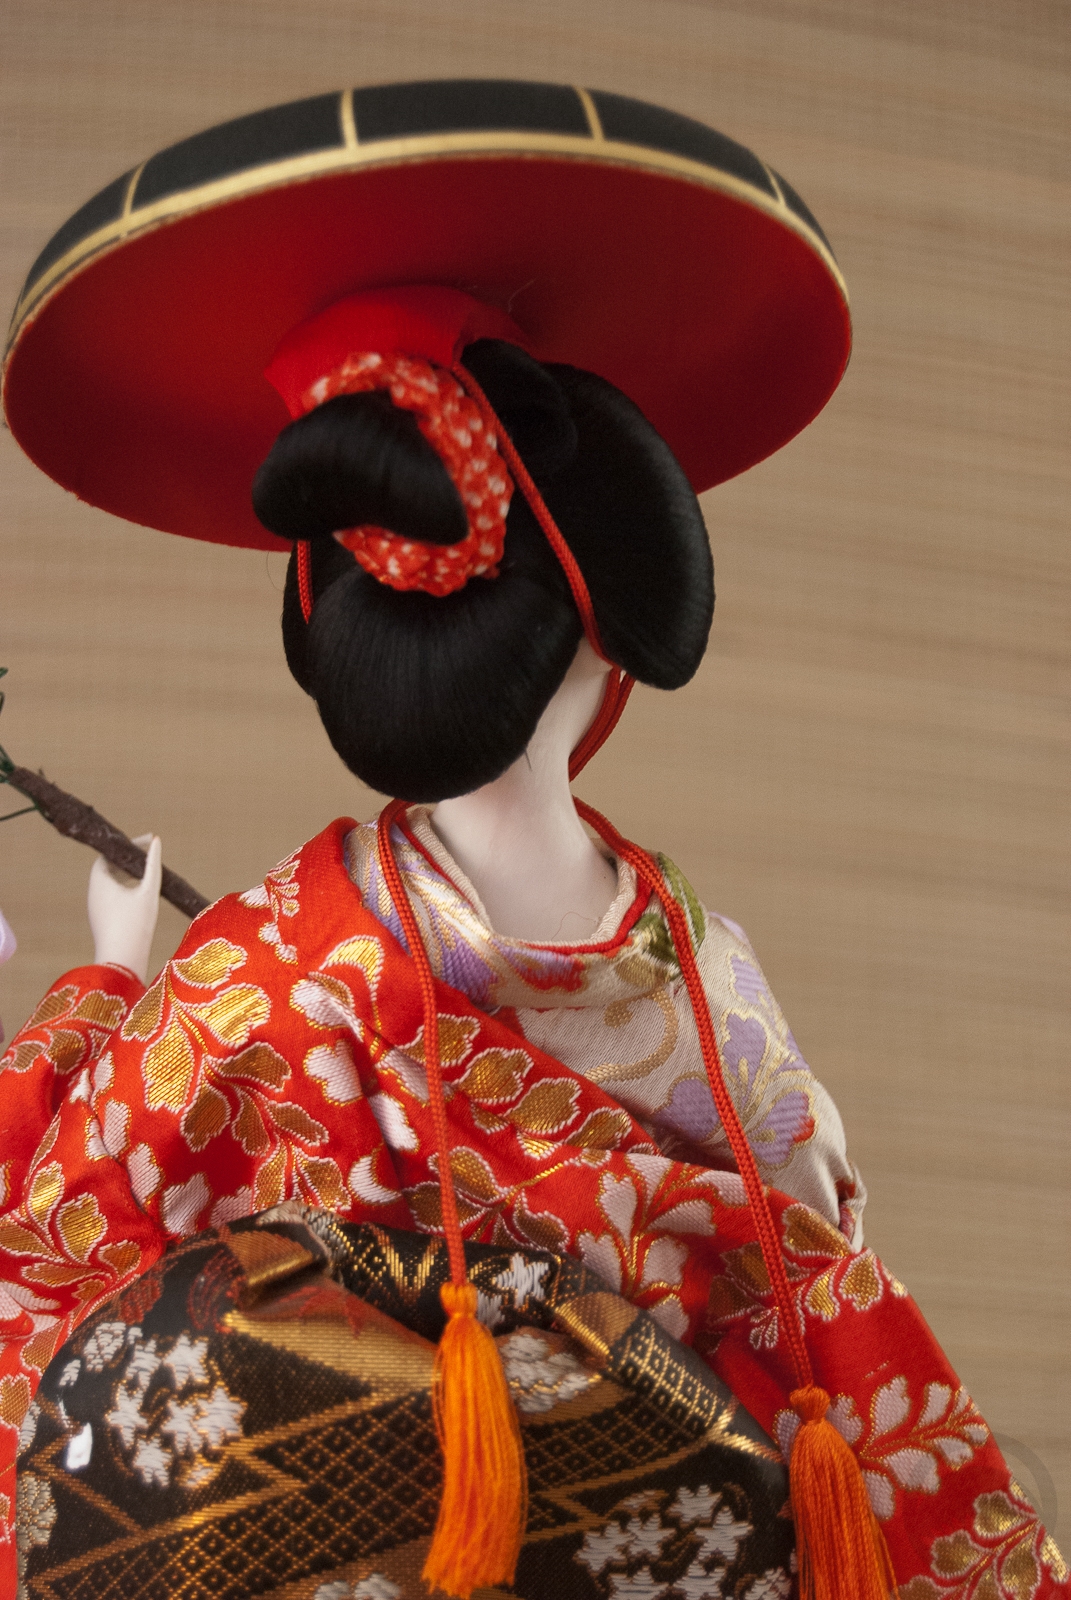
Finally I used a black marker to fill in the bald spots on the sides of her hairstyle, repositioned her obiage and gave her a new obijime. I felt that the original one she came with was too big in scale and to starkly white, but I found this thinner gold cord that works perfectly.
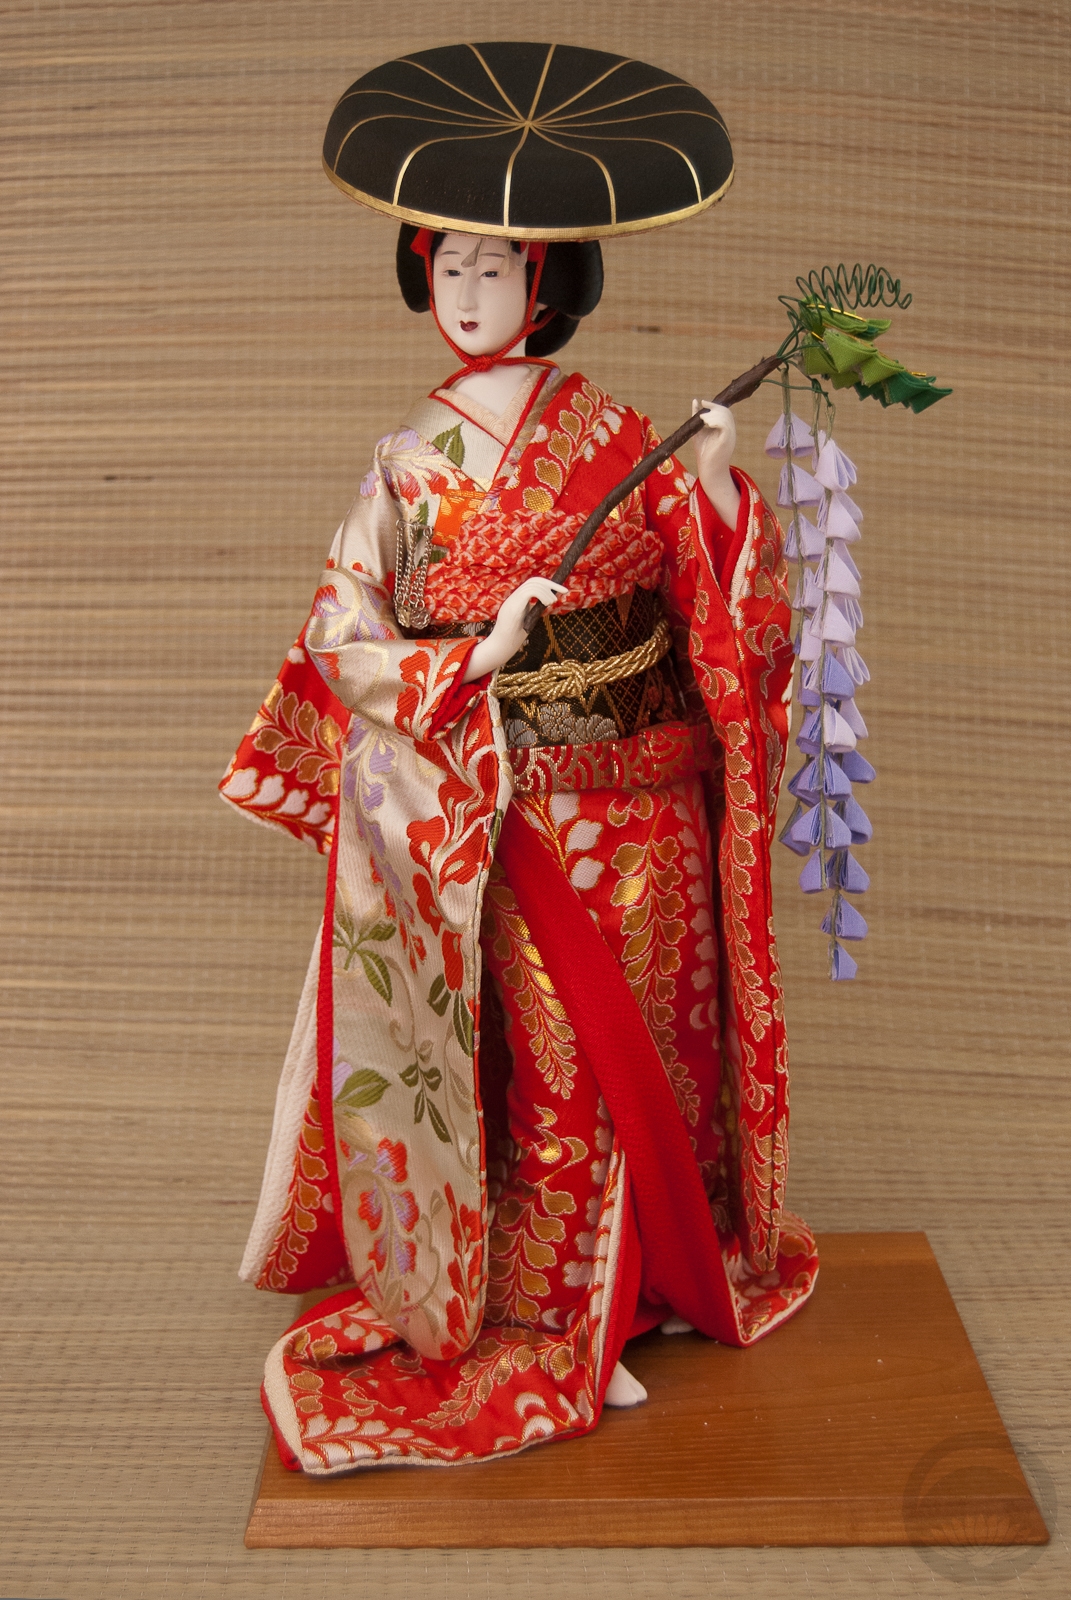

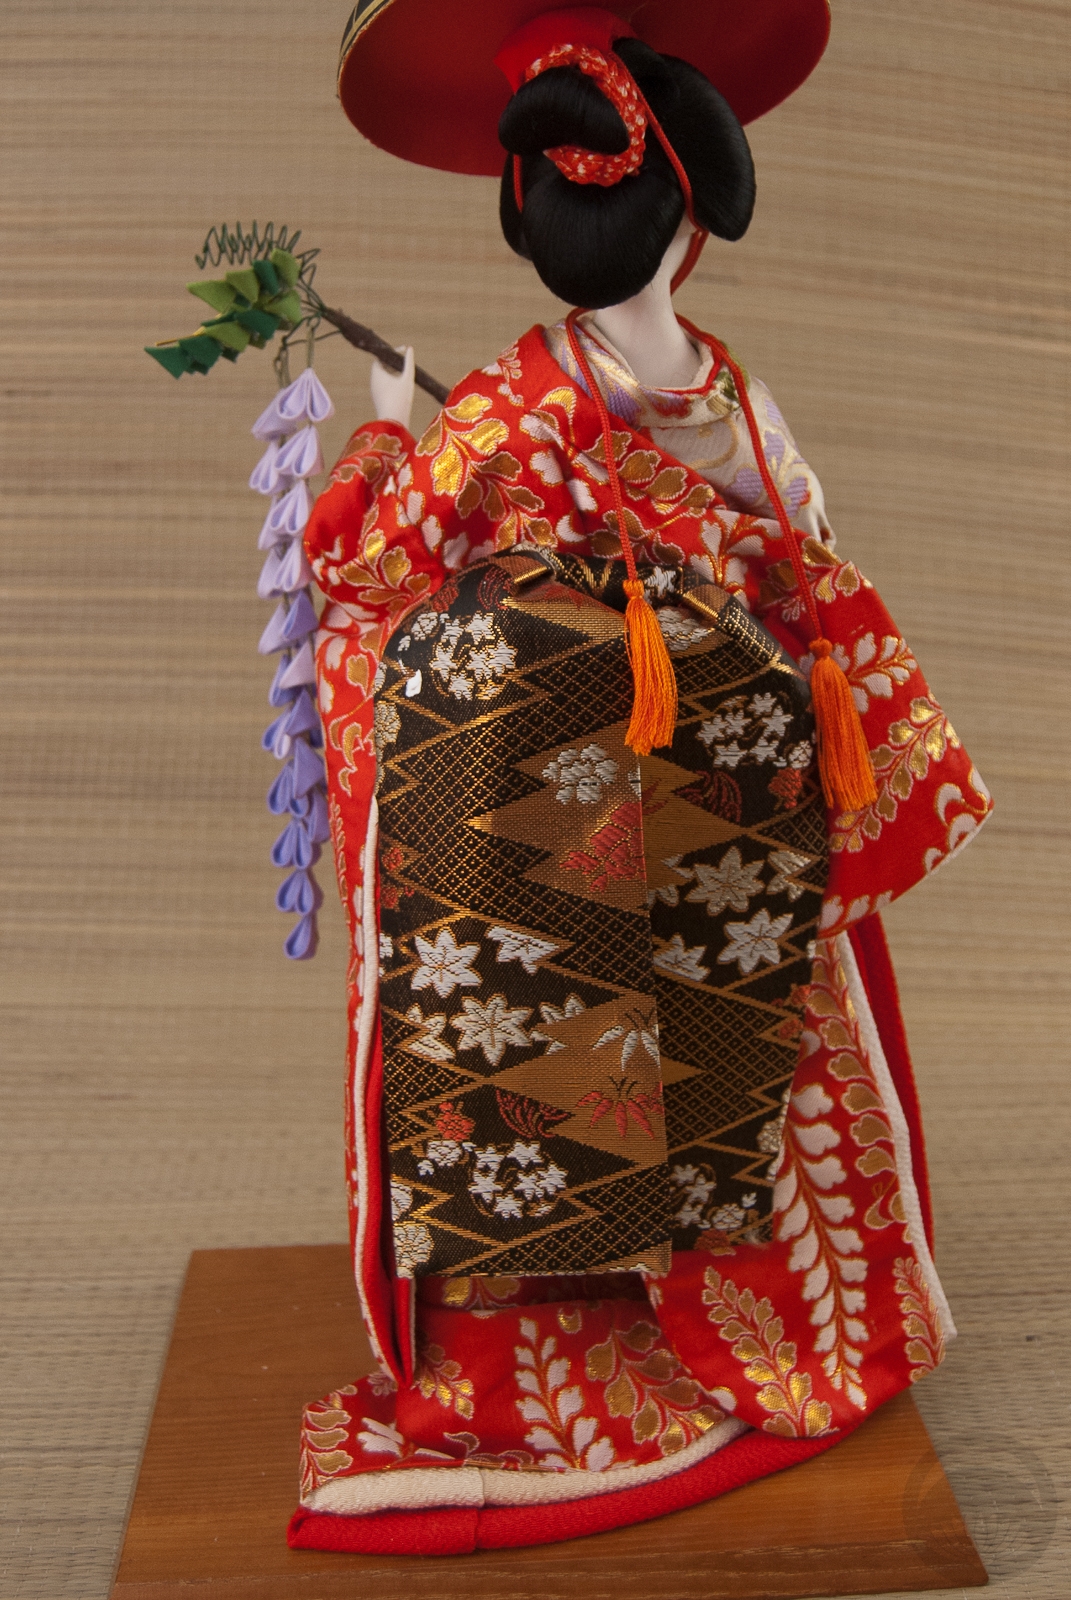
I am so glad I waited to work on her, because I know I’ve done the best job possible instead of eagerly rushing through things as I am sometimes wont to do. I love her to bits, and she occupies place of pride on a table next to my sofa now.
Also, you may be thinking to yourself “Isn’t this primarily a kimono blog? Why aren’t you posting any actual kimono lately?” and I would like to address that briefly. I’ve been feeling under the weather, and combined with the heat and humidity this summer, I have no energy to even wrestle with the mannequin. However, I do have a big project in the works, and hopefully it will make up for the sparsity and somewhat disjointed nature of the posts lately! I just need the weather to calm down a little, and the last of the pieces I’ve ordered to arrive in the mail.
Related Posts


 Bebe Taian
 CHOKO Blog
 Gion Kobu