When I first started this blog, I posted about my amazing crow obi, and mentioned that the silk backing had rotted out due to age, and I had plans to replace it.
Fast forward um, a year and a bit, and my procrastinating self has finally accomplished something! The obi fabric and original lining had been sitting folded in a bag for quite a while and I decided it was high time to finally give it the respect it deserves. If you’ve ever been curious about the construction of an obi, or have an obi yourself that needs to be redone, please read on!
The first step was to separate the obi silk from the obi-shin (stiffening core). They were not sewn together, but have been stuck to each other for what may be nearly a century at this point, so this involved a bit of careful peeling apart.


Isn’t my kitty ironing board cute? You’ll be seeing an awful lot of it in this entry XD
Once the two pieces were separated, I carefully ironed the seam allowance of the obi silk open. I ironed it enough to make the piece lie flat, but left the original fold line visible so I would have a straight line to sew along later without having to mark up the fabric.


Here is the whole piece with the seam allowance ironed flat. You can see how much the colour has faded over the years, but since the allowance will be hidden this isn’t really a problem. I just thought it was interesting and worth sharing.

The next step was to pin the wrong sides together of the obi silk and the black satin I was using for a backing piece. This was exceptionally tedious and I pricked my fingers several times!

Here’s the entire thing pinned together and taking up too much space on my floor. Yes, there is a disgusting area rug on top of disgusting wall-to-wall carpet on my basement. The floor gets cold so I’d rather icky and comfortable over stylish but clammy!

Once everything was pinned together, the next logical step was sewing. Lots and lots and lots of sewing. Due to the fragile nature of the silk and the fact that the obi gets tugged and pulled a lot, this all had to be done by hand, in a closely-spaced but loose slip stitch. I saved a huge amount of time by doing Japanese-style hand-stitching. This is hard to explain, but it basically involves holding the needle still and rocking the thread back and forth until a handful of stitches are lined up on the needle, and then pulling it through. This video gives an amazing visual demonstration with no explanation needed. Once you get the hang of sewing like this, it is an enormous time-saver.

Once both long sides are completely sewn, I ironed the seam allowances down again so it would lie flat. I found it easiest to do one fabric and then the other, rather than trying to press both sides at the same time.

Once the outer parts of the obi were sewn together, I folded them carefully, put them aside, and got to work on the shin (core). An obi is constructed somewhat like a sandwich, with the two visible pieces of silk on the outside, like the “bread”, and the shin in the centre, like a filling. The shin is usually a piece of heavy cloth, sometimes flannel, sometimes duck-cloth, and it serves to give body and stiffness to the obi. Without the shin, the obi would not lie flat and smooth when wrapped and tied around the body. If you’ve ever seen a cosplayer with a really crumpled, lumpy obi that has sort of collapsed on itself over the course of the day, odds are they made themselves an obi without using any sort of a shin or core.
The obi had a shin inside of it, a sort of brushed flannel-y material, but it had gotten incredibly soft over the years, so I decided to reinforce it. I found a roll of obi-shin fabric on eBay, but if you can’t find one specifically, any thicker fabric with a bit of body will work. Because the fabric of the obi itself is so thin, I figured a bit of extra stiffness would be good and used both the old shin and the new one together.

I used the old shin to determine the size of the new one. After I’d folded it to match the size of the old piece, I pinned it down and ironed it flat so it would stay in shape.


I pinned both shin together temporarily, just to make them easier to deal with and prevent things from shifting around while I worked.


With the two pieces pinned together, it was much easier to lay them out and tuck them into the folded seam allowances of the obi lining. Thankfully, I had assistance in the form of a Tribble. And yes, that is her tongue sticking out in the large version. For a mutt-cat, she is incredibly brachycephalic and tends to leave her tongue hanging out a bit because it doesn’t fit in her mouth properly. Poor boo.


Once all the pieces were sandwiched together inside-out, the next step was to turn the whole thing right-side-out. First step was to remove all the pins to make sure none got trapped inside when I was done. Unfortunately I do not have any photos of this phase, because both my arms were very busy and my father was helping me. I will do my best to explain how we did it. I held the end open while he reached inside and carefully pinched all four layers and pulled them outwards through the other end. If you’ve ever cased a sausage, it was a similar procedure. After it was properly turned, I used some delicate fabrics hemming tape to shut the ends. I could have sewn it, but I’ve used the hemming tape before and was pleased with how gentle and permanent the results were so I figured I’d save a little time.
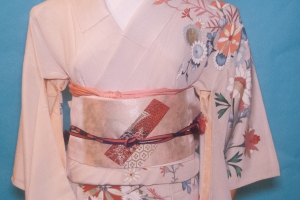
And here she is, finally finished! I’m very proud that I actually finished this, and am very pleased with the results.



 Bebe Taian
 CHOKO Blog
 Gion Kobu