Say Hello to Akane!

Everyone, please say hello to Akane!
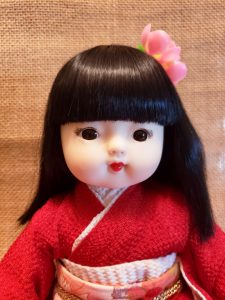
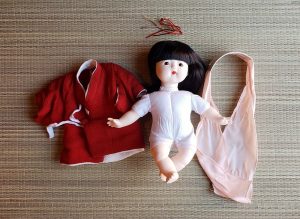
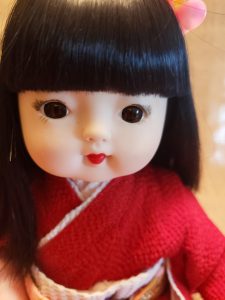
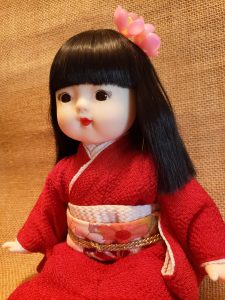
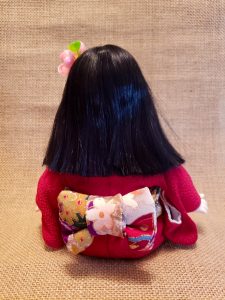
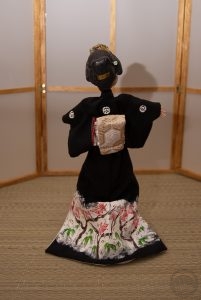
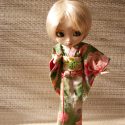
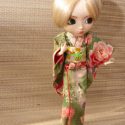
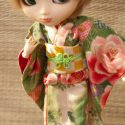
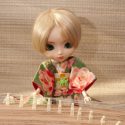
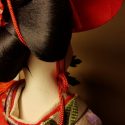
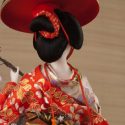
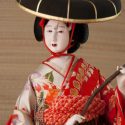
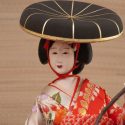
I found this little lady on a shelf at my favourite vintage shop. She’s not particularly old; she’s made of a sort of soft vinyl instead of ceramic and gofun, and seems relatively mass-produced. Nonetheless I was utterly charmed by her and knew I had to bring her home. I was drawn immediately by her bright red kimono, which inspired me to name her Akane (茜), which means deep red and is a traditional girls’ name.

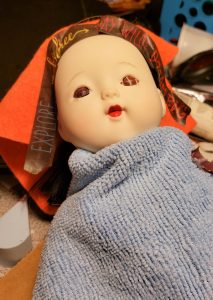
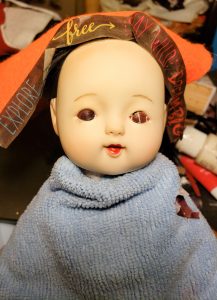
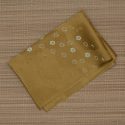
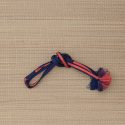
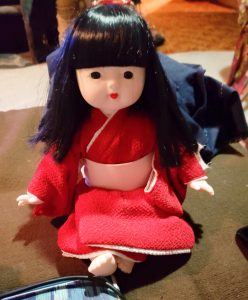
Unfortunately that kimono was pretty much all she had! There was a piece of cardboard wrapped in pink satin tied around her waist like a sort of obi, and a scraggly little piece of twine in her hair, but she had no real accessories or anything, so I decided to make her some custom pieces as well as give her a bit of a glow-up. I did take photos of the whole process, but since it was done more to relax and unwind I took the photos on my phone, wherever I happened to be working so I apologise for the quality and messy background of some of these.

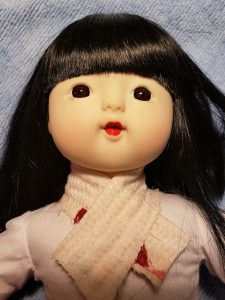
Her face shape is adorable, but it felt very flat due to a lack of shading. She did have some pink blush on her cheeks but aside from that, she honestly looked like a cute potato. She also had lower eyelashes but no upper ones, and nearly invisible eyebrows. Using a combination of actual cosmetics and chalk pastels I gave her some shadows and contouring, deepened the flush on her cheeks, and gave her eyelashes and more defined eyebrows. It’s a subtle change, but she’s gone from a potato to a peach. You can also see the false eri I sewed for her to give the impression of a proper under-layer.

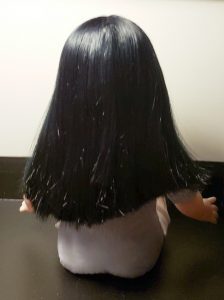
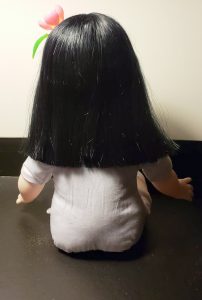
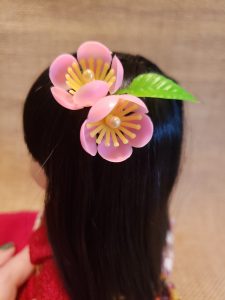
Next up was fixing her hair. Her bangs were quite uneven, but much worse was her hair in the back. I’m not sure if someone tried to trim her hair at some point or if she was made this way, but her hair was very lopsided in the back! I straightened it out and snipped away any broken or kinked hairs I could find. Then I tucked these cute little plum blossoms Kansai_gal sent me. They’re actually from packaging or something but I like that I’ve given them a second life. Since her head is vinyl I was able to just push a straight pin through them and they’re very solidly anchored in there.

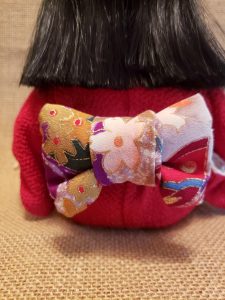
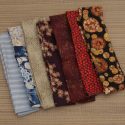
With the cosmetic aspects taken care of, I got to work giving her a proper obi. I used some scrap kimono fabric and sewed a cute little tsuke-obi, and used some of the same textured white fabric from the eri to make an obiage. The whole thing attaches with a magnet and then a length of gold cord works as an obijime. Her socks are a bit of a cheat – they’re simply two fingers off a pair of white cotton polishing gloves! They fit her more perfectly than anything I could have sewn.

I’ve never named a doll I’ve fixed up before, but none of them have captivated me nearly as much as this little girl has. All the others reside in a display cabinet but she lives on my bedside table. Maybe I should sew a little zabuton for her to sit on. XD

Never too old to play with dolls

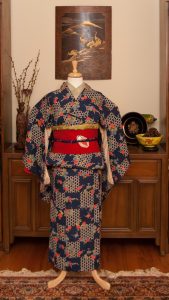
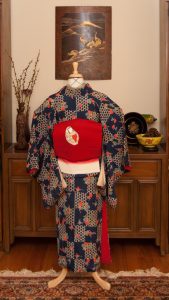
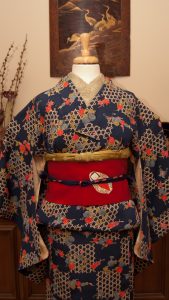
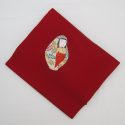
Now we come to the last of my ridiculously indulgent birthday coordinations using items from last month’s kimono bazaar. I fell in love with this obi the moment I laid eyes on it – the dolls are just too cute for words.

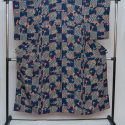
The colours in it paired up perfectly with the colours in this vintage-feeling komon Naomi gave me several years back. I also happened to have a haneri and obiage that were a spot-on match for the olive green tones in the kimono. I was a little stumped when it came to the obijime until I remembered I have this one that is an exact match for the navy background and pink momiji leaves in the kimono. I couldn’t be happier by how well every item in this coordination calls back to at least one other item.

Quick note – I am in the process of changing how images are stored. I used to upload them all to my flickr account and then create linked galleries, but they are now confining free accounts and it’s a system I’ve always found a little inefficient anyway. I used to get traffic from there but I don’t any longer, so I’m going through the arduous task of downloading all my content, hosting it locally, and editing every single entry that contains images from flickr. If you’re browsing and see things broken or missing, please be patient! Thanks for understanding!

Items used in this coordination

Tsukihana, Custom Geisha Monster High Doll

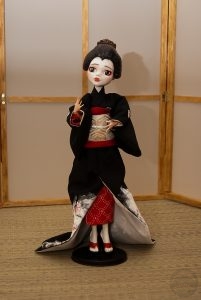
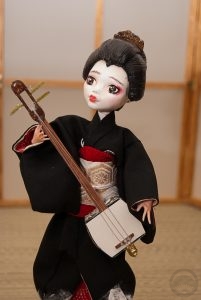
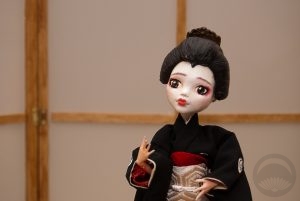
Hello everyone! I’d like you all to meet Tsukihana! Back at the beginning of the year I got a bee in my bonnet and decided I wanted to customise a doll. If you follow me on Instagram, you’ve likely seen sneak peeks and progress shots, but she’s finally complete and I’m so excited to share her.

She started life as a Draculaura doll I bought on the cheap off eBay. I chose Draculaura because I liked the shape of her face, and her skin colour was close enough to a normal human skin tone that it wouldn’t be too difficult to tone down the few visible bits. I also wanted a doll with primarily black hair, but that ended up not mattering in the end.

I started out with her face. I stripped down the original paint, toned down the back of her head and neck with soft pastels, and used white chalk paint as oshiroi. The face details were a combination of pastels, watercolour pencils, and acrylic paint. The Draculaura doll’s face sculpt reminded me very much of a now-retired geiko named Mamehana, so I referenced the following photos of her quite heavily while painting. (1, 2, 3).

My next step was to change the colour of her hands from pink to a more natural tone. Somehow during this process, I lost her hands. I looked for them for literally months, but they’re just… gone. In the end I gave up and bought a replacement set on eBay. I toned them with brown and yellow chalk pastels that helped neutralise the bright pink tone.

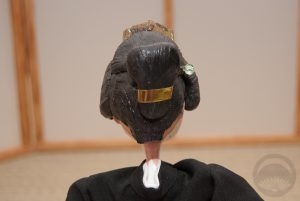
When it came to repainting the face and body, I found Dollightful  and Poppen Atelier, two very helpful YouTube channels with lots of information on customising Monster High and similar dolls. Initially, I’d planned to style her original hair using these traditional katsura styling videos but in the end her hair proved too stubborn and poofy, and it looked pretty awful no matter what I did, so I chopped it all off and sculpted a hairstyle out of clay. It’s primarily based on the tsubushi shimada, but I had to take a few creative liberties. Her kanzashi are beads and charms I had lying around.

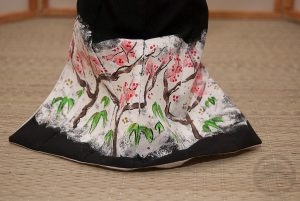
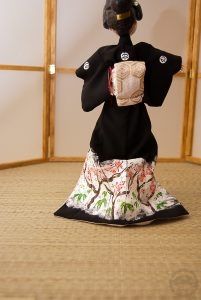
The outfit was a co-production. Makiko of JaponSakura (who also made this beautiful Pullip kimono) was kind enough to custom-make me a plain black hikizuri-style kimono and coordinating obi using the fabric I selected, since it reminded me of the moon. Once I received it, I painted the plum and bamboo design around the hem and the custom crests myself, I thought since it was such a small scale, using regular acrylic would be fine, but if I were to do another custom like this I’d definitely invest in fabric paints instead. The crests might seem a bit proportionally large by modern standards, but any smaller and they would have just looked like blobs. Her momi (the red fabric wrap geisha wear beneath the obi), juban sleeves, and underskirt are just scraps of red fabric I hand-sewed and tacked into place. The zori are a pair of MH shoes I repainted and modified slightly – they originally looked like this. I removed some of the strap bulk and painted some white to make it disappear a little. I did debate reforming her feet so they would be flat, but I was hesitant to experiment that much and risk ruining the doll. Makiko also included tabi with the kimono but they made her feet too bulky to fit in the shoes, so in the end I just sanded some detail off her toes and painted her legs with the same chalk paint I used on her face.

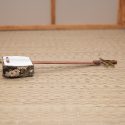
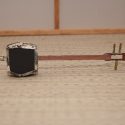
Her shamisen was improvised, made from foam board, stir sticks, and gorgeous washi tape from The Rare Orchid. I got a bunch of beautiful paper and tape from them, a full review is coming!

This beautiful lady has been a labour of love. For my first custom doll, I think she turned out spectacularly. I don’t think I’ll be doing this on a regular basis, as she was a significant investment in time, workmanship, and materials, but I might make her a friend or apprentice maiko in the future. I’m also seriously considering turning a Skelita Calaveras into a very stylised Jigoku Dayu but that will definitely be a much longer and more detailed project if it ever comes to pass.

Review – Doll Kimono by JaponSakura

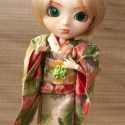
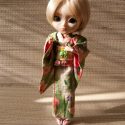
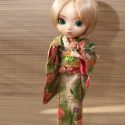
If you’ve ever gone hunting for doll kimono for smaller dolls (Barbie, Monster High, Pullip, Blythe, etc) you know how hard it can be to find accurate, well-made ones. There are lots of really nice options for wa-lolita styles and more modern/fashion types, and some beautiful options for larger BJDs, but if you’re looking for a stylish traditional kimono the options tend to be slim. I’d been looking for a proper kimono for Willow Grace, my beloved Pullip doll (on a 27cm Obitsu body), for a while and wasn’t finding anything that really spoke to me. Then I found Makiko and her shop JaponSakura on Etsy and I knew that was about to change!

The shop is sorted by doll size and type, so whether you’re looking for a kimono for the tiniest MiniFee BJD or your 70cm tall beauty, there are options available. There are multiple feminine styles as well as masculine options, as well as hakama for both.

There are a huge array of options for kimono fabric, obi fabric, obi style, accessories, etc, allowing for nearly limitless combinations. If you still can’t find exactly what you’re looking for, Makiko will also take entirely custom orders as schedule allows. I’ve got one of those in the works for a big project and will hopefully be showing you all soon!

All the items are very solid and well-made. The kimono is fully lined and everything is very cleanly finished with tiny stitching. The kimono is long enough to make a proper ohashori. I used a small clear hair elastic to hold everything in place, and it worked perfectly. The obi is pre-tied and closes with velcro. At this size, that’s quite helpful; tying a full obi would be incredibly fiddly and frustrating. The obijime is tied in a beautiful decorative knot and then just attaches in the back behind the obi musubi. For anyone wondering, the tabi and zori are standard 27cm Obitsu products that I purchased separately. My custom order will also be including tabi, but for now I can’t comment on the quality of those. However, I can only assume they’re made with as much care and attention as the rest of the items.

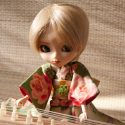
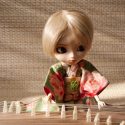
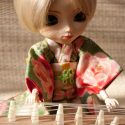
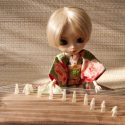
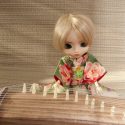
And of course, what’s a girl to do when she’s got not only an adorable doll and a gorgeous kimono, but also a doll-sized koto she found at a thrift store for six dollars? Why, take more photos, of course!

Overall, I am incredibly happy with the artistry and craftsmanship of the whole outfit. Everything coordinates very well and I think the fabrics I picked suit my little Willow Grace very well. She looks very at home in the cabinet with my other Japanese dolls now! And yes, I will have photos of that cabinet eventually.

Don’t forget, there’s just over a week to go in my Facebook giveaway! If you haven’t checked that out yet, now is your chance. 💖

 I purchased this item myself and chose to review it.If you have a topically appropriate craft, product, or service you would like me to review, please contact me. 

Art Gallery – Fuji Musume Doll (and repairs)

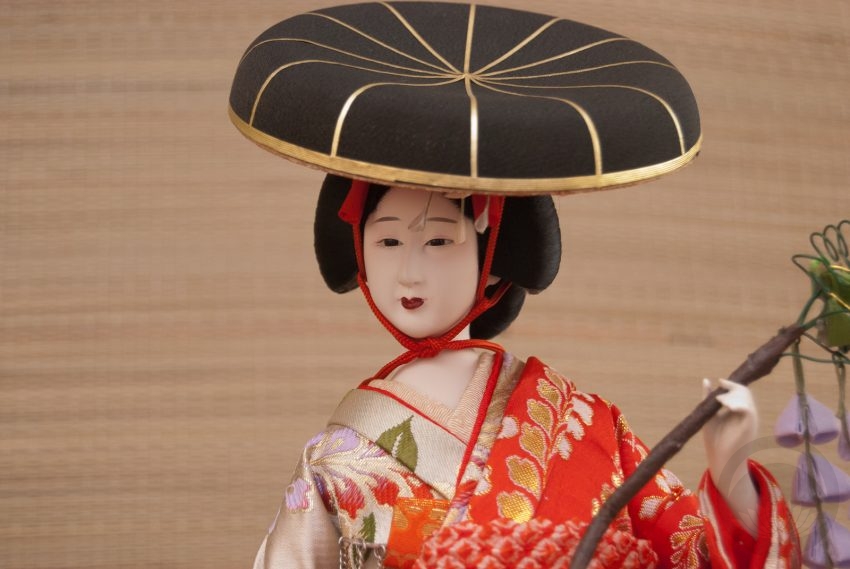
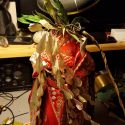
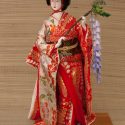
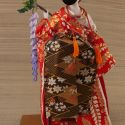
You may have seen the little souvenir doll I fixed up recently, and maybe even the ceramic hakata-style dancer I refinished, but this pretty Fuji Musume has been waiting for her moment in the spotlight since February of 2016! She had a very brief cameo on my Instagram account but has been in hiding ever since, unless you’ve been in my bedroom.

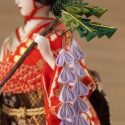
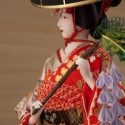
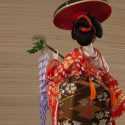
I found her in an antique shop near my house before I found the other two dolls. The owner tried to tell me she was in “perfect condition”, but once I took her out and had a good look at her I could see that absolutely was not the case. The delicate painting on her face was faded and chipped, her wisteria branch was sun-damaged and brittle, the structure under her hair was almost bleached, and there was a not insignificant crack in the bisque on the back of her neck. I managed to talk him down to a more than reasonable price for her and her glass case. I knew I wanted to restore her beauty, but I had no idea where to start, aside from the obvious things like getting her a new wisteria branch. While that was in the works, I focused on the other dolls and the things I learnt doing those two helped prepare me for more on her.

Jess from Tiaras ‘n Teakettles came to the rescue for the wisteria! I sent her photos and measurements of the original branch and she crafted this beautiful tsumami branch by hand. It’s got a lovely weight to it, the dangles flow gracefully, and it fits perfectly between her hands. I didn’t even have to glue it, it balances so well.

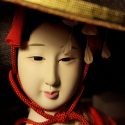
Once that was sorted I knew it was time to tackle the more serious issues. Her lips were lacquered in an almost glassy red that had cracked and split and faded over time. I ended up having to use Tamiya paint thinner to strip the original off properly, and then used watercolours to repaint her lips and add a tiny hint of red to her eyes. I feel like it helps breathe new life into her facial features.

Next up was the most challenging bit; repairing the cracked bisque on the back of her neck. Thankfully it was just a surface defect, not a structural one, and with the way she stands in her display case it’s virtually unnoticeable, but I knew it was there and I wanted to fix it. I tried a few different things before stumbling upon crafting chalk paint. It’s easy to find in any large craft store such as Michaels. I bought a bottle of white and mixed in the tiniest amounts of peach and brown to make it warmer and less stark. I worked in incredibly thin coats, brushing it over the crack and wiping away the excess each time, essentially filling the crack in with the chalk paint and blending the edges out with a wet brush. If you’re right next to her or looking through a camera lens you can see it faintly, but it’s nearly gone.

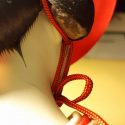
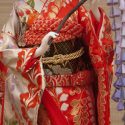
Finally I used a black marker to fill in the bald spots on the sides of her hairstyle, repositioned her obiage and gave her a new obijime. I felt that the original one she came with was too big in scale and to starkly white, but I found this thinner gold cord that works perfectly.

I am so glad I waited to work on her, because I know I’ve done the best job possible instead of eagerly rushing through things as I am sometimes wont to do. I love her to bits, and she occupies place of pride on a table next to my sofa now.

Also, you may be thinking to yourself “Isn’t this primarily a kimono blog? Why aren’t you posting any actual kimono lately?” and I would like to address that briefly. I’ve been feeling under the weather, and combined with the heat and humidity this summer, I have no energy to even wrestle with the mannequin. However, I do have a big project in the works, and hopefully it will make up for the sparsity and somewhat disjointed nature of the posts lately! I just need the weather to calm down a little, and the last of the pieces I’ve ordered to arrive in the mail.