Art Gallery – Yukata Cutie by Nikki R

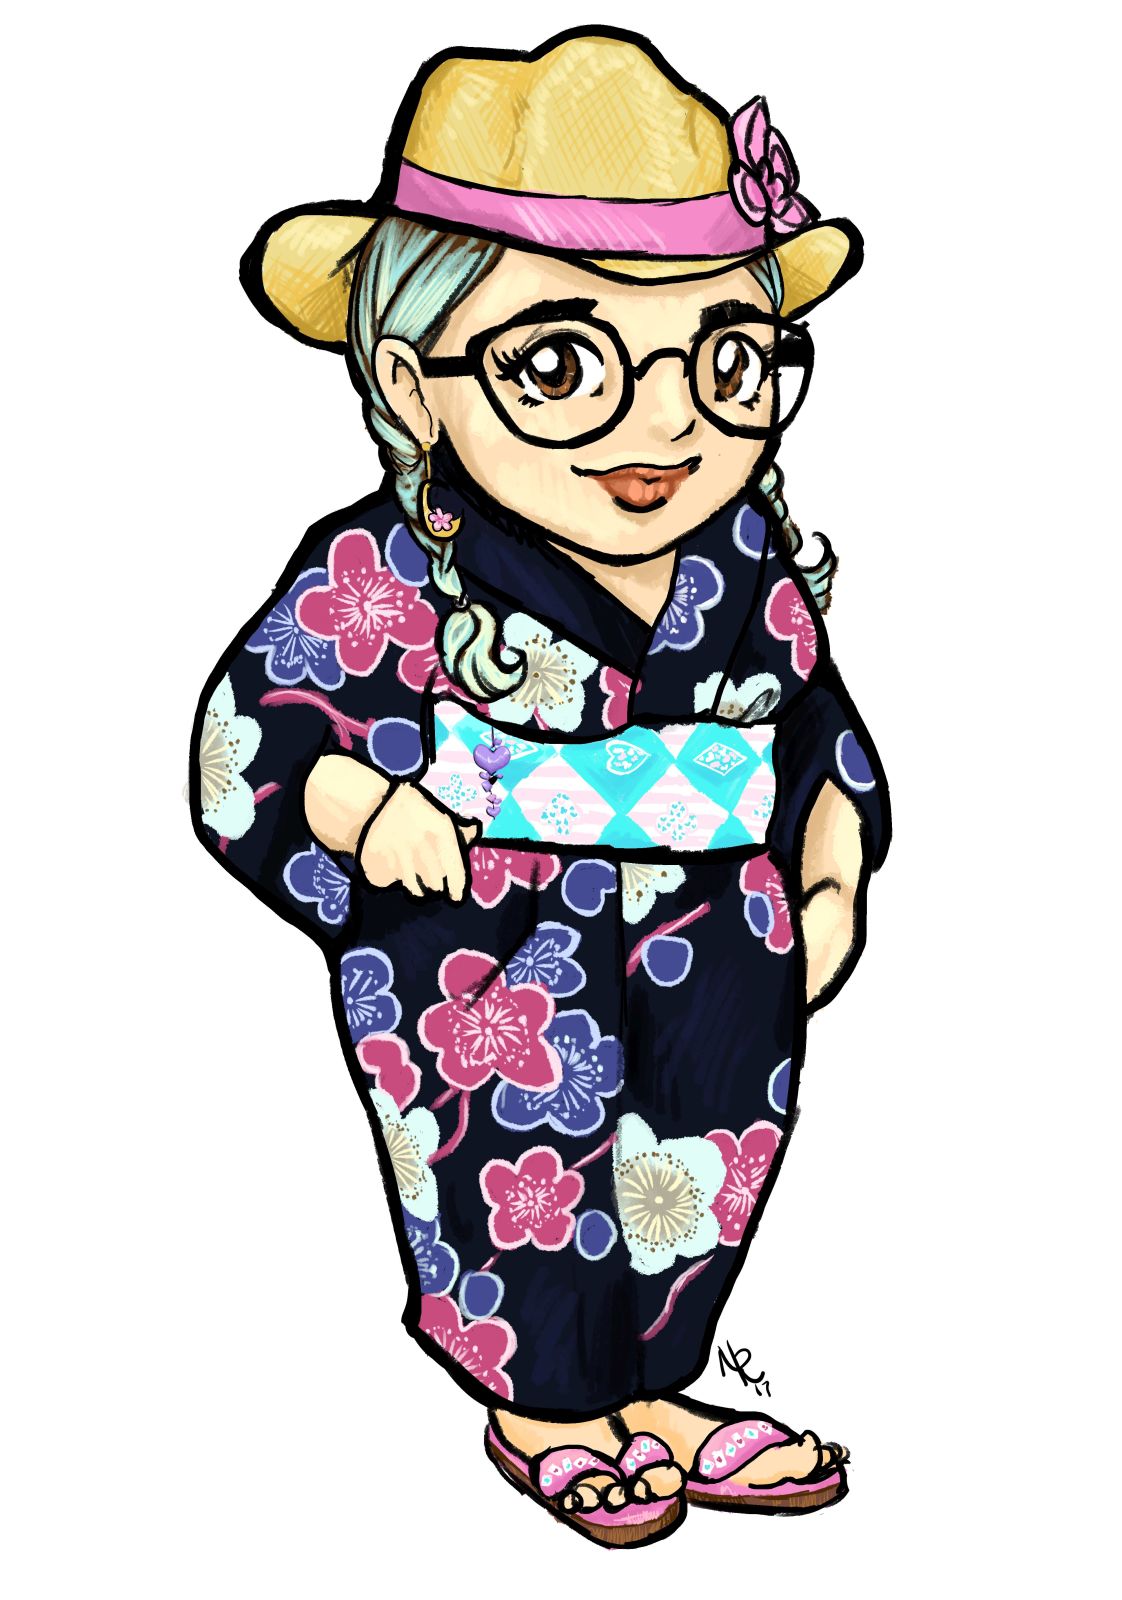
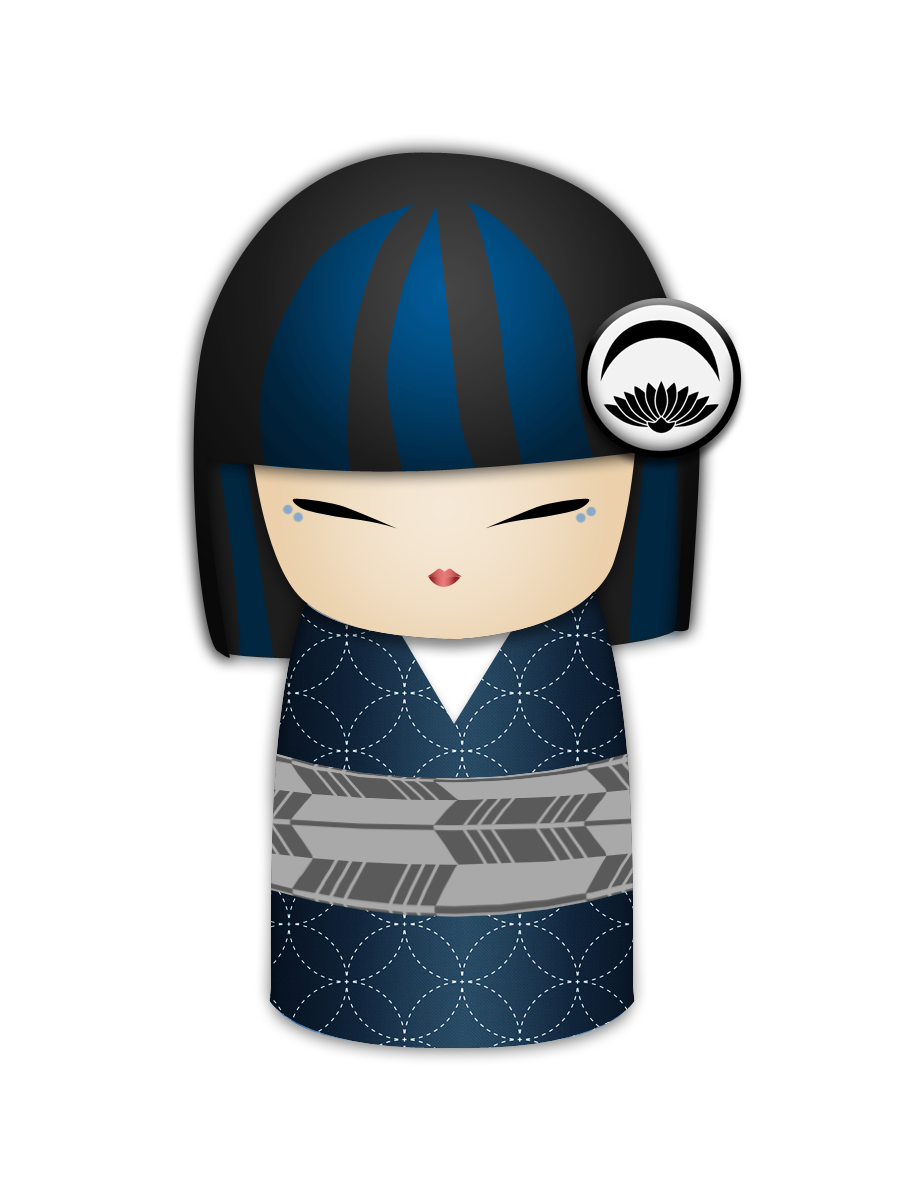
Check out this utterly adorable drawing of my recent yukata outfit! It was drawn by my friend Nikki, who draws all sorts of awesome comic, pin-up, and stylised artwork. This chubby little caricature style is probably my favourite, though, and I’ve loved watching her artwork evolve over the years.

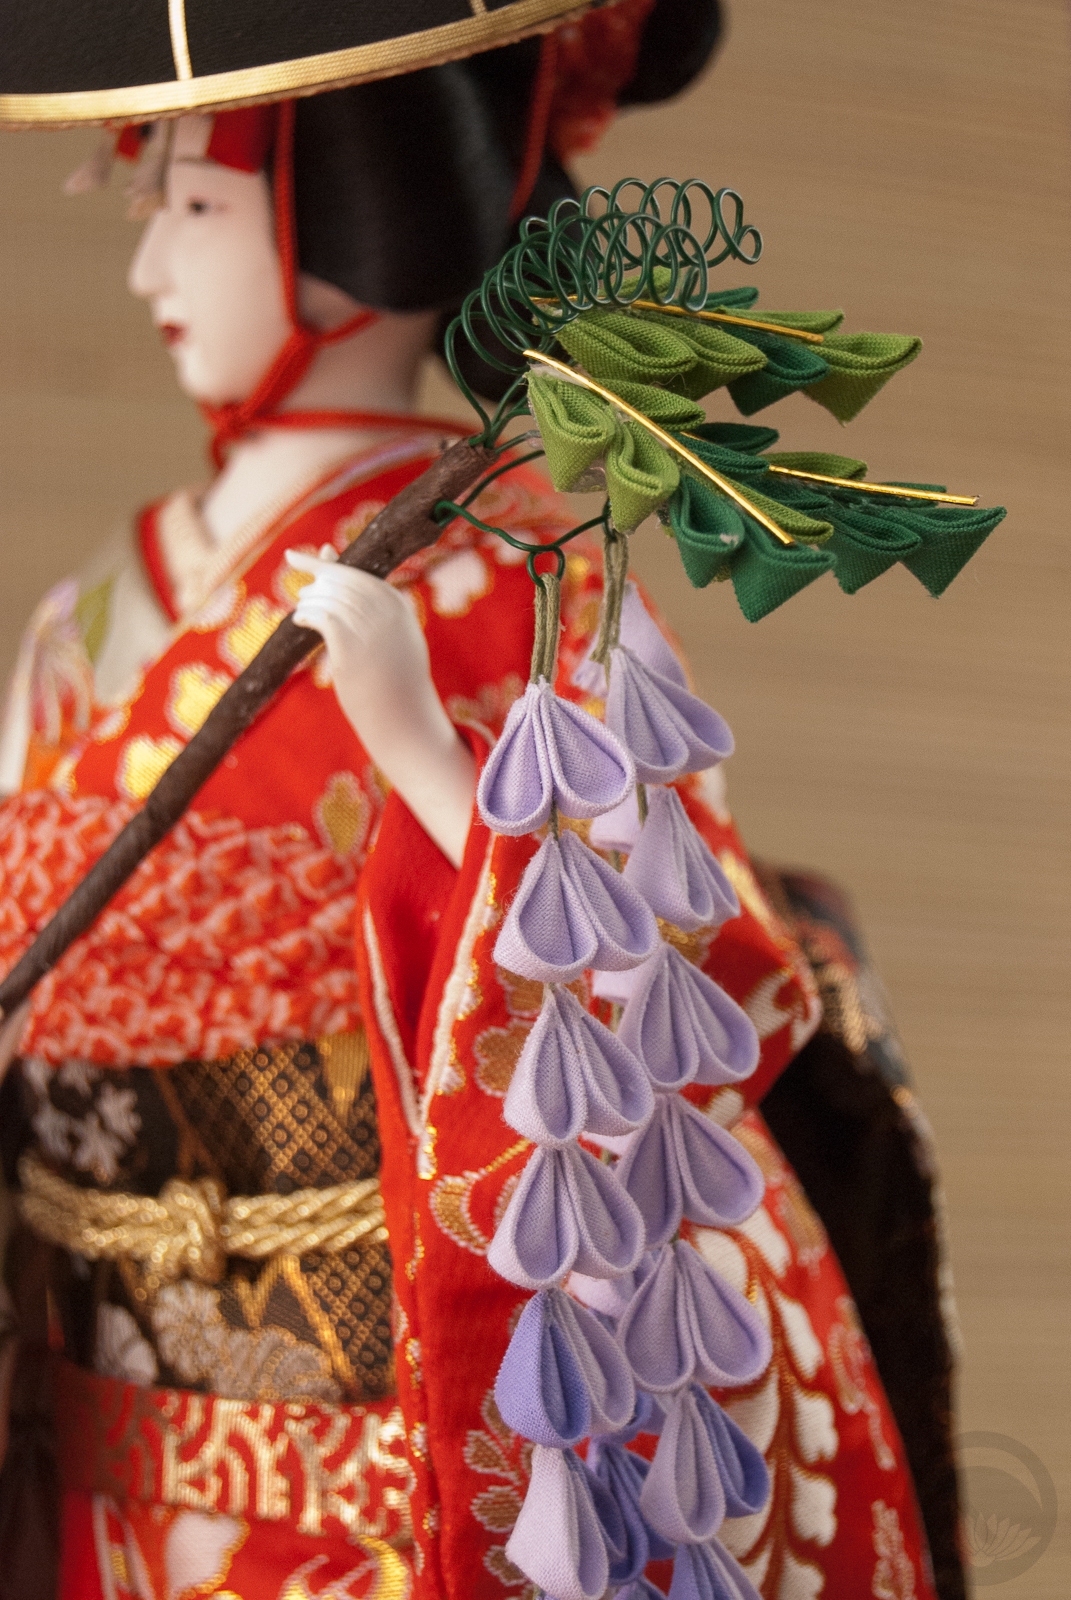
I’m amazed by how much detail she managed to fit in to such a tiny and cartoony piece. It’s super accurate without feeling cluttered or busy. She even got the ume kanzashi on my hat and the little obi-kazari down pat. For someone not in the habit of drawing kimono-related artwork, she did a fantastic job of getting the details spot-on!

The artist’s going through a bit of a rough spot financially right now, and she deserves all the best. So if you love this style as much as I do and would like one for yourself, please check out Nikki R Illustration on Facebook! Also, I always love seeing how different artists interpret my coordinations so if you’re an artist taking commissions and are interested in giving it a shot, please don’t hesitate to contact me.

Art Gallery – Maiko by Charlotte Royal

Sometimes you find the most beautiful things in the most unexpected places. While browsing Kickstarter last year, I came across the Postcards from Japan project by Charlotte Royal. Her goal was simple and straightforward – travel across Japan while creating beautiful and unique works of art for people who helped back her financially.

The painting I received is an absolutely stunning watercolour painting of a maiko, done in Kyoto. I love the rich, warm colours and the thoughtful expression on her face. There’s so much personality and talent in this piece, and the fact that it’s an original, one-of-a-kind artwork makes it all the more special to me. It is large postcard-sized, more than enough room for lush detail but small enough to feel like a little jewel in my growing art collection

I have a bunch of new pieces I need to hang, and this one will definitely be front and centre once I figure out where everything is going.

I received this item as a backer perk for a project or product that was crowd-funded (Kickstarter, IndieGoGo, etc)

Art Gallery – Fuji Musume Doll (and repairs)

You may have seen the little souvenir doll I fixed up recently, and maybe even the ceramic hakata-style dancer I refinished, but this pretty Fuji Musume has been waiting for her moment in the spotlight since February of 2016! She had a very brief cameo on my Instagram account but has been in hiding ever since, unless you’ve been in my bedroom.

I found her in an antique shop near my house before I found the other two dolls. The owner tried to tell me she was in “perfect condition”, but once I took her out and had a good look at her I could see that absolutely was not the case. The delicate painting on her face was faded and chipped, her wisteria branch was sun-damaged and brittle, the structure under her hair was almost bleached, and there was a not insignificant crack in the bisque on the back of her neck. I managed to talk him down to a more than reasonable price for her and her glass case. I knew I wanted to restore her beauty, but I had no idea where to start, aside from the obvious things like getting her a new wisteria branch. While that was in the works, I focused on the other dolls and the things I learnt doing those two helped prepare me for more on her.

Jess from Tiaras ‘n Teakettles came to the rescue for the wisteria! I sent her photos and measurements of the original branch and she crafted this beautiful tsumami branch by hand. It’s got a lovely weight to it, the dangles flow gracefully, and it fits perfectly between her hands. I didn’t even have to glue it, it balances so well.

Once that was sorted I knew it was time to tackle the more serious issues. Her lips were lacquered in an almost glassy red that had cracked and split and faded over time. I ended up having to use Tamiya paint thinner to strip the original off properly, and then used watercolours to repaint her lips and add a tiny hint of red to her eyes. I feel like it helps breathe new life into her facial features.

Next up was the most challenging bit; repairing the cracked bisque on the back of her neck. Thankfully it was just a surface defect, not a structural one, and with the way she stands in her display case it’s virtually unnoticeable, but I knew it was there and I wanted to fix it. I tried a few different things before stumbling upon crafting chalk paint. It’s easy to find in any large craft store such as Michaels. I bought a bottle of white and mixed in the tiniest amounts of peach and brown to make it warmer and less stark. I worked in incredibly thin coats, brushing it over the crack and wiping away the excess each time, essentially filling the crack in with the chalk paint and blending the edges out with a wet brush. If you’re right next to her or looking through a camera lens you can see it faintly, but it’s nearly gone.

Finally I used a black marker to fill in the bald spots on the sides of her hairstyle, repositioned her obiage and gave her a new obijime. I felt that the original one she came with was too big in scale and to starkly white, but I found this thinner gold cord that works perfectly.

I am so glad I waited to work on her, because I know I’ve done the best job possible instead of eagerly rushing through things as I am sometimes wont to do. I love her to bits, and she occupies place of pride on a table next to my sofa now.

Also, you may be thinking to yourself “Isn’t this primarily a kimono blog? Why aren’t you posting any actual kimono lately?” and I would like to address that briefly. I’ve been feeling under the weather, and combined with the heat and humidity this summer, I have no energy to even wrestle with the mannequin. However, I do have a big project in the works, and hopefully it will make up for the sparsity and somewhat disjointed nature of the posts lately! I just need the weather to calm down a little, and the last of the pieces I’ve ordered to arrive in the mail.

Tiny Doll, Tiny Makeover

Hello! Just a quick post today. A few weeks ago, I found this charming little doll at one of the thrift stores near me. I posted a photo of her (along with the rest of my haul) on my Instagram but now that she’s had a bit of a face-lift I felt like she needed her own post.

She’s nothing fancy – maybe 4″ tall and made primarily of plastic. I assume she was a cheap souvenir or something. But I was really charmed by her, and wanted to give her a new lease of life. I was inspired by my friend Naomi, who has been rescuing dolls from thrift stores for ages now, and my friend Vi who runs The Heirloom Smith, a small custom design and restoration business.

The biggest and most obvious problem was her head; her hair was a wreck and there was a flat circle of paper glued to the crown of her head, where a hat had likely fallen off. Thankfully, she had two other hats – one in each hand! I carefully pried the hats off and put them aside, and moistened her hair so I could brush it and try to tame it down somewhat. I then soaked her hands carefully in warm water to dissolve the leftover glue and paper. However, without her hats her pose definitely looked a bit funny, and the fact that her hands, feet, and face were made of cheap yellowed plastic was very apparent. I re-posed her slightly (thankfully, her body is a wire frame so she’s relatively flexible), covered over her yellowed bits with white chalk paint, gave her a cute little umbrella to dance with, and glued one of the salvaged hats onto her head. The last step was to give her slightly more subdued facial features with watercolours over the newly-painted surface of her face. She looks very at home in the cabinet with the ceramic doll I repainted a while back. I’m so happy Ito have given both these girls a new home. Their big sister is also in the works, I hope to be posting about her sometime soon.

I didn’t take too many photos during the process, and the ones I did take were done at my desk with my phone so they’re not fantastic, but it’s still nice to see how she progressed to the final result up at the top of the page.

Art Gallery – Moonflowers

I recently bought myself a Microsoft Surface to be able to work on the go, and one of the greatest appeals for me was the fact that I could draw directly on the screen. What I didn’t take into account is the significant learning curve. Painting with a graphics tablet like a Wacom is markedly different from painting on a canvas, and painting directly on your work surface is different from both. The Surface has the benefit of allowing me to put my input tool directly on top of the artwork, more like a traditional painting, but the screen itself is so smooth, there’s no tooth at all like there would be with “real” paper or canvas.

I found a photo of a lovely painting of a moonflower in a book recently and it called out to me.  As you may know, moonflowers are kind of my “thing”, hence the moonblossom.net domain, my moon and flower custom kamon, etc etc. So when I found this, I thought I would use it as inspiration to start to get the hang of painting directly on the Surface! I’ve definitely got a ways to go, but I’m happy with my progress.

I suspect I will be doing digital painting much more often now that I have this thing, so be prepared for an influx of kimono and woodblock-inspired doodles!